Attempting to customize high-value footwear without a technical understanding of material science often leads to irreversible material degradation and a total loss of investment. Many hobbyists dive into painting projects only to discover that their creative efforts result in catastrophic paint cracking, peeling, or “bleeding” within the first few hours of wear. This occurs because the factory-applied protective coatings on leather and synthetics are designed specifically to repel foreign substances, including standard hobbyist paints. Essentially, applying pigment without proper chemical preparation is a recipe for failure that destroys the structural integrity of the shoe’s aesthetic.
Furthermore, the mechanical stress placed on a shoe during a standard walking gait is immense, with the “vamp” area flexing thousands of times per day. If the paint film lacks the necessary elasticity or a robust molecular bond with the substrate, the pigment will inevitably delaminate from the surface. To avoid these common pitfalls, a professional-grade approach is required—one that focuses on chemical de-glazing, precision pigment application, and industrial-standard finishing. By following the verified protocols used by master customizers, you can transform a standard silhouette into a durable work of wearable art that maintains its vibrancy and flexibility over time.
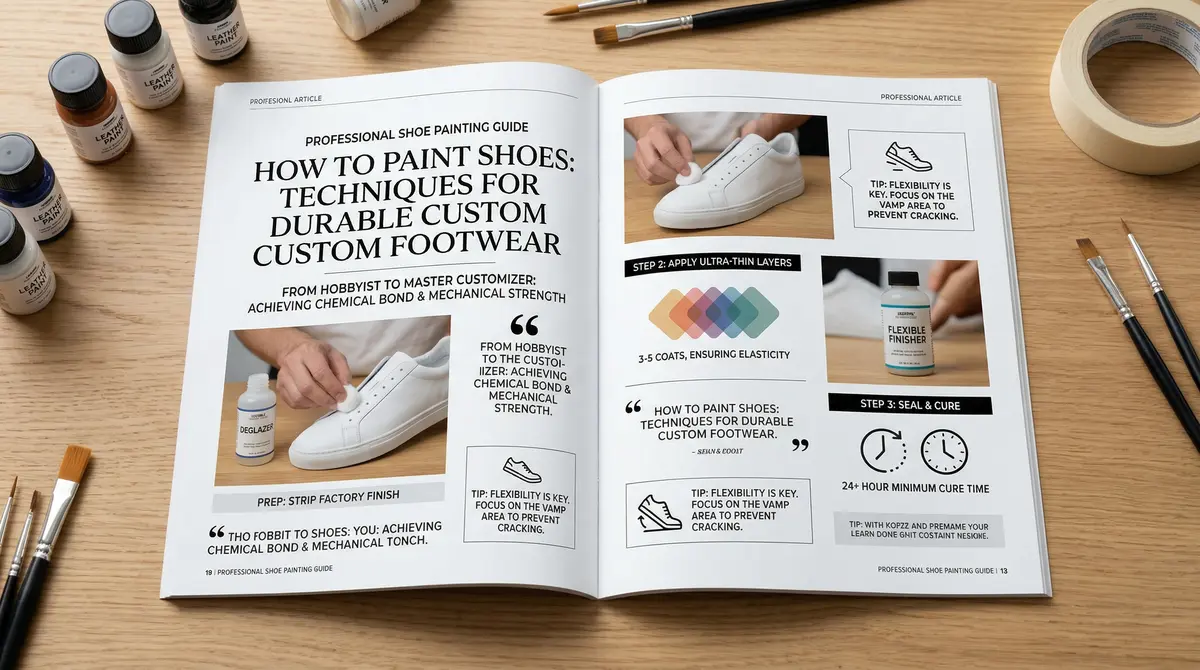
Quick Answer: How to Paint Shoes Correctly To achieve a professional result, you must strip the factory finish using a high-grade deglazer (Acetone), apply multiple ultra-thin layers of specialized leather or fabric acrylics, and protect the work with a flexible acrylic finisher. Success depends on the transition from a chemical bond to a mechanical bond through meticulous surface preparation and thin-film layering.
| Step | Action | Technical Requirement |
|---|---|---|
| 1. Prep | Deglaze surface | Use 100% Acetone or Leather Preparer |
| 2. Mask | Tape off soles | Use high-tack painter’s tape and a precision knife |
| 3. Base | Apply thin layers | 3–5 coats, allowing 15 minutes of drying between |
| 4. Detail | Add designs | Use Taklon-bristle brushes for pigment control |
| 5. Seal | Apply finisher | Use a flexible acrylic finisher (Matte/Gloss) |
| 6. Cure | Final drying | Minimum 24-hour cure time before wearing |
What is the Best Paint for Shoes? (Acrylic vs. Specialized Leather Pigments)
Standard craft acrylics are generally unsuitable for footwear because they lack the high pigment load and flexible binders required for movement. Specialized footwear paints, however, utilize a high-concentration pigment suspended in a unique acrylic polymer that remains elastic once cured. This elasticity allows the paint to expand and contract with the shoe material rather than snapping under tension. Essentially, the binder is the “glue” that determines if your design survives the first mile of walking.
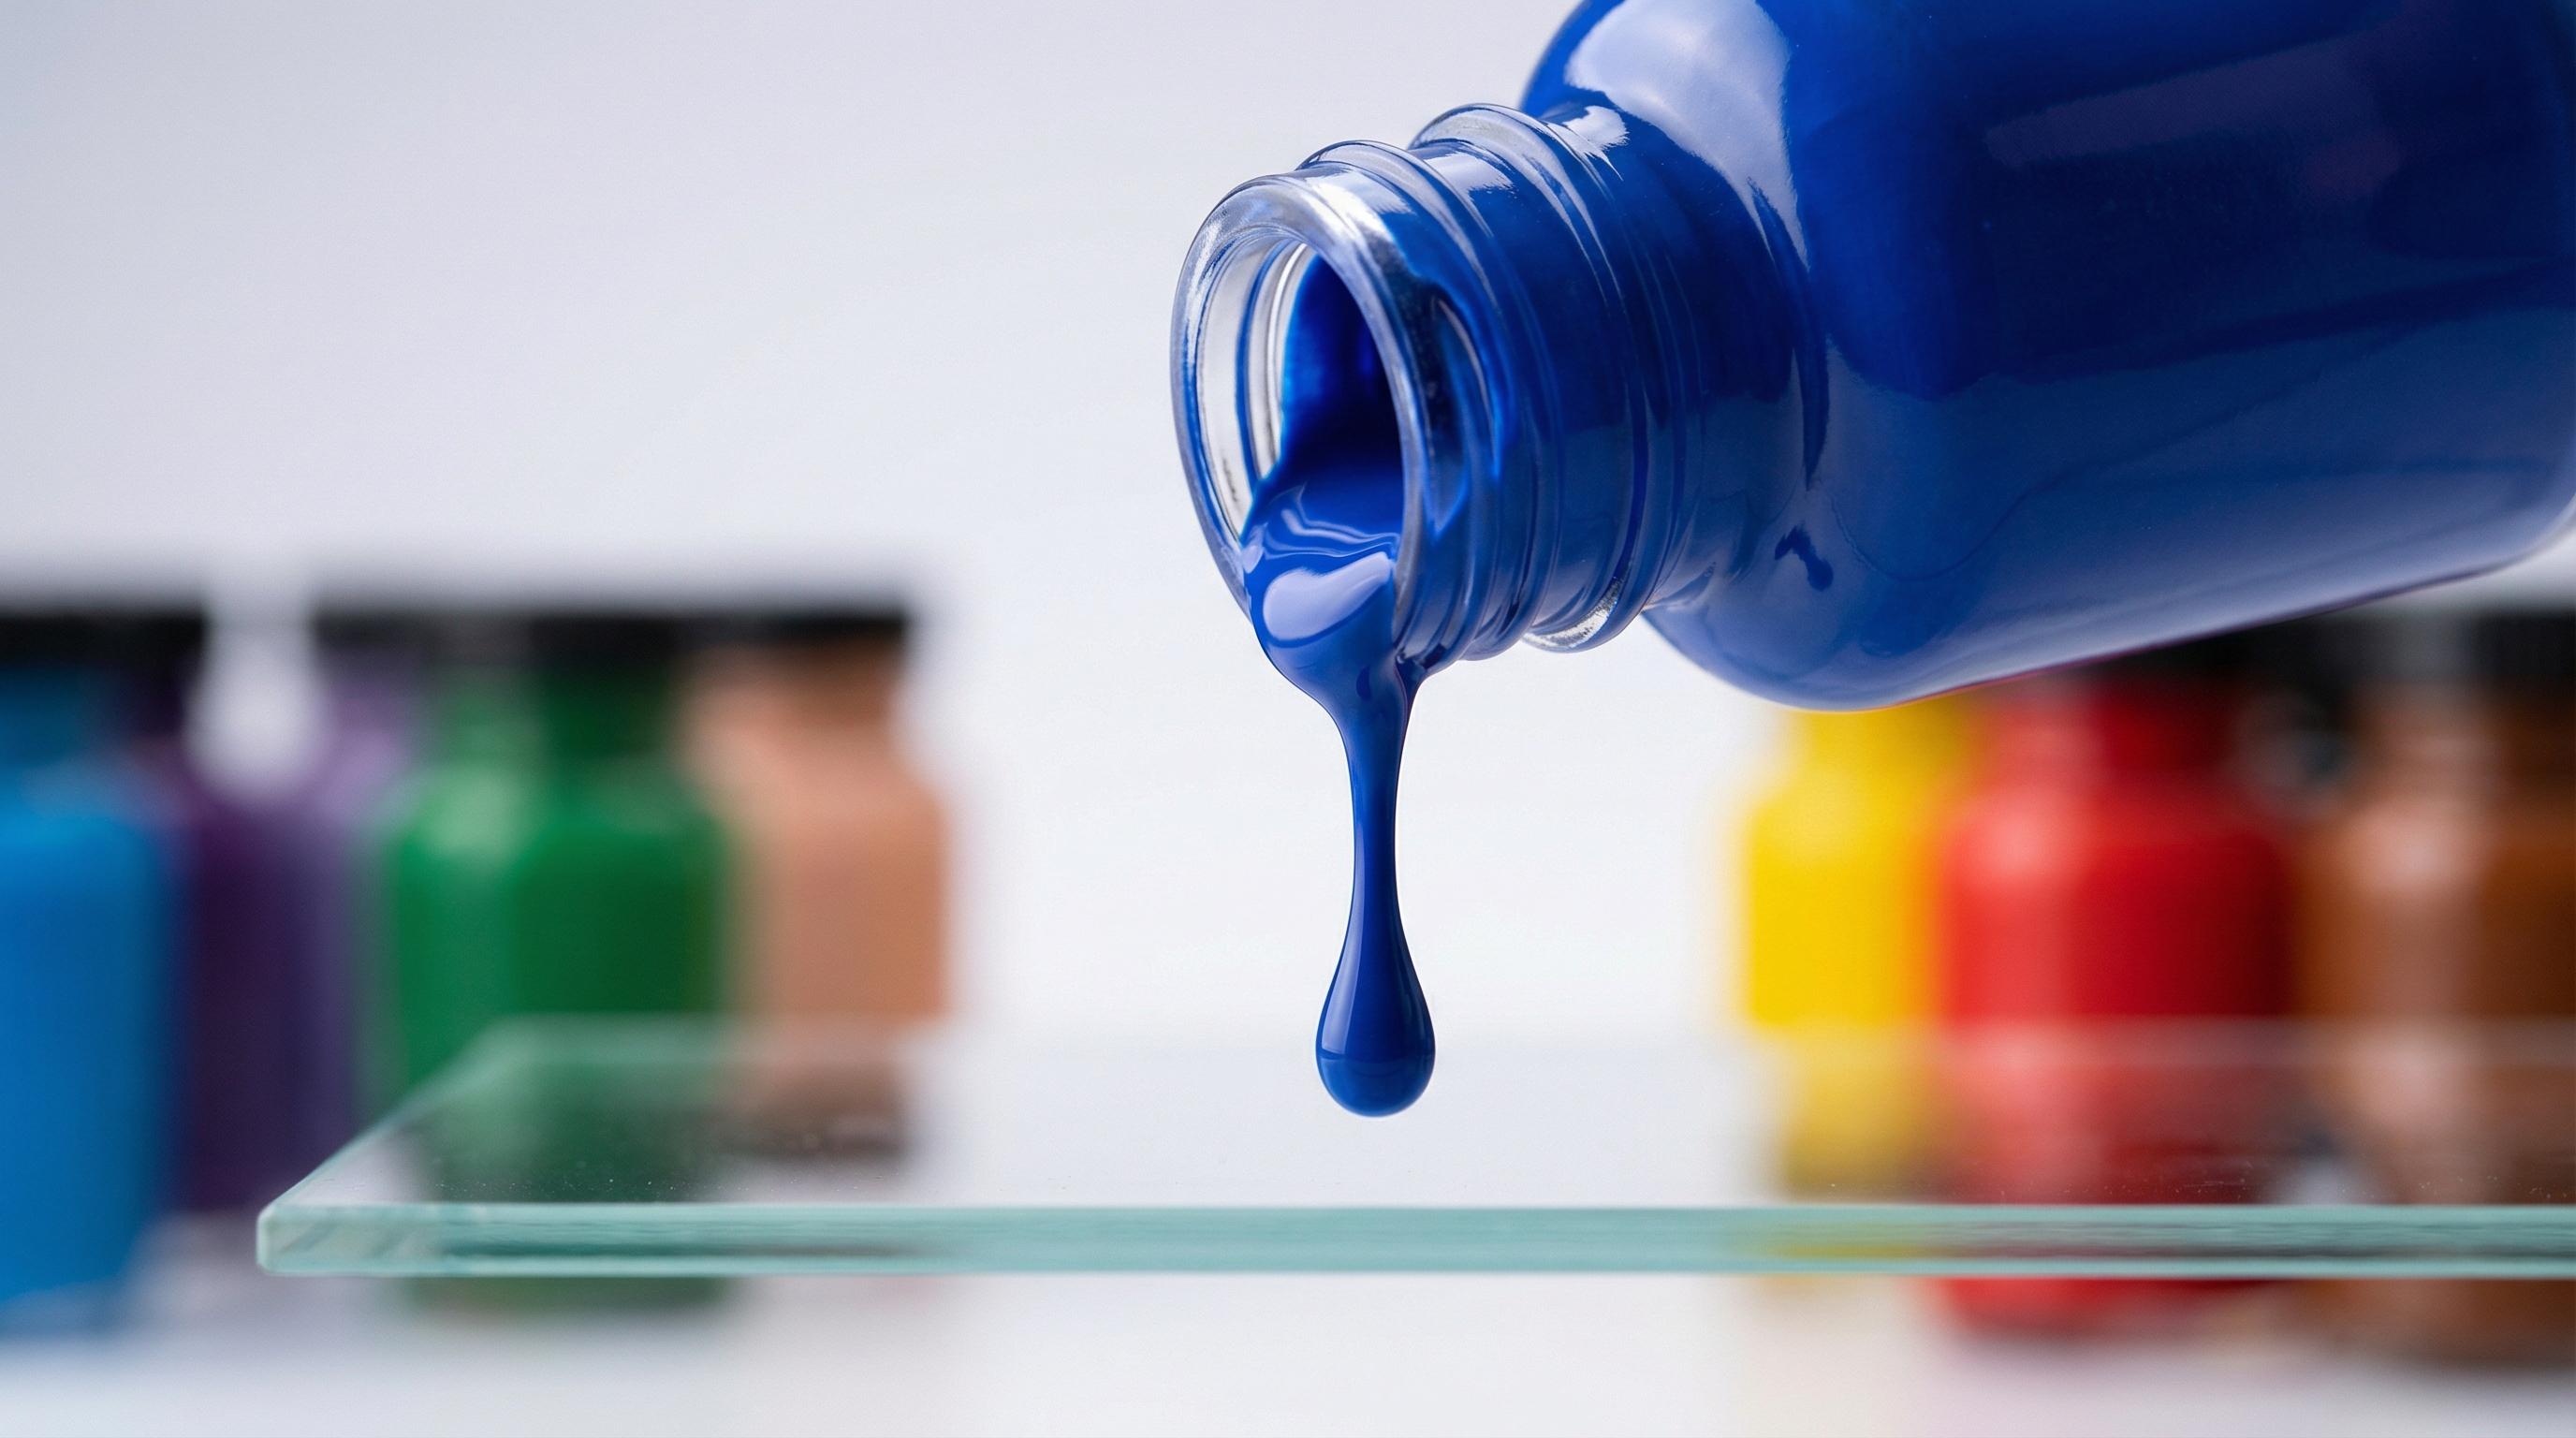
Understanding Pigment Load and Binders
If you are working with porous materials like canvas or mesh, standard leather paint will be too viscous and may cause the fibers to become brittle. To solve this, professional customizers use a fabric medium—a thinning agent that allows the pigment to penetrate deep into the textile fibers. Furthermore, these mediums often require heat-setting to “lock” the color into the weave, ensuring the design remains waterproof and resistant to fading during cleaning cycles.
When to Use Fabric Mediums
Leather is a non-porous, organic substrate that requires a specific chemical profile for adhesion. High-quality leather paints are formulated to “bite” into the surface after the factory finish has been removed. But there’s a catch: even the best paint will fail if the underlying material is not correctly identified. Whether you are working on top-grain leather or a synthetic substitute, using a dedicated pigment line ensures the chemical compatibility necessary for scaling your shoe brand or personal project.
Essential Supplies: A Professional Customizer’s Checklist
The most critical tool in your kit is not the brush, but the deglazer used to strip the shoe’s original protective layer. For leather, 100% pure acetone or a specialized “Preparer & Deglazer” is mandatory to remove the factory clear coat and waxes. Without this step, the paint essentially floats on top of the shoe, leading to immediate peeling. For canvas, a high-purity isopropyl alcohol or a gentle degreaser is preferred to remove manufacturing oils without damaging the delicate fibers.
Cleaning and Deglazing Agents
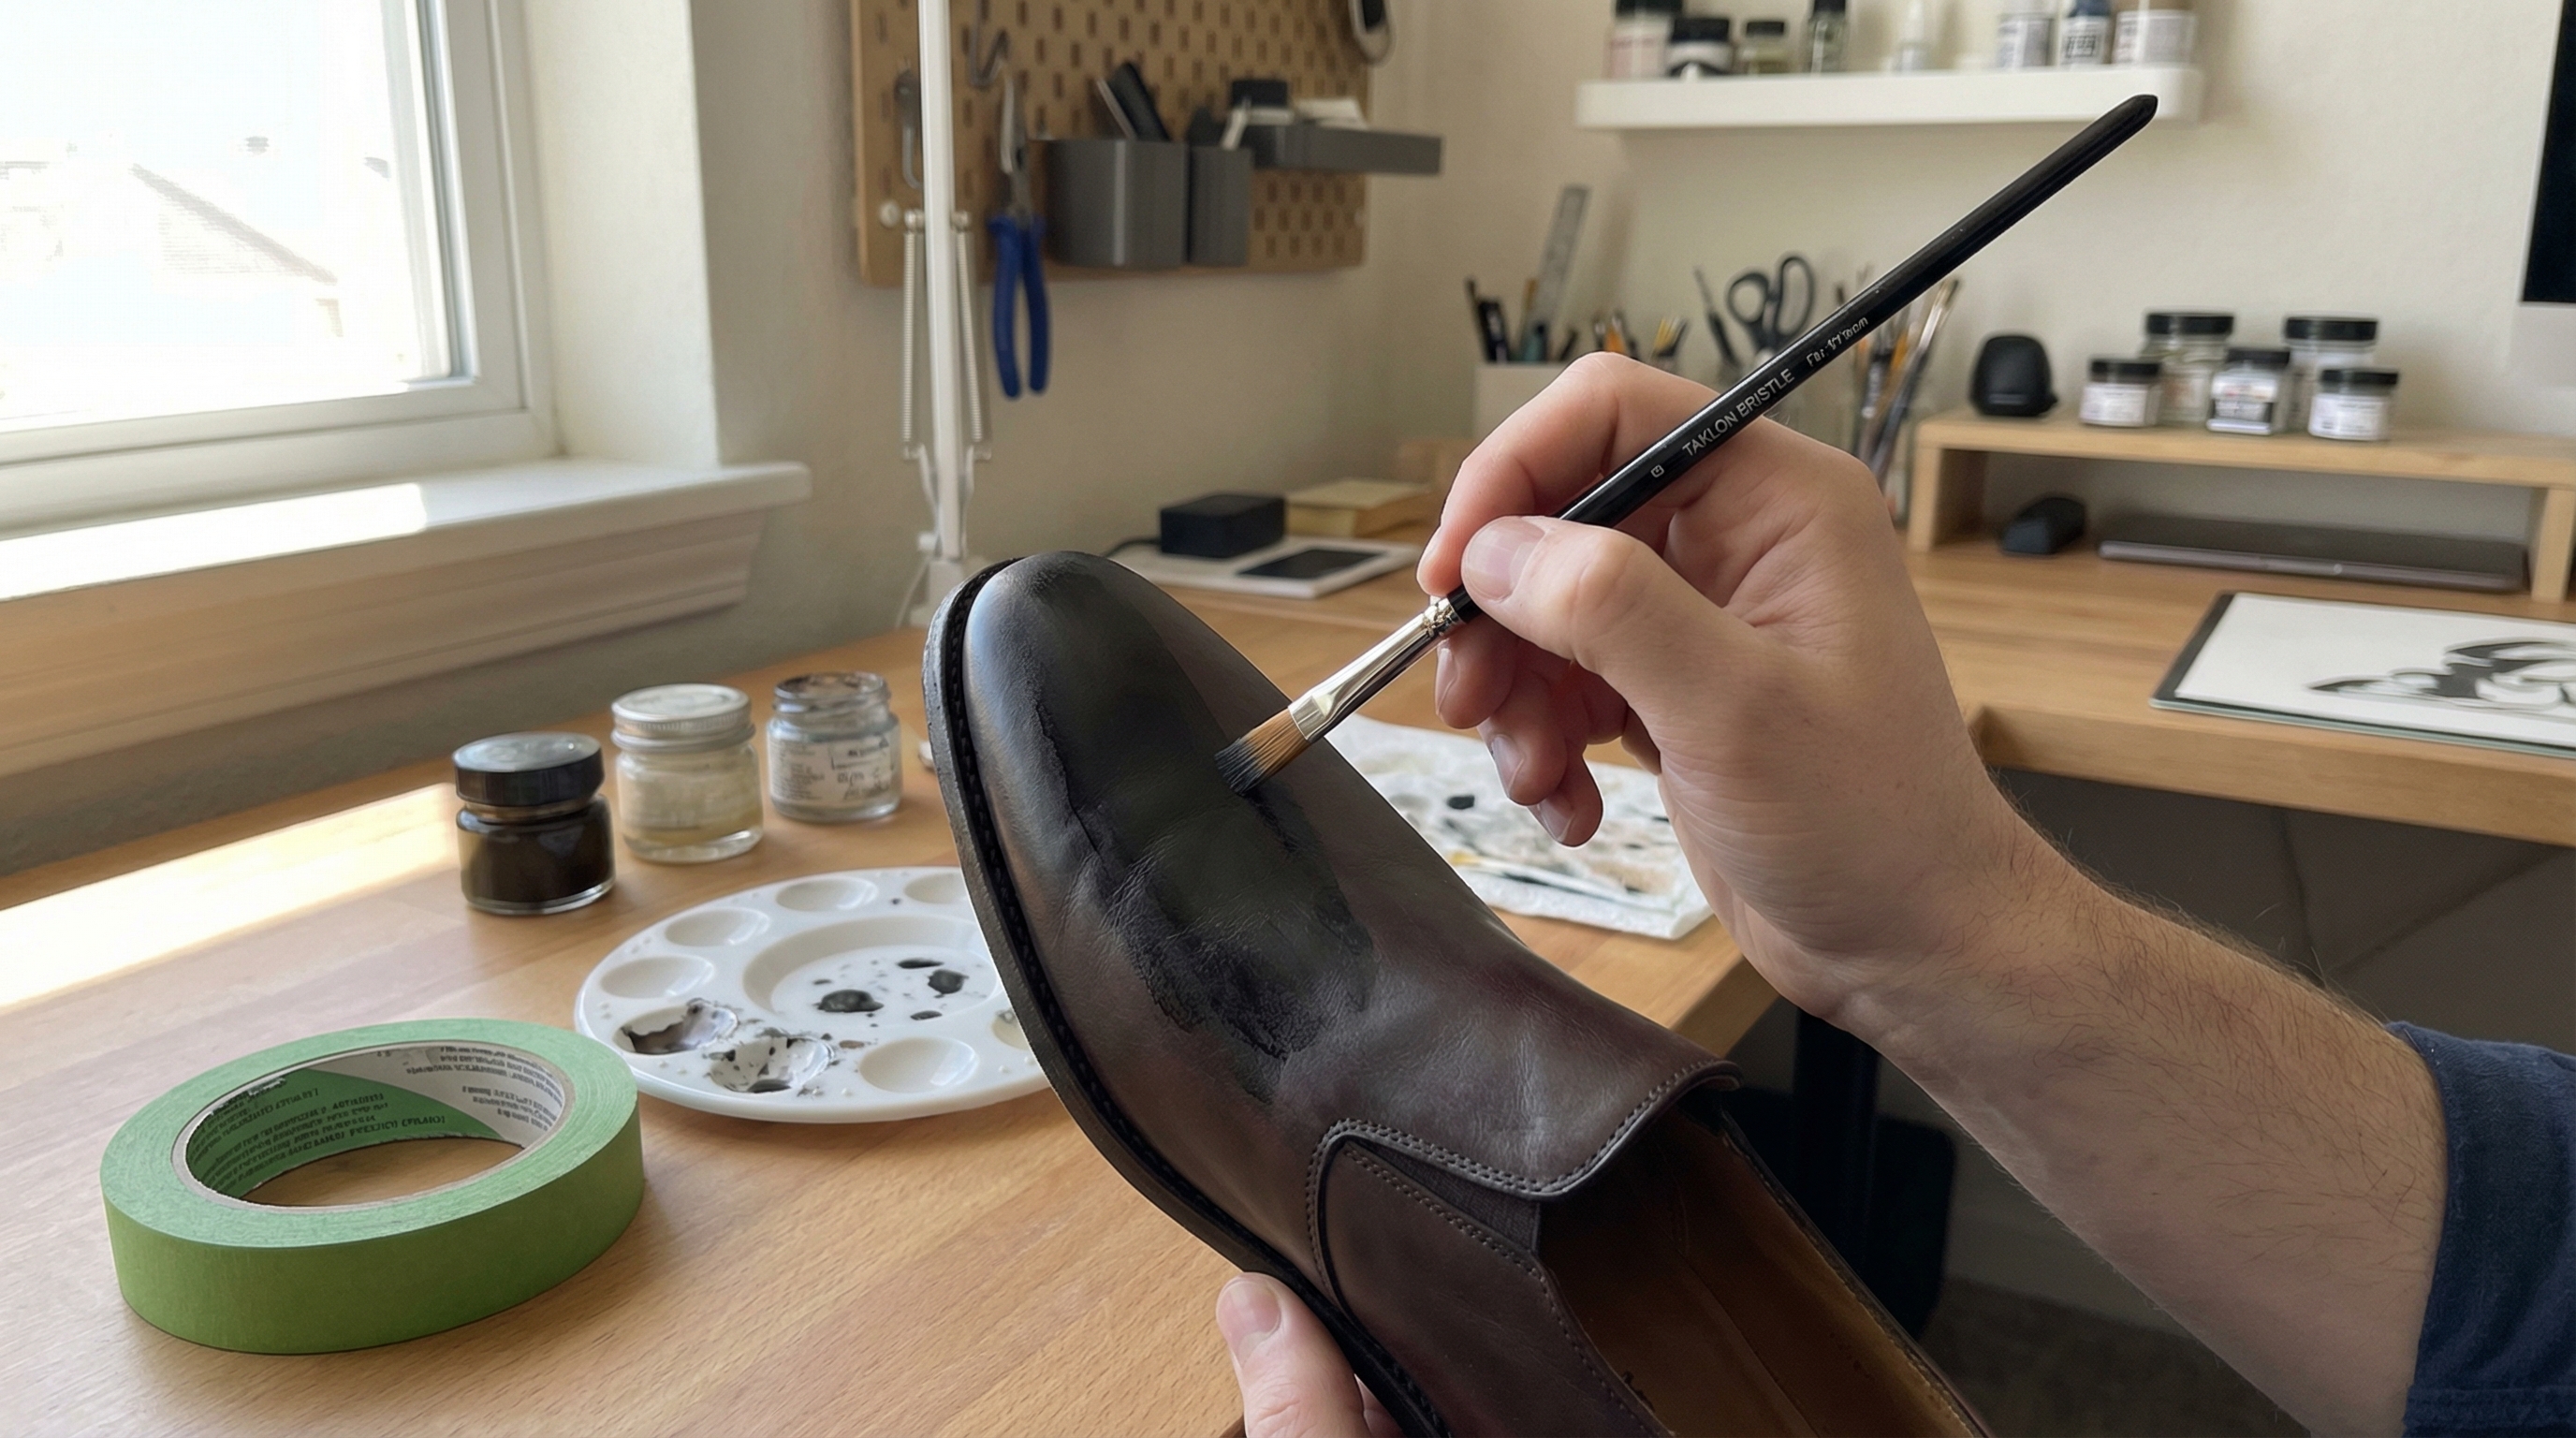
Selecting the right brushes can make or break the professional appearance of your customization. You should look for synthetic Taklon-bristle brushes, which provide a smooth flow of paint and do not leave heavy stroke marks. Round brushes (sizes 0, 1, and 2) are essential for fine detail work, while flat shaders are better for large panels. Furthermore, many professionals utilize airbrushes for gradients, as they provide a thinner, more even application than any hand-held brush can achieve.
Precision Applicators and Brushes
Precision masking is the hallmark of a high-quality custom, as it protects the “outsole” and “midsole” from stray pigment. You will need high-quality painter’s tape and a sharp hobby knife to trim the edges around the eyelets and sole lines. Additionally, because deglazers and finishers often emit volatile organic compounds (VOCs), working in a well-ventilated area or wearing a respirator is highly recommended. Essentially, the goal is to create a clean, controlled environment for your professional footwear solutions.
Phase 1: Surface Preparation (Deglazing Leather and Cleaning Canvas)
The factory finish on a leather sneaker is designed to resist stains and water, which also makes it resistant to paint. To strip this, soak a cotton ball in acetone and rub the leather surface in circular motions until the shine disappears and the surface feels slightly tacky. You will know you are successful when the cotton ball begins to pick up the original factory color. However, be careful not to over-saturate the leather, as excess acetone can dry out the collagen fibers and cause premature cracking.

Stripping the Factory Finish
For certain materials, chemical stripping isn’t enough to guarantee a permanent bond. Lightly scuffing the surface with a fine-grit abrasive can create the necessary surface area for the paint to latch onto. This process is particularly effective for high-wear areas like the heel cup or the toe box. Here’s the kicker: the grit number matters immensely. Using something too coarse will leave visible scratches under the paint, so stick to a very fine range to maintain a smooth aesthetic.
Manufacturer Pro Tip: Chemical Adhesion vs. Mechanical Adhesion For synthetic leathers or plastics (TPU), simple cleaning isn’t enough. These materials often require an adhesion promoter (like a flame treatment or specific primer) rather than just a deglazer. If you are painting non-porous synthetics, a light scuff with 800-grit sandpaper creates “mechanical teeth” that help the pigment bond.
Cleaning Porous Canvas Fibers
Canvas preparation differs significantly from leather because the goal is to remove dirt and oils trapped within the weave. Use a stiff-bristled brush and a dedicated sneaker cleaner to scrub the entire upper, followed by a thorough rinse. It is essential to let the shoe dry completely for at least 24 hours at room temperature (approximately 70°F or 21°C). Any residual moisture trapped in the fibers will prevent the fabric medium from properly saturating the material, leading to blotchy color distribution.
How to Paint Shoes Step-by-Step: From Base Coat to Fine Details
One of the most common mistakes is applying paint straight from the bottle. Professional results require a 1:1 or 2:1 ratio of paint to thinner/reducer to ensure the layers remain thin and flexible. Thin paint flows better, levels out brush strokes, and penetrates the surface more effectively. Furthermore, multiple thin layers are significantly more durable than a single thick layer, as they create a cohesive, flexible film that can withstand the stresses of daily wear.
Thinning Your Paint for Maximum Flex
A professional-grade paint job usually requires between three and five thin coats. After applying the first “tack coat,” you must allow the paint to dry for at least 15 to 20 minutes before applying the next layer. This prevents the previous layer from being pulled up by the brush, which creates unsightly clumps and textures. Essentially, patience is the primary ingredient in a high-quality custom. You can use a hair dryer on a “cool” or “low” setting to speed up this process, but avoid high heat, as it can warp the shoe’s internal components.
Manufacturer Pro Tip: The Bally Flex Test Logic Most DIYers test paint by simply wearing the shoe. Professionally, we use the Bally Flex Test (bending the material 50,000+ times). To mimic this, focus on the “vamp” area (where the shoe creases); apply 50% thinner layers here than on the heel to prevent structural fatigue of the paint film.
Mastering Fine Detailing and Stencils
Once your base coats are opaque and even, you can begin the intricate detailing process. If you are using stencils, ensure they are pressed firmly against the surface to prevent “bleeding” underneath the edges. Use a “dry brush” technique—applying minimal paint to the brush and dabbing it on—to keep the lines sharp and clean. But there’s a catch: if you make a mistake, you must act quickly with a damp Q-tip or a tiny amount of deglazer to remove the error before it cures. This level of detail is what separates hobbyist work from our shoe manufacturing heritage.
Handling Niche Materials: How to Paint Mesh, Knit, and Synthetic Uppers
Mesh and knit uppers present a unique challenge because the material is designed to be breathable. Applying heavy paint will clog the pores, turning a comfortable sneaker into a rigid, plastic-like shell. To prevent this, use an airbrush with a highly thinned pigment or a fabric medium. Essentially, the goal is to dye the fibers rather than coat them. Work in very light passes, ensuring the material remains soft to the touch after each layer has dried.
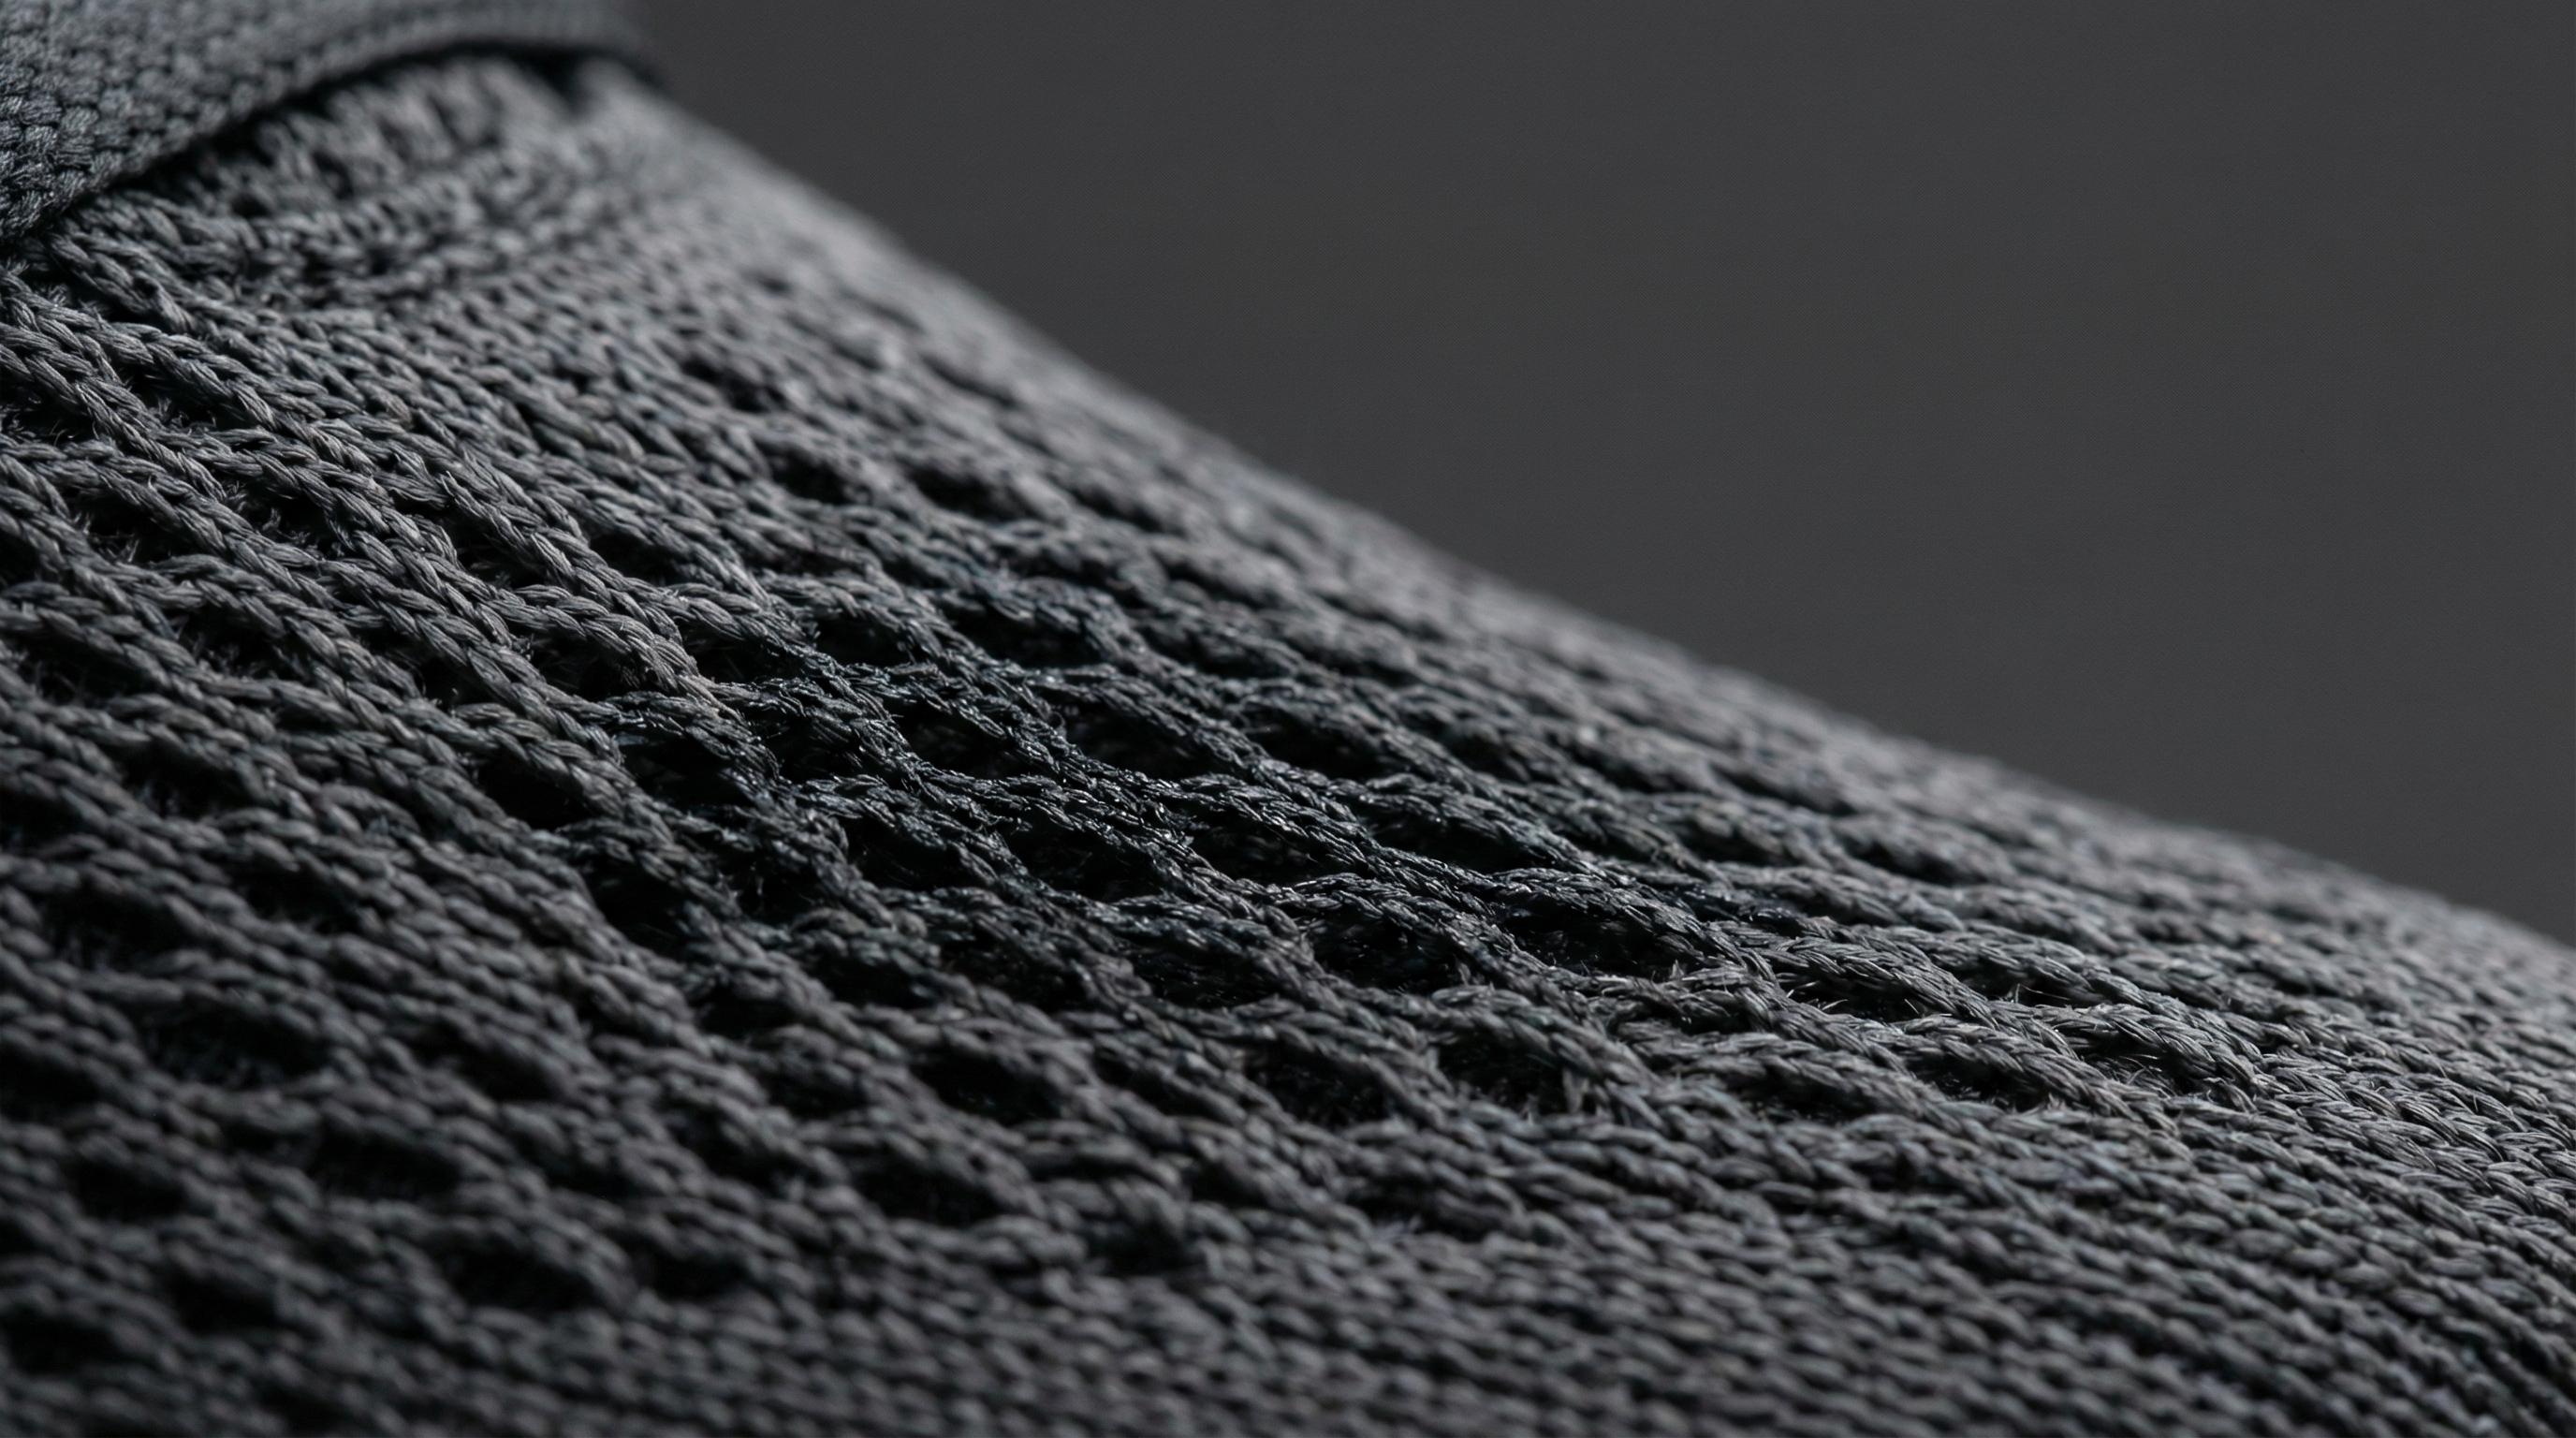
Preventing Clogged Mesh Pores
Synthetic materials like TPU or PVC have high surface tension, which causes paint to “bead up” rather than spread evenly. To combat this, you must use a dedicated plastic primer or an adhesion promoter. Furthermore, adding a tiny amount of flow improver to your paint can help the pigment “wet out” on the surface, creating a smoother finish. It is vital to test a small, inconspicuous area first to ensure the chemical components do not melt or deform the synthetic substrate.
Manufacturer Pro Tip: Pigment Load and Viscosity Control In industrial production, we monitor the “solids content” of the paint. For DIY, this means if your paint feels “heavy,” it has too much binder and not enough flow. Use a professional reducer—not just water—to maintain the chemical integrity of the paint while ensuring it penetrates the material fibers rather than sitting on top.
Adhesion on Plastic Components
Midsole sections and plastic heel tabs often require a different approach than the leather uppers. Because these parts are usually made of non-porous rubber or foam, they are prone to paint cracking almost immediately. To maximize durability, use a specialized “soft” additive that increases the elasticity of the acrylic paint. However, many professionals recommend only painting these areas for “display” pieces, as the constant friction and impact of the ground make permanent adhesion difficult to maintain over long periods.
Sealing for Success: How to Finish Painted Shoes for Maximum Durability
The final step in the customization process is the application of an acrylic finisher. This clear coat protects the paint from UV rays, water, and scuffing. Finishers come in various sheens, including Matte, Satin, and Gloss. Choosing the right sheen is crucial for achieving a factory-fresh look; for example, most modern sneakers use a “Satin” or “Matte” finish on the leather panels. Furthermore, the finisher adds an extra layer of “slip” that helps the shoe resist dirt and grime during daily use.
Selecting the Right Finisher
Brush-on finishers are excellent for precision, but they can sometimes leave visible streaks if applied too thickly. For a truly professional, uniform look, many customizers prefer a spray-on matte finisher or a specialized aerosol sealant. When spraying, maintain a distance of 8 to 10 inches from the shoe and apply in quick, light bursts. This prevents the sealant from pooling in the creases, which can lead to a cloudy or “milky” appearance once the product dries.
Spray vs. Brush-on Sealants
If you have used a fabric medium on canvas or mesh, heat-setting is a non-negotiable step for durability. Once the paint is completely dry, use a heat gun at a temperature of approximately 300°F (150°C) for 2 to 3 minutes per section. This thermal process causes the fabric medium to bond permanently with the textile fibers. But there’s a catch: you must keep the heat gun moving constantly to avoid scorching the fabric or melting the glue that holds the sole to the upper.
Troubleshooting: Why is My Paint Cracking or Peeling?
The number one cause of paint failure is applying the pigment in layers that are too thick. When paint is applied heavily, it forms a thick “skin” that cannot flex at the same rate as the underlying leather. When the shoe bends during a step, this rigid skin snaps, resulting in deep cracks. Essentially, the thinner the layers, the more “flex cycles” the design can withstand. If you notice cracking, the only solution is usually to strip the area back to the base and restart with thinned pigment.
Identifying Over-Application Issues
If the paint is peeling off in large “sheets,” the culprit is almost certainly a failure in the deglazing phase. If the factory wax or silicone coating was not completely removed, the paint has nothing to grab onto. This is often visible when the back of the peeled paint feels smooth and shiny. Furthermore, if you touched the prepared leather with oily fingers before painting, those fingerprints can create “dead zones” where adhesion fails. Always handle prepared shoes with gloves to maintain a pristine surface.
Correcting Poor Surface Preparation
Curing is a chemical process that takes much longer than simple drying. While the paint may feel dry to the touch in 20 minutes, it takes at least 24 to 48 hours for the acrylic molecules to fully cross-link and harden. If you wear the shoes too early, the paint remains soft and is highly susceptible to scuffs and moisture damage. To ensure a professional-grade result, keep the shoes in a cool, dry environment with low humidity during the final curing phase.
Long-Term Maintenance: How to Clean and Store Your Custom Footwear
Maintaining a custom pair of shoes requires a departure from standard cleaning methods. You should never put painted shoes in a washing machine, as the heat and agitation will destroy the acrylic bond. Instead, use a soft-bristled brush and a pH-neutral cleaner to gently remove surface dirt. Furthermore, avoid using harsh chemicals or alcohol-based cleaners on the painted areas, as these can dissolve the finisher and eventually the paint itself.
Gentle Cleaning Protocols
How you store your shoes is just as important as how you paint them. Constant exposure to direct sunlight can cause the pigments to fade and the leather to become brittle. Store your customs in a cool, dark place, preferably with cedar shoe trees to maintain the shape and absorb moisture. Essentially, protecting your investment means treating the shoes as a piece of art. For those interested in taking these DIY skills to a commercial level, we recommend that you contact our consultants for expert advice on scaling production.
People Also Ask
Can I use regular acrylic paint on my shoes?
While you can use regular acrylics, they are not recommended for long-term durability. Standard acrylics lack the specific flexible binders found in leather-specific paints, meaning they will crack and peel much faster when the shoe flexes. For a professional finish, always use paints formulated for leather or fabric.
How do I prevent the paint from cracking?
The key to preventing cracks is surface preparation and layering. You must strip the factory finish with acetone and apply 3-5 ultra-thin layers of paint rather than one thick coat. Thin layers create a flexible film that moves with the shoe, whereas thick layers form a rigid shell that snaps under pressure.
Is it necessary to seal the paint after I’m finished?
Yes, applying a finisher is critical. It acts as a protective barrier against water, dirt, and UV rays. Without a sealer, the paint is exposed to the elements and is much more likely to scuff or fade. A flexible acrylic finisher also allows you to choose the final sheen of the shoe.
What is the best way to prepare leather sneakers for painting?
The professional method involves using a cotton ball soaked in 100% pure acetone to rub away the factory’s protective clear coat. You should continue this process until the leather feels tacky and the shine is gone. For even better adhesion, a light sanding with 800-grit sandpaper is recommended.
Can I wash my custom-painted shoes in the washing machine?
No, you should never machine-wash custom footwear. The combination of hot water, detergent, and mechanical agitation will cause the paint to delaminate and crack. To clean them, use a soft cloth or brush with a gentle, sneaker-specific cleaning solution and air-dry them away from heat sources.
For those interested in transitioning from hobbyist customization to high-volume production, please explore our comprehensive resources for contacting our footwear consultants.