
Have you ever experienced the crushing disappointment of unboxing a pair of stunning new shoes, only to find they pinch your toes or slip off your heels? It is a frustrating reality for many online shoppers. Most of us rely on a shoe size we were assigned a decade ago, ignoring the fact that feet change over time due to age, weight fluctuations, and even gravity. When you buy shoes that don’t fit, you aren’t just wasting money on return shipping; you are actively risking your foot health. Ill-fitting footwear is the primary culprit behind painful bunions, persistent blisters, and the agonizing ache of plantar fasciitis. If your shoes feel more like torture devices than comfort wear, the problem likely isn’t the brand—it is the measurement.
Think about the last time you bought shoes online. You probably looked at the “8” or “10” on the label of your current pair and hoped for the best. But wait, there is a catch. Sizes vary wildly between manufacturers, and a “Standard” width in one brand might feel like a “Narrow” in another. Without a precise, data-driven understanding of your foot’s unique dimensions, you are essentially gambling with your comfort. The agitation of a poorly fitted shoe can ruin your workday, cut your morning run short, or leave you limping through a wedding reception.
The good news is that you don’t need a professional Brannock device or a trip to a specialty boutique to find your true size. You can achieve professional-grade accuracy in your own living room with a few household items and a bit of technical know-how. This guide will walk you through the exact methodology used by footwear designers and manufacturers to ensure a perfect fit. By the end of this article, you will have a comprehensive “foot profile” that allows you to navigate any size chart with total confidence.
Quick Steps for Measuring Your Feet
- Prepare Your Surface: Tape a piece of paper to a hard floor against a wall.
- Stand and Trace: Place your foot on the paper with your heel against the wall and trace the outline with a pen held at a 90-degree angle.
- Measure Length: Find the distance from the back of the heel to the tip of your longest toe.
- Measure Width: Measure the widest part of your foot across the ball/forefoot.
- Compare to Charts: Use your measurements in centimeters for the highest accuracy when checking brand-specific size guides.
- Measure Both: Always use the dimensions of your larger foot to determine your final shoe size.
1. Essential Tools and the Ideal Environment
Before you begin the process, you must assemble the correct toolkit. Accuracy in footwear sizing is measured in millimeters, so using the wrong tools can result in a size discrepancy that makes a shoe unwearable. You cannot simply “eyeball” it or use a soft sewing tape for the length measurement, as these are prone to stretching or misalignment.
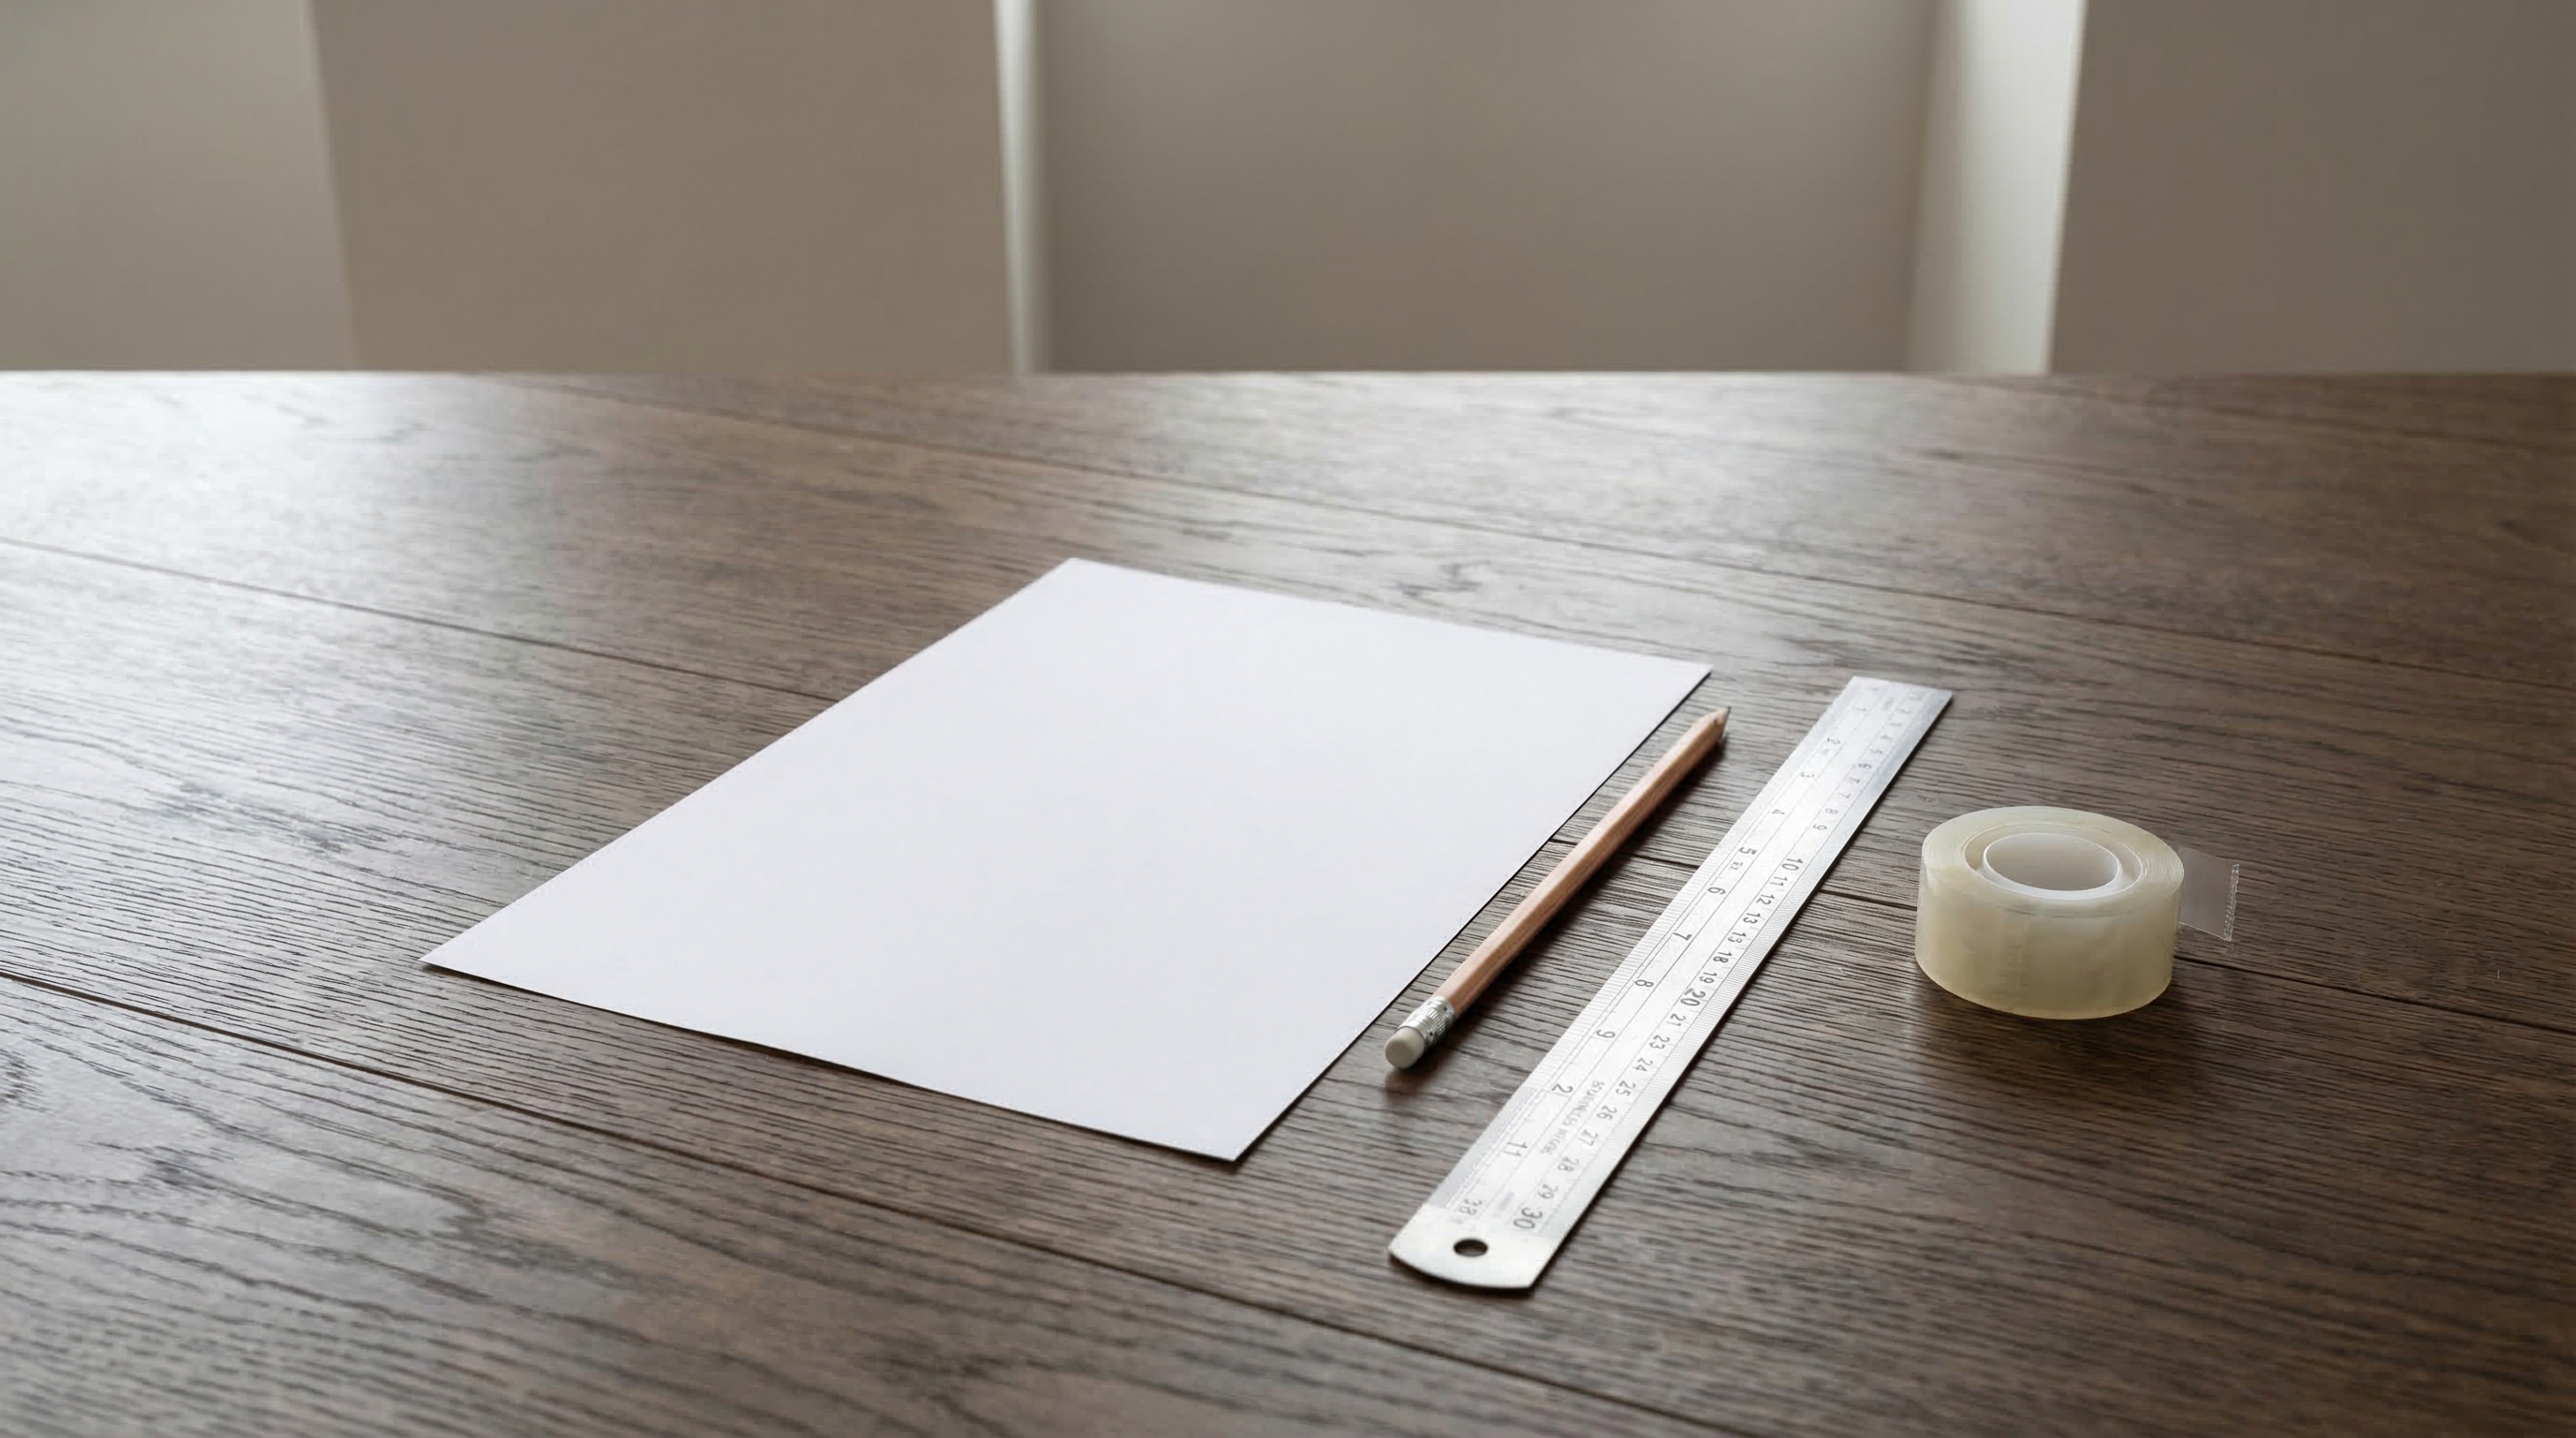
The Foot Measurement Toolkit
| Tool | Purpose | Why it’s Essential |
|---|---|---|
| A4 or US Letter Paper | The canvas for your tracing | Provides a static surface that won’t move during the process. |
| Masking/Clear Tape | Securing the paper | Prevents the paper from sliding on hard surfaces, which causes distorted tracings. |
| Sharp Pencil/Pen | Creating the outline | A fine point ensures you stay as close to the foot as possible without adding “ghost” millimeters. |
| Metric Ruler/Tape | Measuring the distance | Centimeters and millimeters are more precise than inches for shoe sizing. |
| Standard Socks | Simulating real wear | You must measure with the socks you intend to wear with the shoes for a realistic fit. |
The environment matters just as much as the tools. Ensure you are working on a hard, flat surface like tile, laminate, or hardwood. Measuring on a carpeted surface is a recipe for disaster because the foot will sink into the pile, making it impossible to get an accurate tracing of the heel or the ball of the foot.
2. Timing: Why Evening is Your Secret Weapon
Timing is everything when it comes to human anatomy. If you measure your feet first thing in the morning, you are likely catching them at their smallest. Throughout the day, as you walk, stand, and move, your feet naturally swell due to increased blood flow and the effects of gravity. This is a normal physiological process, but it has significant implications for shoe sizing.
The Swelling Factor
Most experts recommend measuring your feet in the late afternoon or evening. By this time, your feet have reached their maximum volume. If a shoe fits comfortably in the evening, it will almost certainly be comfortable in the morning. However, a shoe that feels “just right” at 8:00 AM will likely feel like a vice grip by 6:00 PM. This is especially critical for those looking into private label shoes or custom footwear where precision is paramount.
Wait, there is more. If you are an athlete or a runner, your feet will swell even more during exercise. In these cases, it is even more vital to measure at the end of a long day of activity to ensure there is enough volume in the toe box for natural expansion.
3. Step-by-Step Foot Length Measurement
The length of your foot is the primary metric for determining your shoe size. While it seems simple, the technique used during the tracing phase determines whether the measurement is a success or a failure. Most people make the mistake of sitting down, but your foot expands significantly when bearing weight.
Perfecting the Tracing Technique
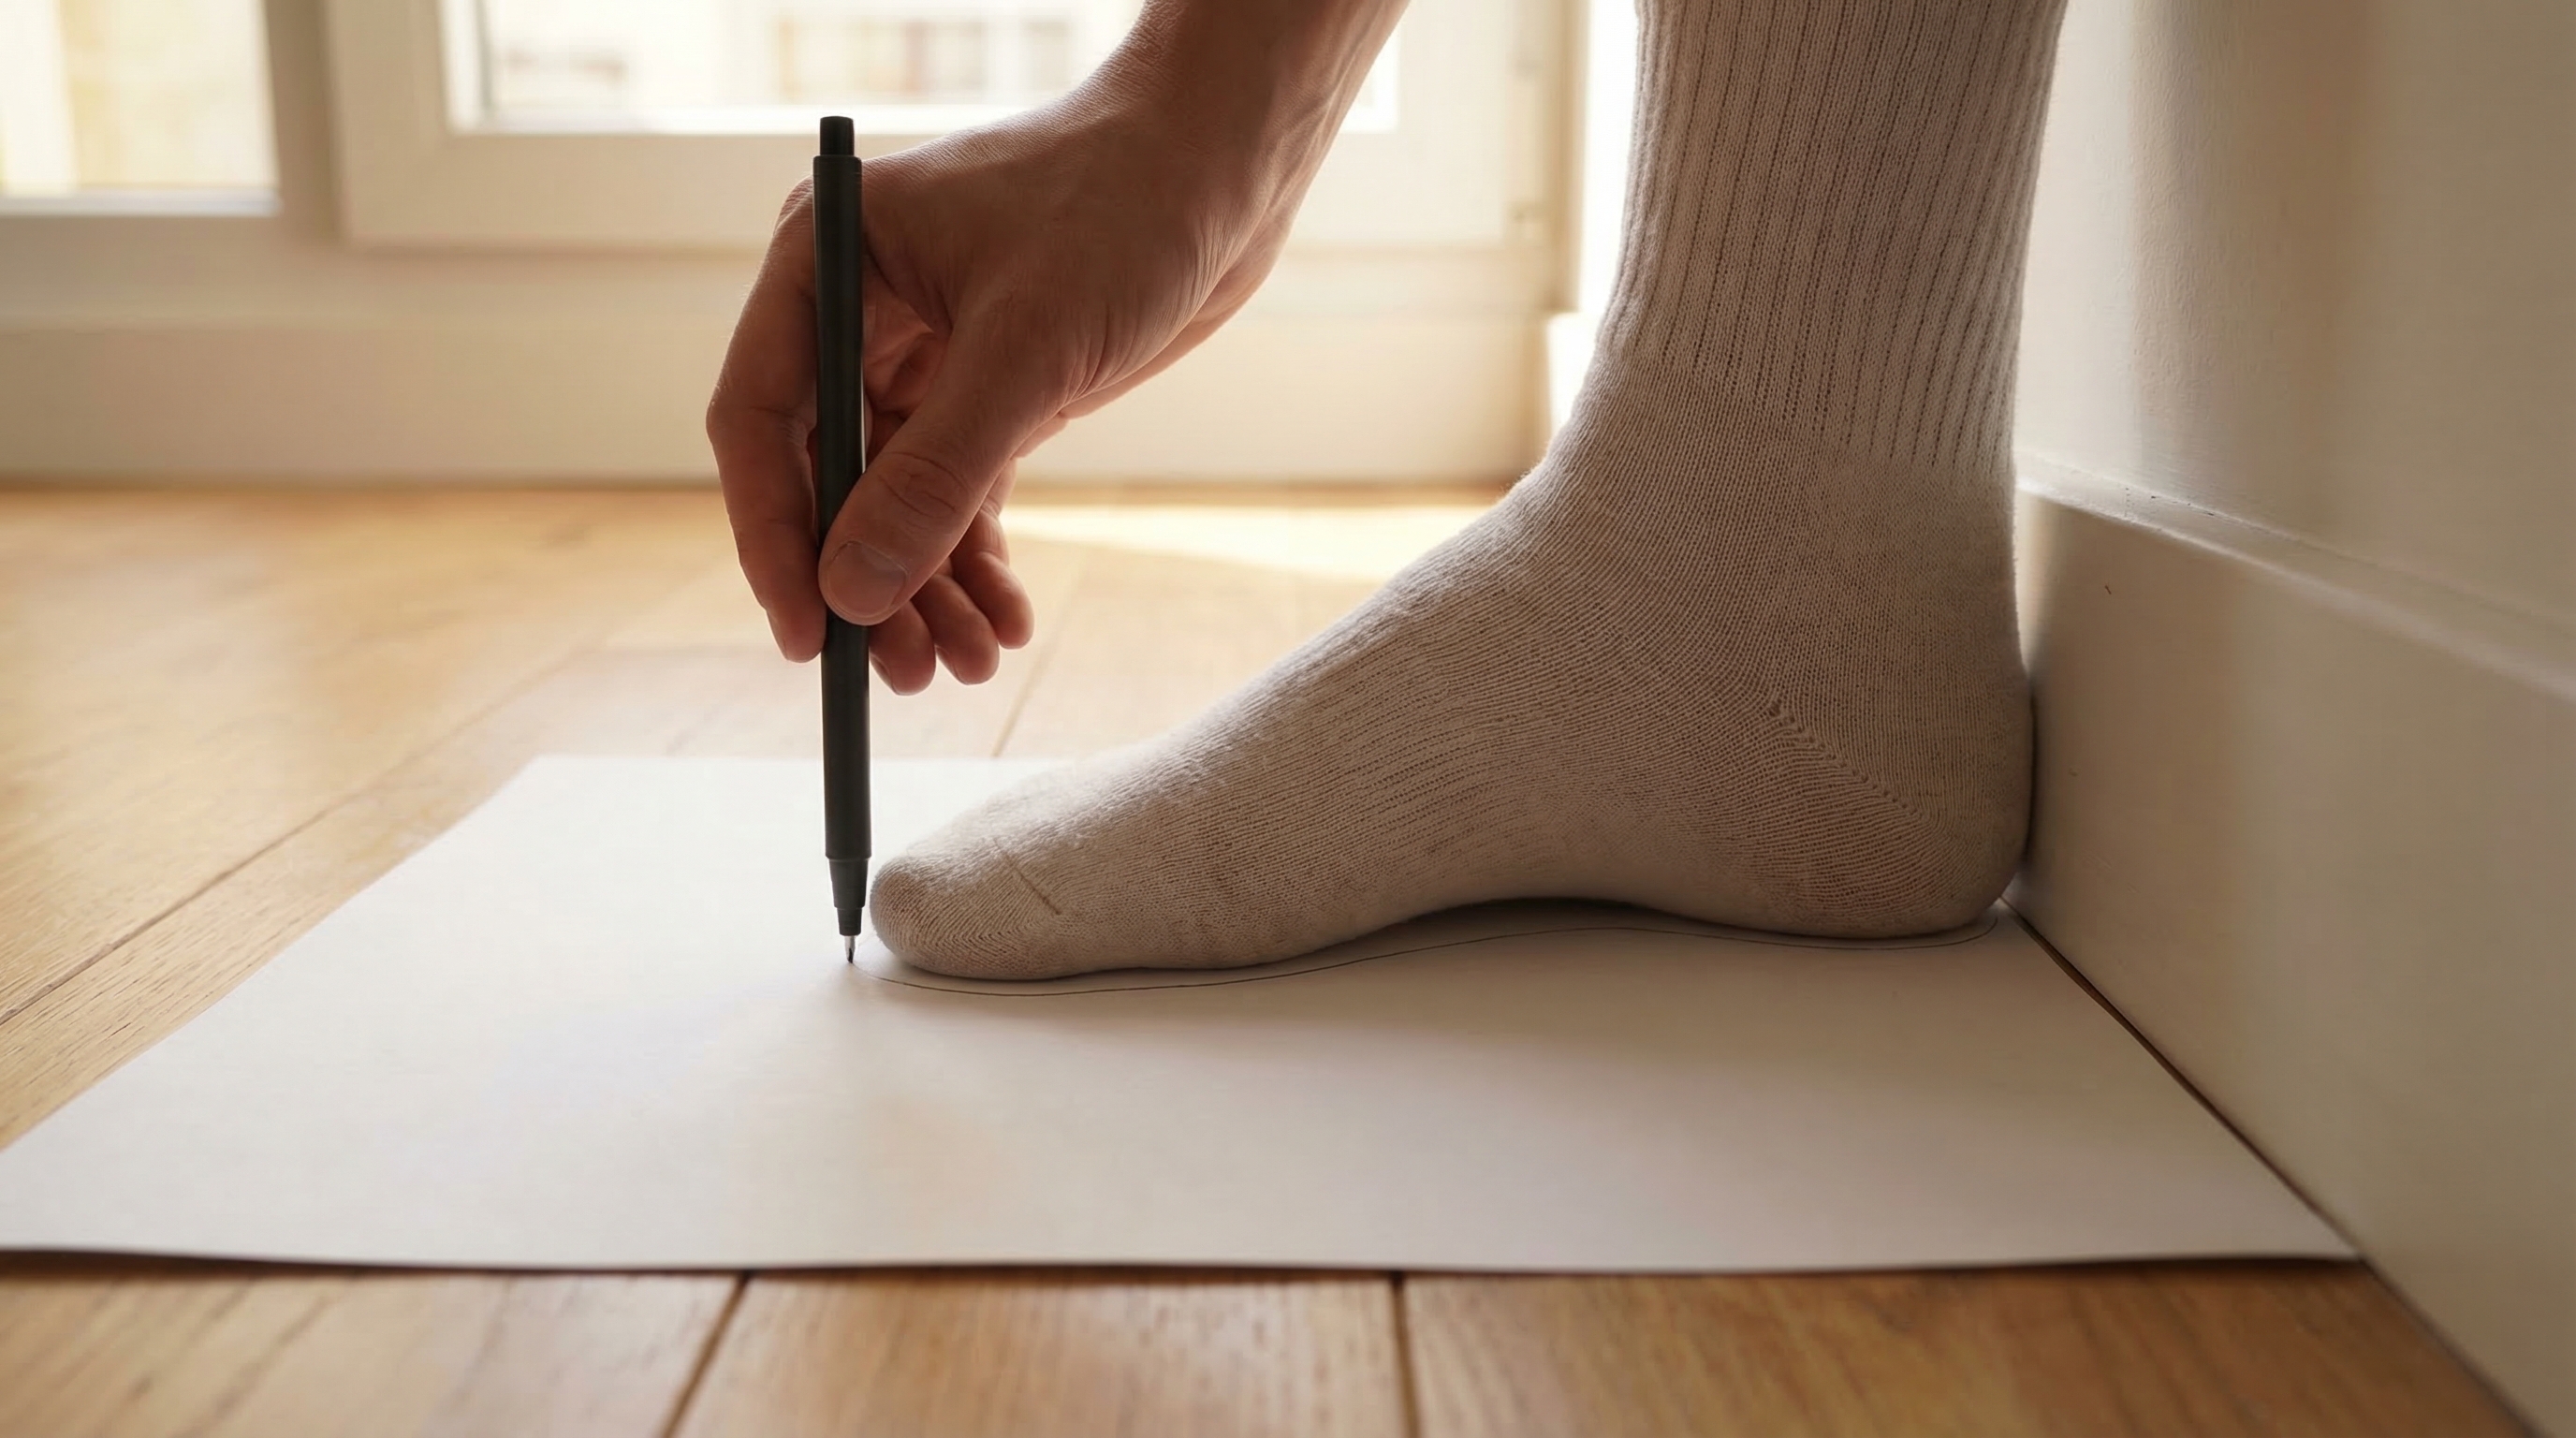
- The Wall Placement: Place the paper on the floor and tape it down. Align the edge of the paper perfectly with a wall.
- The Weighted Stance: Stand on the paper with your heel lightly touching the wall. You must stand with your weight distributed evenly across both feet. Do not lean on a table or chair, as this shifts your center of gravity and changes the foot’s shape.
- The Knee Bend: Keep a very slight bend in your knees. This mimics the “active” state of your foot when walking.
- The 90-Degree Rule: This is the most important technical detail. Hold your pen or pencil perfectly vertical (at a 90-degree angle to the floor). If you angle the pen inward, you will trace under the foot, making the measurement too small. If you angle it outward, you will add unnecessary bulk.
- The Trace: Carefully trace the outline of your entire foot. Pay close attention to the area around the toes.
Once the tracing is complete, use your ruler to measure the straight-line distance from the very back of the heel (the edge that was against the wall) to the tip of your longest toe. Note that for many people, the second toe is longer than the big toe—always measure to the absolute furthest point.
4. Measuring Foot Width Like a Pro
While length gets all the glory, width is usually why shoes feel uncomfortable. A shoe that is the correct length but too narrow will compress the metatarsal bones, leading to numbness and long-term structural damage. Conversely, a shoe that is too wide will allow the foot to slide forward, causing the toes to hit the front of the shoe (toe-bang) and creating friction blisters on the heel.
Finding the Ball of the Foot
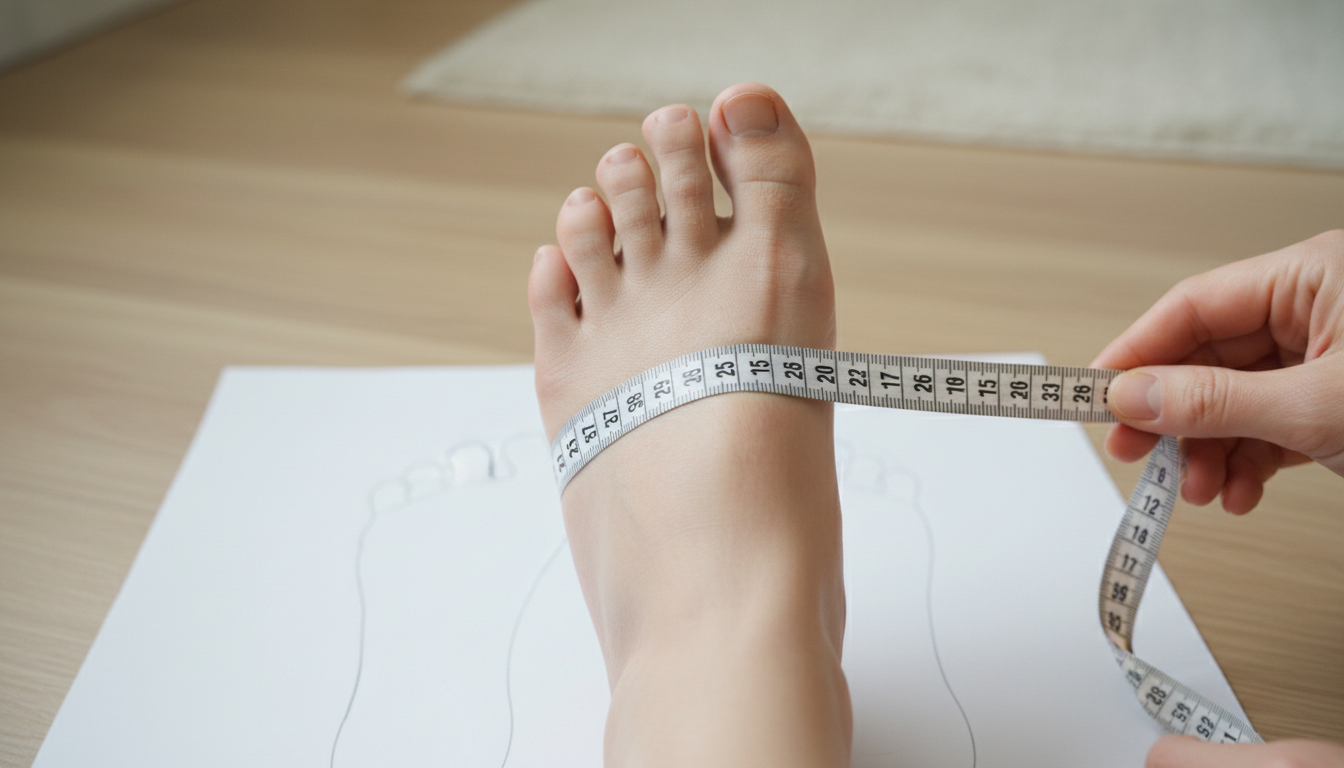
The “width” of a shoe is measured at the ball of the foot—the widest part where your toes meet your foot. To measure this accurately, you have two options:
- The Tracing Method: On your existing foot outline, use a ruler to find the two widest points of the forefoot. Measure the distance between them in millimeters.
- The Girth Method: For even better results, use a flexible measuring tape. Wrap it around the widest part of your foot while you are standing. This measures the “volume” of your foot, which is a better indicator for brands that offer wide (E/EE) or narrow (B/C) options.
Manufacturer Pro Tip: Material Shrinkage & Lasts
When we design shoes at the factory level, we use a “last”—a mechanical form that represents the foot. It is important to know that different materials react differently to the lasting process. For instance, natural leather will “give” and stretch over time, whereas synthetic materials or reinforced work boots will not. If you are between widths and buying a synthetic shoe, always opt for the wider size. To learn more about how we handle these technicalities, visit our about page for insights into our production standards.
5. The Importance of Arch and Instep Girth
If you have ever found that shoes feel tight across the top of your foot even if the length is right, you likely have a high instep. The instep is the arched part of the top of your foot between the toes and the ankle. Measuring this can help you decide if you need shoes with more “depth” or specific lacing systems.
How to Measure Instep Girth
Take your flexible tape measure and wrap it around the center of your foot, over the highest part of your arch. This measurement is particularly useful when buying loafers or slip-on shoes that don’t have laces to adjust the fit. If you have a very high instep, you may need to look for shoes with “extra depth” or models that feature an open lacing system (like a Derby shoe) rather than a closed one (like an Oxford).
6. Decoding Shoe Size Charts: Men, Women, and Kids
Once you have your measurements in centimeters or millimeters, you must translate them into a commercial size. Here is the catch: there is no universal shoe size. A US size 9 is not the same as a UK size 8 or a European size 42. Furthermore, gender-specific sizing adds another layer of complexity.
Comparing Measurement Significance
| Metric | Significance | Common Mistakes |
|---|---|---|
| Length (cm) | Determines the primary size (e.g., US 10) | Failing to measure to the longest toe. |
| Width (mm) | Determines the letter (D, E, EE) | Measuring while sitting down. |
| Instep Girth | Determines “Depth” and entry comfort | Ignoring it for slip-on footwear. |
Gender Differences in Sizing
Generally, there is a 1.5-size difference between US Men’s and Women’s sizing. For example, a Women’s size 8.5 is roughly equivalent to a Men’s size 7. However, Men’s shoes are typically built on a wider last (Standard ‘D’) compared to Women’s shoes (Standard ‘B’). If you are a woman with a wide foot, you might find that a Men’s shoe provides a much better fit than a “Wide” Women’s model.
For children, the rules change entirely. Their feet are still developing and consist of more cartilage than bone. You should check a child’s shoe fit every 2-3 months. A good rule of thumb for kids is to ensure there is a full thumb’s width of space at the front of the shoe to allow for rapid growth.
7. Common Measurement Mistakes to Avoid
Even with the best intentions, small errors can lead to a size that is off by a full step. Awareness of these common pitfalls is the best way to ensure your data is reliable.
The “Sitting Down” Error
We have mentioned this before, but it bears repeating. When you sit, your arches don’t flatten, and your foot doesn’t spread. You must be standing to get the “loaded” measurement. If you cannot stand and trace at the same time, have a friend help you. This ensures your weight remains centered and your tracing remains accurate.
The Pencil Angle
If you hold the pencil at an angle, you are either adding nearly 5mm to the perimeter or subtracting it. Imagine the pencil is a wall; it should be perfectly vertical against the side of your foot.
Ignoring the “Dominant” Foot
Almost everyone has one foot that is slightly larger than the other. It might be only a few millimeters, but that is enough to make the smaller shoe feel tight. Always measure both feet and always buy the size that fits the larger foot. You can always add an insole to the smaller foot’s shoe, but you cannot “stretch” a shoe that is fundamentally too small.
8. From Paper to Purchase: Buying Tips for Online Shoppers
Armed with your measurements, you are ready to hit the digital stores. But don’t just click “add to cart” yet. You need to apply your measurements to the specific brand you are interested in.
Look for the “CM” or “JP” Size
On most size charts, you will see US, UK, EU, and then a “CM” (Centimeters) or “JP” (Japanese, which is in millimeters) column. This is your most reliable anchor point. Because a “US 10” can vary by brand, the actual physical length of the shoe’s interior in centimeters usually stays consistent. If your foot is 27.3cm long, look for a shoe that lists an internal length of roughly 28cm to 28.5cm.
Manufacturer Pro Tip: Quality Control Tolerances
In mass production, there is a “tolerance” range. At tlstage.com, we maintain strict QC to ensure shoes don’t deviate from the last. However, in the wider industry, a shoe can sometimes be 2-3mm off due to the heat used in the vulcanization or bonding process. If you find a brand consistently runs “small,” it is often because their lasting process causes the upper material to pull tighter than the design intended.
9. Sizing Differences Across Brands
Why is an Adidas size 10 different from a Nike size 10? The answer lies in the brand’s “fit philosophy.” Some brands design for a snug, athletic feel, while others design for casual comfort.
- Athletic Brands (Asics, Nike): Often run slightly smaller and narrower. Many runners “size up” by half a size to accommodate foot swelling during long runs.
- European Brands (Clarks, Birkenstock): These often use a different last shape that is more anatomical. They frequently run “wider” in the toe box than American athletic brands.
- Boots (Timberland, Red Wing): Work boots often run large. It is common to size down by half or even a full size from your sneaker size because they are built to accommodate very thick wool socks.
If you are ever unsure, check the “About” section or the FAQ of the brand’s website. They often explicitly state if their models run “True to Size” (TTS) or if you should adjust your choice based on your measurements.
10. Signs of a Poor Fit (Beyond the Size)
Sometimes the numbers look right, but the shoe still feels “off.” This is because shoe fit is subjective and depends on the interaction between your foot shape and the shoe’s architecture.
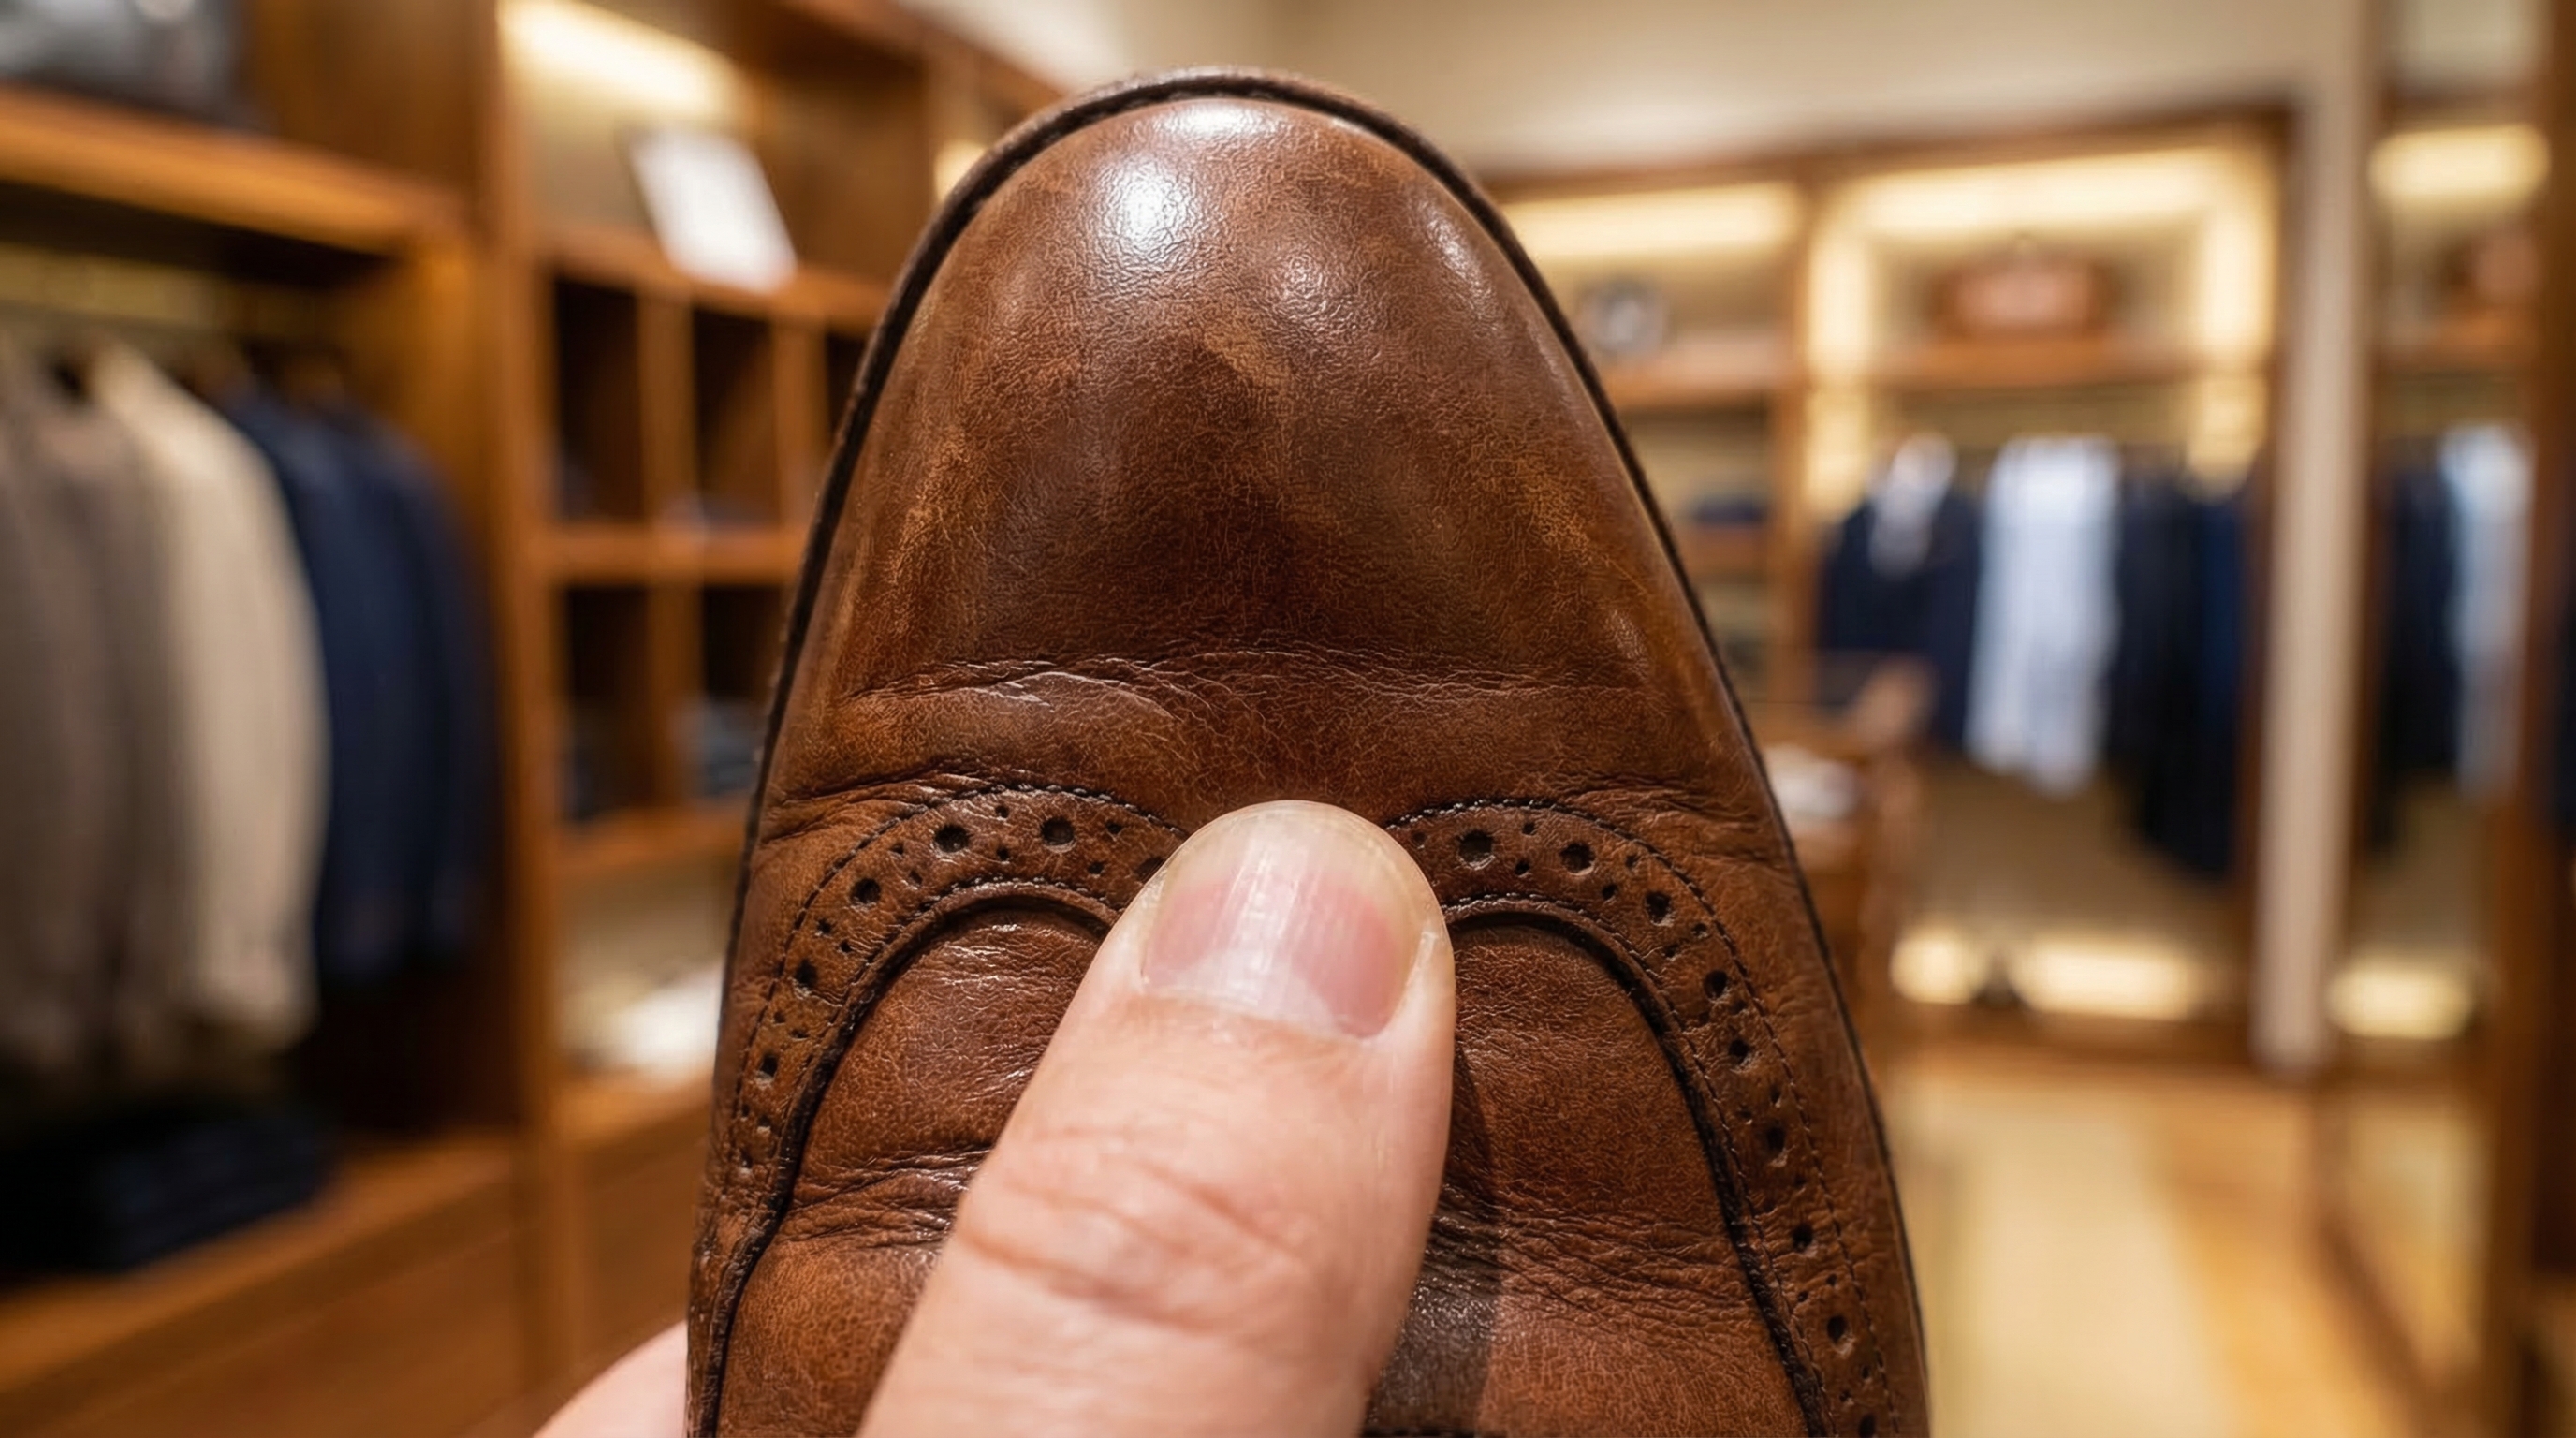
The “Thumb” Test
When standing, press your thumb down at the front of the shoe. You should have between 1/2 inch and 1 inch (about 1.25cm to 2.5cm) of space between your longest toe and the end of the shoe. If your toe is touching the end, the shoe is too small. If there is more than an inch, you may trip.
The Heel Lockdown
Walk around on a clean surface. Does your heel lift out of the shoe? A small amount of “slip” (a few millimeters) is normal in new, stiff leather shoes, but in sneakers, your heel should feel locked in. If your heel is moving significantly, the shoe is either too long or the heel cup is too wide for your anatomy.
The Pinky Toe Check
Feel the side of the shoe near your pinky toe. If you can see the outline of your toe pushing against the material, or if you feel a “pinch,” the shoe is too narrow. This is a common issue that leads to corns and calluses.
Frequently Asked Questions (PAA)
How much room should be in the front of a shoe?
For most casual and walking shoes, you should aim for about 1/2 inch (roughly the width of your thumb) of space between your longest toe and the front of the shoe. This space is essential because your foot slides forward slightly as you walk. For running shoes, some athletes prefer up to a full inch to account for the significant swelling and forward movement during high-impact activity.
Should I measure my feet with or without socks?
You should always measure your feet while wearing the type of socks you plan to wear with the shoes you are buying. If you are measuring for winter boots, wear thick wool socks. If you are measuring for dress shoes, wear thin dress socks. The difference in sock thickness can easily account for half a shoe size.
Is it normal for one foot to be larger than the other?
Yes, it is extremely common. Most people have a “dominant” foot that is slightly larger in both length and width. This is often linked to handedness (right-handed people often have a larger left foot as it acts as the “sturdy” side during movement). Always size your footwear to the larger foot to ensure total comfort.
How often should I re-measure my feet?
Adults should measure their feet at least once a year. While your bones stop growing in your late teens, the ligaments and tendons in your feet lose elasticity over time, causing the foot to “spread” and become longer or wider. Changes in weight, pregnancy, and certain medical conditions can also significantly alter your shoe size.
What do the letters like ‘D’ or ‘E’ mean in shoe sizes?
These letters indicate the width of the shoe. In North America, ‘D’ is considered the standard width for men, while ‘B’ is the standard for women. ‘E’, ‘EE’, and ‘EEEE’ represent progressively wider fits. On the other side, ‘A’ or ‘AA’ represent narrow fits. If you have consistently felt “pinched” in standard shoes, look for models specifically labeled with an ‘E’ or ‘Wide’ designation.
For more information on high-quality footwear construction or to inquire about bulk production, please visit our homepage or feel free to contact our expert team today.
If you are looking for specific material options or detailed manufacturing spec sheets, please feel free to reach out via our contact page.