Have you ever looked down at your favorite pair of sneakers or leather boots and wondered exactly how are shoes made? Transforming a flat sketch into a comfortable, durable, and structurally sound piece of footwear is a fascinating journey. In reality, producing a single high-quality shoe requires a highly orchestrated assembly line involving over 150 individual manual and mechanized operations. Whether you are a curious footwear enthusiast wanting to peek behind the factory doors, or an aspiring designer looking to understand the craft, this chronological guide will take you straight onto the production floor.
However, for modern footwear brand owners and procurement managers, understanding this precise timeline is about much more than just satisfying curiosity—it is a critical business survival skill. In the commercial manufacturing world, treating the factory floor as a “black box” leads to catastrophic physical failures. A missed chemical primer during sole attachment causes massive delamination (soles peeling off), while incorrect heat-setting parameters lead to shape distortion and crippling return rates. To maintain healthy margins and build a product that survives real-world wear, you must respect the chronological physics and chemistry of the assembly line.
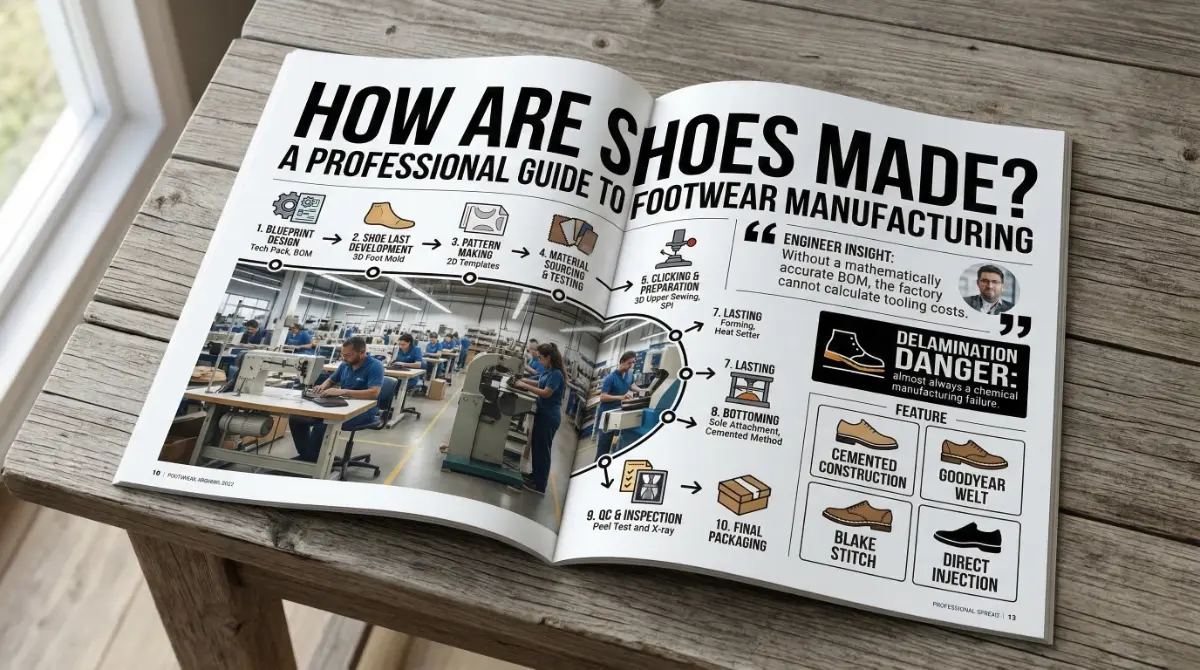
To prevent these industrial pitfalls, professional factories follow an unforgiving, linear standard operating procedure. Below is the authentic 10-step footwear manufacturing process, explaining exactly how raw materials are engineered into market-ready products.
The True Factory Workflow: At a Glance
- Blueprint Design: Creating the Tech Pack and BOM.
- Shoe Last Development: Carving the 3D anatomical foot mold.
- Pattern Making: Translating 3D shapes into 2D cuttable templates.
- Material Sourcing: Procuring and testing leathers and textiles.
- Clicking & Preparation: Precision cutting and material skiving.
- Closing (Stitching): Sewing the 2D pieces together into a 3D upper.
- Lasting (Forming): Shaping the upper over the mold and heat-setting.
- Bottoming (Cementing): Priming, gluing, pressing, and freezing the sole.
- QC & Inspection: Physical testing.
- Packaging: Final cleaning, lacing, and boxing for global transit.
Step 1: Blueprint Design and Tech Packs
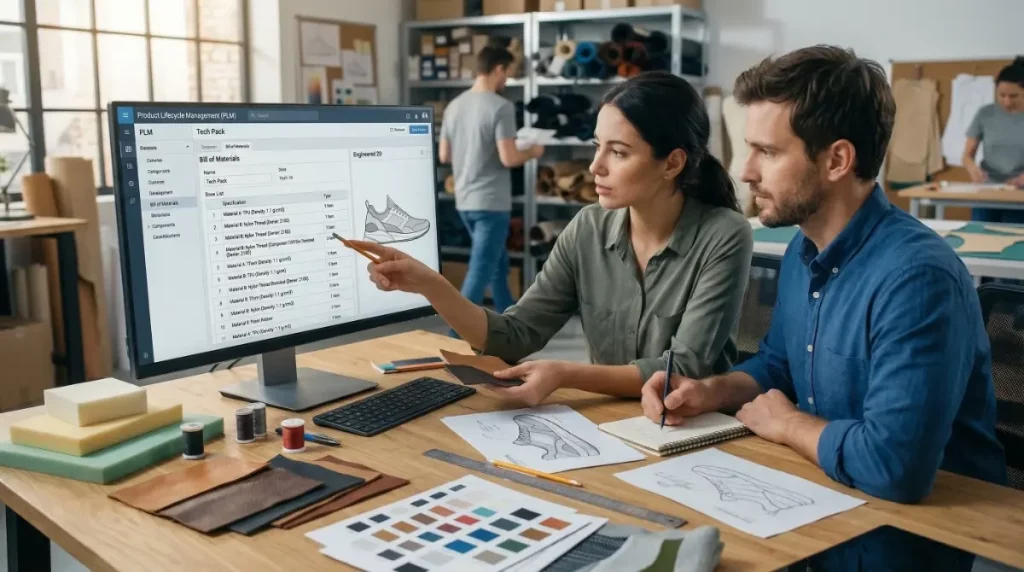
The physical production of a shoe begins with structural engineering. An initial sketch is visually appealing, but a factory cannot build a shoe from a sketch. Designers and engineers must collaborate to convert that vision into a comprehensive “Tech Pack.” This digital document acts as the factory’s ultimate instruction manual.
The Tech Pack includes the Bill of Materials (BOM), which lists every physical component required—from the exact density of the EVA foam to the specific gauge of the nylon thread. Without a mathematically accurate BOM, the factory cannot calculate tooling costs or program the automated machinery. For brands looking to bypass this complex development phase, utilizing private label shoes services allows direct access to pre-vetted, factory-ready technical blueprints.
Step 2: Shoe Last Development
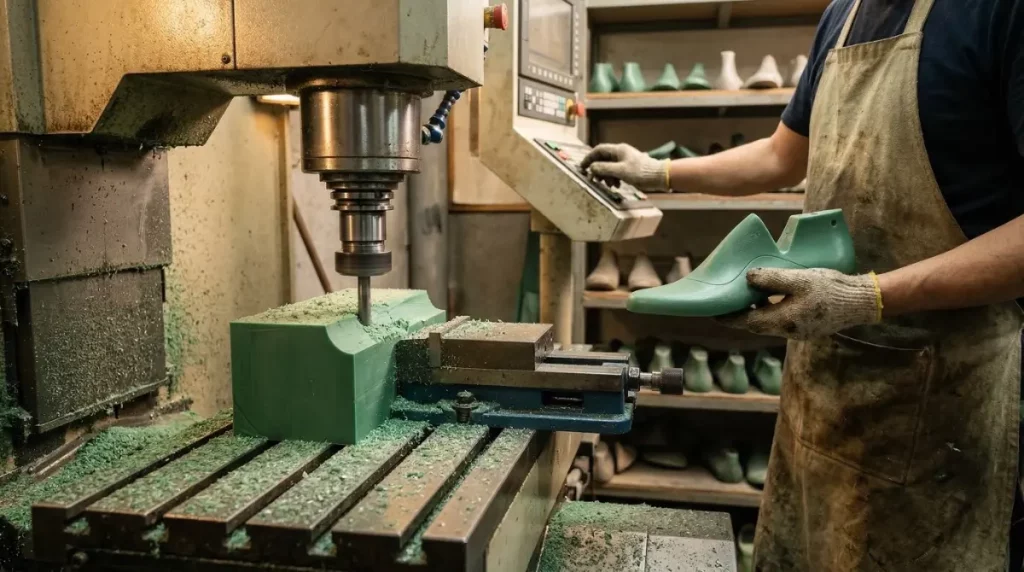
You cannot build a house without a foundation, and you cannot build a shoe without a “Last”. The last is a solid, three-dimensional mechanical mold that perfectly mimics the volume, instep, and gait mechanics of a human foot. It dictates the entire shape and ergonomic fit of the final shoe.
While bespoke shoemakers still carve lasts from hardwood, modern mass-manufacturing facilities primarily CNC-mill their lasts from High-Density Polyethylene (HDPE) plastic or aluminum. These industrial materials are strictly required because the last must remain inside the shoe throughout the entire assembly process, acting as a rigid “anvil” to withstand the crushing pressure of hydraulic machines and the extreme temperatures of the curing ovens.
Step 3: Pattern Making and Grading
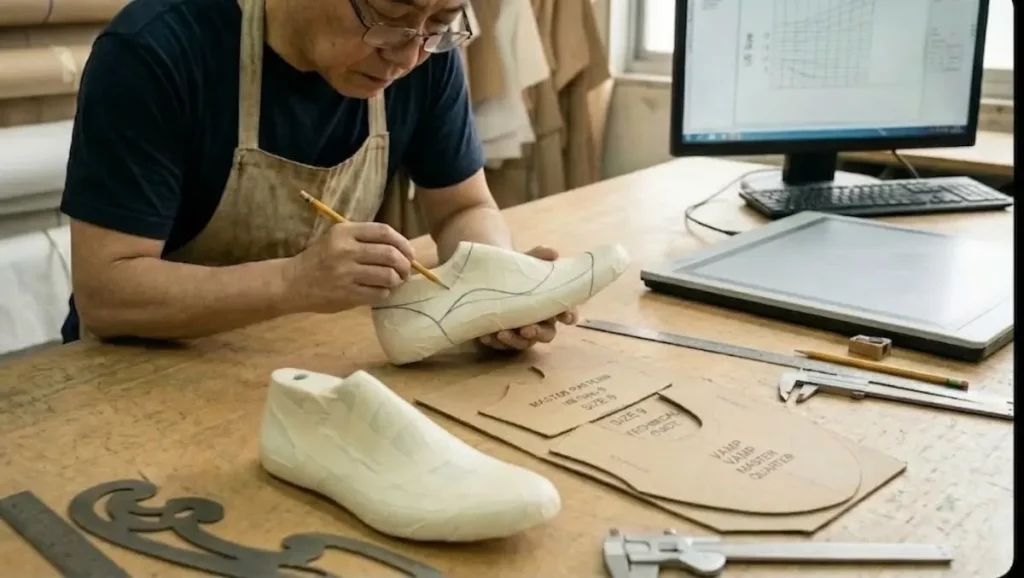
With the physical 3D last completed, the engineering team must figure out how to cover it using flat, 2D materials. This highly specialized process is known as Pattern Making. A master pattern maker wraps the 3D last in masking tape, draws the design seam lines directly onto the tape, and then carefully peels it off to lay it flat.
These flattened shapes become the master 2D shell patterns for the upper components. These patterns are then digitized into a CAD system for “Grading”. Grading is the mathematical process of scaling the master pattern up and down to create a full run of commercial sizes (e.g., from US Size 6 to US Size 13) without distorting the original proportions or misaligning the seams.
Step 4: Material Sourcing and Testing
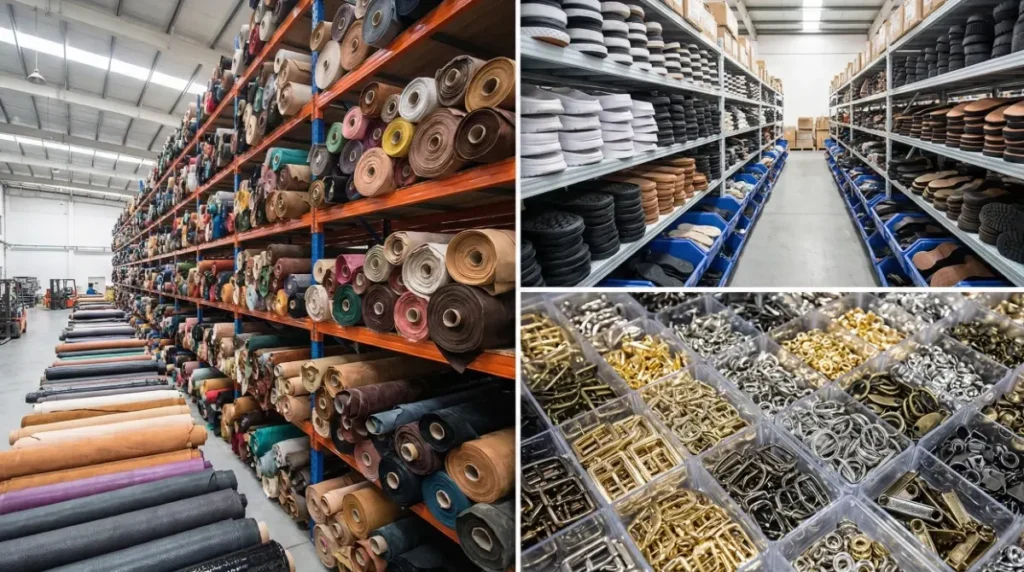
Once the BOM and patterns are locked in, the procurement team begins sourcing raw materials. This includes selecting full-grain leathers, engineered meshes, Strobel boards, and rubber outsole compounds. Partnering with an experienced shoe manufacturer ensures that materials are sourced from compliant, high-quality mills rather than unreliable open markets.
When bulk materials arrive at the factory, they must pass rigorous laboratory testing. Leather hides are checked for moisture content; if the leather is too dry, it will crack under the extreme tension of the lasting machines. Synthetic textiles undergo shrinkage tests to ensure they will not warp when exposed to factory steam later in the production line.
Comparing Leathers, Synthetics, and Performance Textiles
The physical properties of the upper material influence everything from the “clicking yield” to the final “lasting tension.” Genuine leather offers natural breathability and “memory,” allowing it to conform to the foot over time, but it is prone to natural defects that can complicate cutting. Conversely, synthetic microfibers and engineered knits provide consistency and high tensile strength, making them ideal for performance athletic footwear. Choosing the right material involves balancing the cost per square meter against the expected lifespan of the finished product.
Table 1: Footwear Material Comparison Matrix
| Material Type | Durability | Breathability | Environmental Impact | Common Use Case |
|---|---|---|---|---|
| Full-Grain Leather | High | High | High (Tanning process) | Premium Dress Shoes |
| Synthetic PU | Medium | Low | Medium (Petrochemicals) | Fast Fashion/Casual |
| Engineered Knit | Medium | Extreme | Low (Zero-waste potential) | Running/Performance |
| Recycled TPU | High | Variable | Low (Circular economy) | Outdoor/Sustainable Gear |
Footwear Engineer Insight: The Direction of Stretch When sourcing natural leather hides, factory technicians must identify the “line of tightness.” Leather inherently stretches more in one direction than the other. If the cutting patterns are mistakenly aligned perpendicularly to this directional stretch, the finished shoe will rapidly lose its structural shape and warp outward after only a few wears.
Step 5: Clicking and Preparation
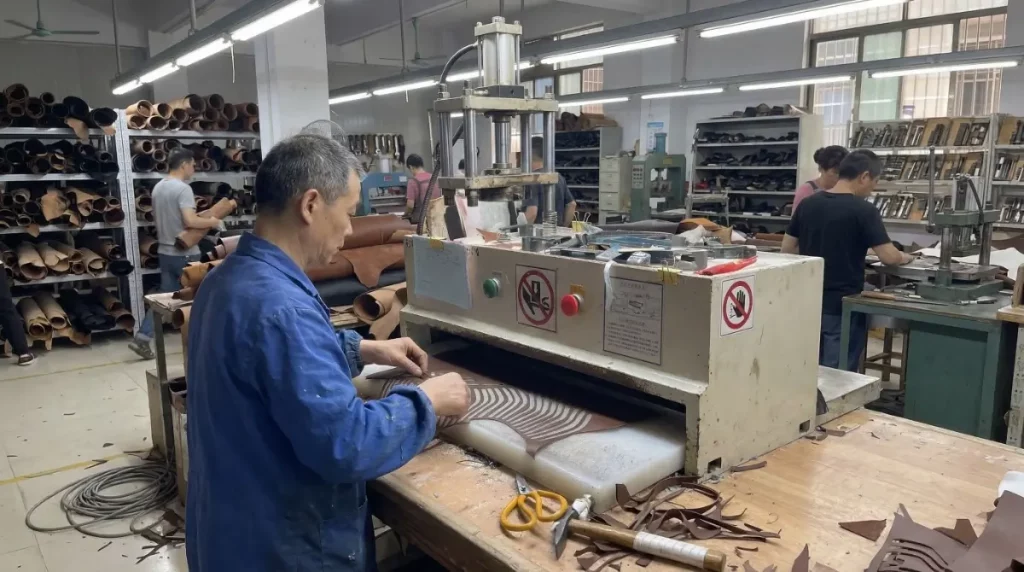
The physical construction finally begins in the “Clicking Room” . Here, massive rolls of fabric and irregular leather hides are precision-cut into the dozens of individual pattern pieces required to build the upper. The term “clicking” originates from the sharp sound traditional metal cutting dies make as they punch through dense materials.
Component Nesting and Precision Cutting
A standard sneaker upper can consist of 15 to 30 separate cut pieces, including the “vamp,” “quarters,” “tongue,” and “heel counter.” During the clicking phase, machine operators must account for the “skiving allowance”—the tiny extra margin of material left at the edges where pieces will eventually overlap. Precision at this cutting stage is non-negotiable; if the pieces are not cut exactly to the graded patterns from Step 3, the shoe will look asymmetrical and fail to fit together like a 3D puzzle during the subsequent assembly phases.
Manual Die Cutting vs. Automated CNC Laser Cutting
Traditional “clicking” involves a skilled operator manually positioning heavy steel dies on a hide to avoid scars or thin spots. While this method is still used for luxury leather goods, modern mass production relies heavily on automated CNC (Computer Numerical Control) laser or knife cutters. These machines use sophisticated algorithms to nest patterns together, maximizing material usage and achieving yields that human operators simply cannot match. But here is the catch: while automated cutting is faster, it requires a high level of technical expertise to program the initial nesting software correctly.
The Crucial Skiving Process
Before leaving the preparation area, leather and thick synthetic pieces must undergo “Skiving” (削边). A high-speed rotating blade shaves down the exact edges of the material so that when two pieces overlap to form a seam, the joint isn’t bulky or uncomfortable. Crucial Factory Note: Skiving generates an immense amount of dust. Therefore, it is strictly performed in the prep department. If skiving were done inside the stitching room, the floating debris would instantly jam the sensitive gears of the sewing machines.
Step 6: Closing the Upper
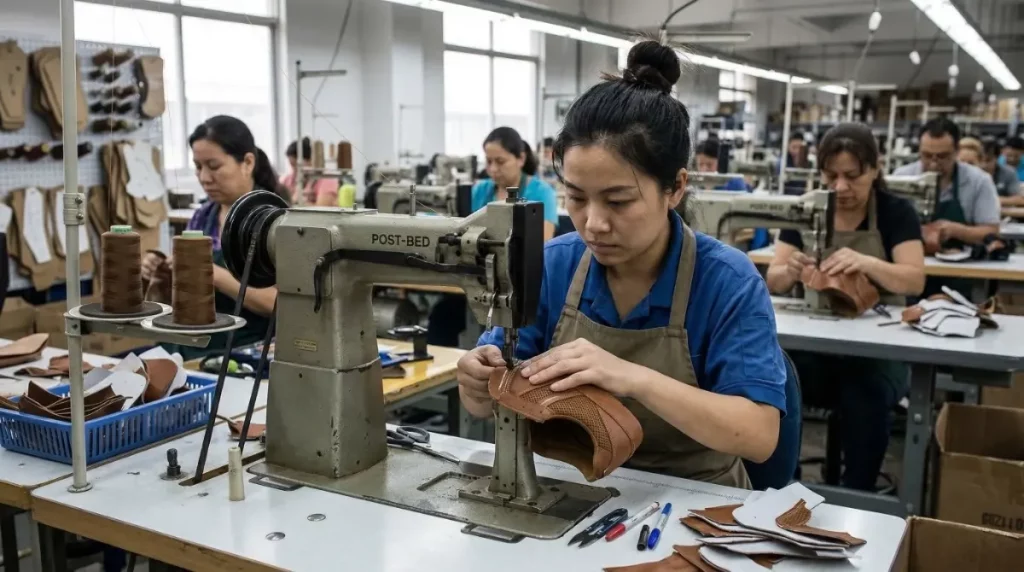
Once the components are cut and skived, they move into the Closing Room. This is the most labor-intensive department in the entire factory. Here, hundreds of highly skilled operators use heavy-duty industrial sewing machines to stitch the flat 2D pieces together into a fully closed, 3D upper shell.
Because a shoe upper is inherently three-dimensional, standard flat-bed sewing machines cannot do the job. Operators use “Post-Bed” machines, which feature an elevated vertical column that allows the worker to rotate the curved heel and toe areas seamlessly under the needle. Quality is strictly monitored by measuring the SPI (Stitches Per Inch). A premium leather shoe demands a tight 10-12 SPI for a refined look and maximum tear resistance.
Step 7: The Lasting Process
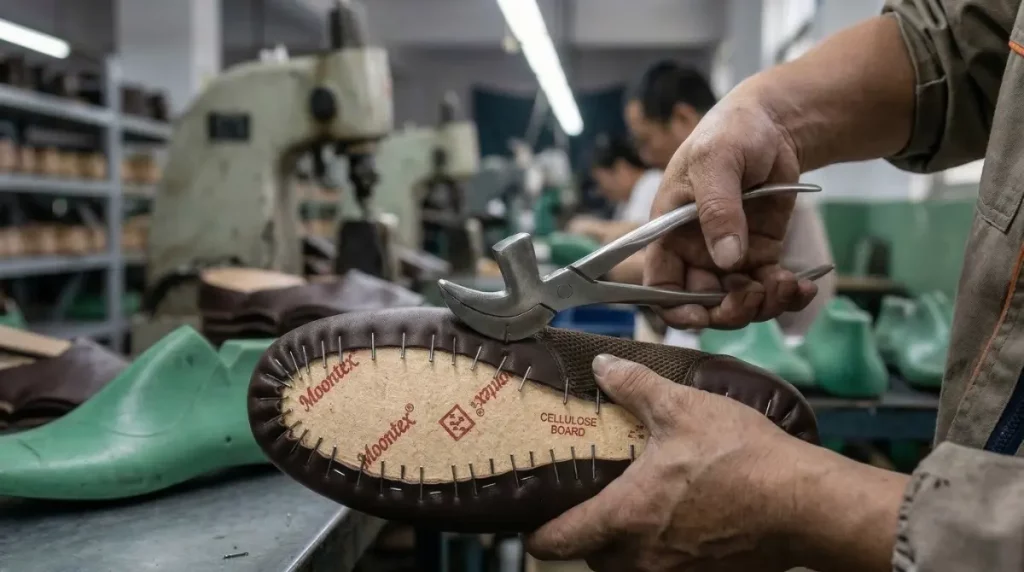
Up to this point, the stitched upper is just a floppy, unshaped bag of fabric. It now enters the Lasting Department, the true technical heart of shoemaking. Here, the upper is stretched tightly over the plastic shoe last (from Step 2) to take on its permanent anatomical shape. The specific method depends entirely on the type of shoe:
- Board Lasting (Boots & Formal Shoes): The upper is placed over the last, and a heavy-duty “Toe Laster” machine uses hydraulic metal pincers to violently pull the edges of the upper down, wrapping them underneath the last and gluing them to a stiff insole board.
- Strobel Construction (Athletic Sneakers): Used in 90% of modern running shoes. In the previous step, the upper was stitched directly to a flexible fabric bottom (a Strobel board) to create a closed “sock.” The rigid plastic last is now forcefully driven into this tight sock using a pneumatic pushing machine.
Once the upper is stretched tightly over the last, it passes slowly through a massive “Heat Setter Tunnel.” Baking at around 120°C (248°F) with high steam humidity, this tunnel breaks down the molecular bonds in the material. When it exits, the material has gained a permanent “memory” of the last’s shape.
Step 8: Bottoming and Sole Attachment
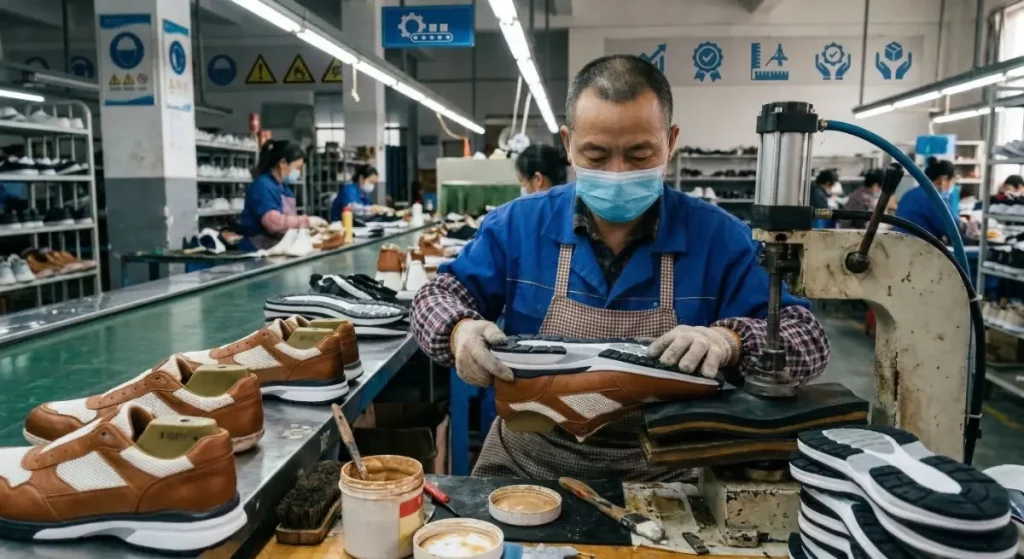
With the upper perfectly shaped and baked, it moves to the Bottoming Department. This is where the heavy-duty outsole is permanently bonded to the upper. This chemical and mechanical process is the most critical structural joint in the entire shoe; if done incorrectly, the sole will peel off after a week of wear.
The method used to attach the sole to the upper is the primary factor in determining a shoe’s durability, flexibility, and price point. While there are dozens of variations, most modern footwear falls into one of three categories: Cemented, Stitched, or Injection Molded.
Cemented Construction (The Industry Standard)
The vast majority of modern sneakers and casual shoes use “Cemented Construction.” Think about it this way: the bond is not just a layer of glue; it is a chemical weld that, when done correctly, is stronger than the materials themselves. A professional factory follows an unforgiving 5-step sequence to prevent delamination:
- Roughing: A high-speed wire brush grinds away the smooth surface layer at the bottom of the lasted upper, exposing the raw, porous fibers.
- Chemical Primer / Halogenation (Mandatory Step): The roughed upper and the rubber outsole are painted with a liquid chemical primer. This alters the surface tension and molecular polarity of the materials so the glue can actually bite into them.
- PU Cementing: Once the primer dries, heavy-duty Polyurethane (PU) cement is applied to both surfaces.
- Hydraulic Pressing: The glued parts travel through an Infrared oven to “reactivate” the PU cement into a hyper-sticky state. With the solid plastic last still inside acting as an anvil, the shoe is placed into a multi-directional hydraulic press applying tons of pressure to forge a seamless bond.
- The Chill Tunnel: Immediately after the hot press, the shoe is thrust into a Chill Tunnel running at sub-zero temperatures (-5°C). This thermal shock flash-freezes the PU cement, instantly crystallizing the chemical bonds into an unbreakable weld.
Footwear Engineer Insight: The Delamination Danger
The vast majority of “sole separation” defects in the global market happen because a factory either skipped the Primer application or rushed the shoe through the Chill Tunnel. Chemical adhesion requires exact timing; cutting corners here is the fastest way to ruin a brand’s reputation.
Stitched Methods: Goodyear Welt vs. Blake Stitch
For high-end footwear, stitched construction remains the gold standard. The “Goodyear Welt” involves stitching a strip of leather (the welt) to both the upper and the insole, and then stitching the outsole to that same welt. This creates a highly durable, water-resistant bond that allows the shoe to be resoled multiple times. The “Blake Stitch,” common in Italian dress shoes, involves stitching the outsole directly through the insole and upper.
Injection Molding and Vulcanization
Performance athletic brands often utilize “Direct Injection” or “Vulcanization.” In direct injection, the lasted upper is placed into a mold, and molten TPU or PU is injected directly onto the bottom of the shoe, forming the sole and the bond simultaneously. “Vulcanization,” famously used by brands like Vans and Converse, involves wrapping the upper and a “green” (un-cured) rubber sole with a rubber foxing tape and then “baking” the entire shoe in a pressurized oven.
Table 2: Construction Method Pros and Cons
| Method | Best For | Durability | Repairability | Production Cost |
|---|---|---|---|---|
| Cemented | Sneakers / Casual | Medium | Low | Low |
| Goodyear Welt | Premium Boots | Extreme | High | High |
| Blake Stitch | Dress Shoes | High | Medium | Medium |
| Direct Injection | Safety / Sport | Extreme | None | Medium |
Step 9: Quality Control and Inspection
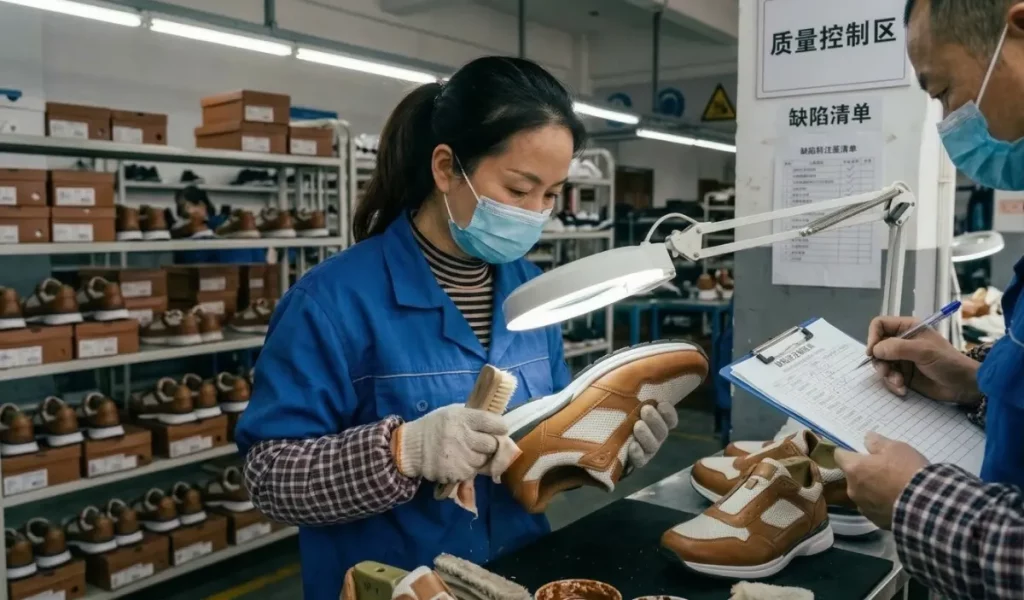
The heavy manufacturing is complete. The first action in the QC phase is De-lasting. Only after the glue has fully crystallized in the chill tunnel is the mechanical last forcefully extracted from the shoe using a pneumatic pulling machine. Pulling the last out while the shoe is still warm will cause the materials to instantly shrink and lose their graded size.
The shoes now enter the Quality Control line. To understand the strict physical parameters we enforce, you can learn more about our internal testing standards. Technicians meticulously clean off any stray marking pens or excess glue using specialized industrial solvents.
To ensure safety and durability, random batch samples are placed into a tension machine that physically tries to rip the sole off the upper (Peel Testing) to verify the bond strength meets international minimums. Every single shoe then passes through an industrial X-ray scanner to guarantee no broken sewing needles or sharp metal fragments were accidentally left hidden inside the lining.
Step 10: Final Packaging
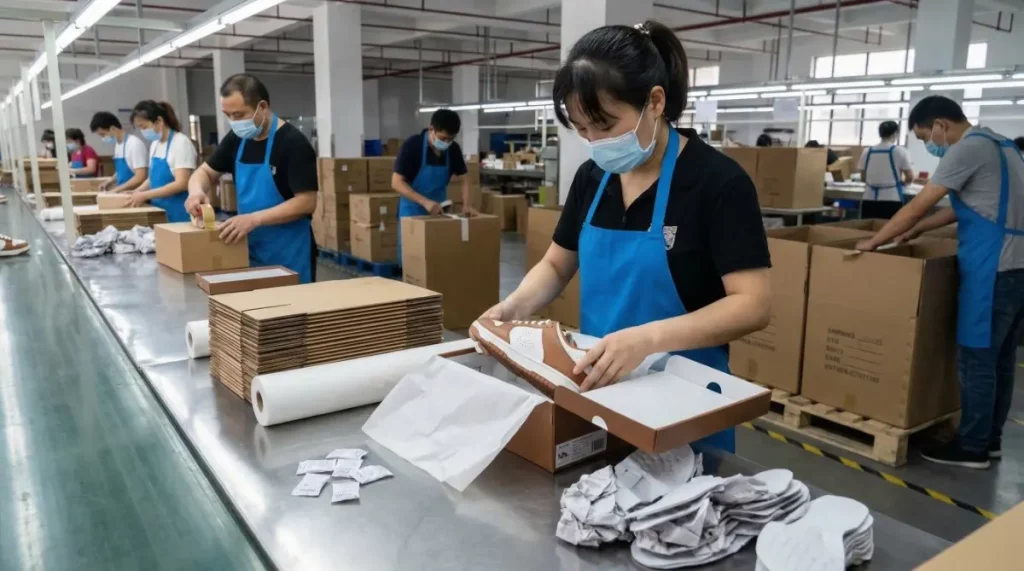
The surviving, pristine shoes enter the final packaging department, often referred to in the industry as “Treeing.” Leather shoes are hand-burnished and treated with protective waxes to enhance their depth of color, while technical sneakers are brushed clean.
Workers carefully insert the anatomical insoles (sock liners) and precisely thread the laces. To ensure the shoes maintain their toe shape during months of trans-oceanic shipping, they are stuffed with shape-retaining paper inserts. Finally, the pairs are wrapped in acid-free tissue paper and placed into their retail shoeboxes alongside silica gel packets to prevent mold and moisture damage inside the shipping containers. From here, they are loaded onto pallets and ready to be distributed worldwide.
Frequently Asked Questions
Why do some shoe soles peel off so easily?
Catastrophic sole delamination is almost always a chemical manufacturing failure. It occurs when a factory fails to properly mechanically “rough” the bonding surface, skips the chemical Primer/Halogenation wash before gluing, or removes the shoe from the last before the PU cement has fully crystallized in the Chill Tunnel.
How long does the entire shoe manufacturing process take?
While the actual active labor time spent touching a single pair of shoes might only total 90 to 120 minutes, the complete factory assembly line cycle usually takes 45 to 60 days per bulk order. This timeline accounts for material procurement, resting periods, the drying of chemical primers, and the thermal cycling required to permanently lock the materials into their new shapes.
What is the most durable type of shoe construction?
For traditional footwear, the Goodyear Welt is widely considered the most durable because it is highly water-resistant and allows for the shoe to be rebuilt over time. For athletic footwear, “Direct Injection” or “Vulcanization” provides the strongest bond between the sole and the upper.
Why are most shoes manufactured in Vietnam and China?
These regions have developed the most sophisticated “footwear clusters” in the world. They offer a concentrated supply chain where material suppliers, tooling factories, and skilled labor are all located in close proximity, significantly reducing lead times and logistical costs.
Can I make high-quality shoes using sustainable materials?
Absolutely. Many of the world’s leading performance brands are now using recycled TPU, organic cotton, and “vegan leathers” made from pineapple or mushroom fibers. The key is to ensure that the factory understands how to calibrate their machinery for these non-traditional materials.
Understanding exactly how shoes are made empowers brands to make better sourcing decisions and helps consumers appreciate the intense engineering behind their daily footwear. If you are developing a new footwear line and need a partner that strictly adheres to these rigorous industrial workflows, reach out to our technical team through our contact page today.