
Every shoe lover has faced the same sinking feeling: stepping into a deep puddle or getting caught in an unexpected downpour. Wet shoes are more than just a temporary discomfort; they represent a significant threat to your footwear investment. When moisture permeates the deep fibers of your shoes, it doesn’t just sit there; it begins a destructive process. From the breakdown of expensive adhesives to the structural warping of delicate leathers, water is often the primary cause of premature shoe “death.” Furthermore, damp environments are the perfect breeding ground for bacteria and fungi, leading to persistent odors that no amount of spray can truly eliminate.
The frustration of waiting days for a favorite pair of boots to dry, only to find them stiff, cracked, or smelling like a locker room, is enough to ruin anyone’s morning. You might be tempted to throw them in the tumble dryer or blast them with a hairdryer, but these “quick fixes” often cause irreversible damage, such as shrinking the midsoles or melting the glue that holds the sole to the upper. If you value your collection, you need a methodology that balances speed with structural integrity. This authoritative guide provides professional-level insights into the science of drying, ensuring your shoes remain in peak condition regardless of the weather.
Beyond the aesthetics, there is a sustainability argument for proper drying. In an era of fast fashion, extending the life of your footwear by even 12 months significantly reduces your personal carbon footprint. Quality shoes are built to last, but only if the user understands the fundamental principles of material care. By mastering the techniques outlined in this guide, you transition from a consumer to a curator of your own wardrobe.
The safest and most effective way to dry shoes is to remove the insoles, stuff the interiors with plain absorbent paper, and place them in a well-ventilated area with consistent, cool airflow from a floor fan.
Quick Steps to Dry Your Shoes Safely:
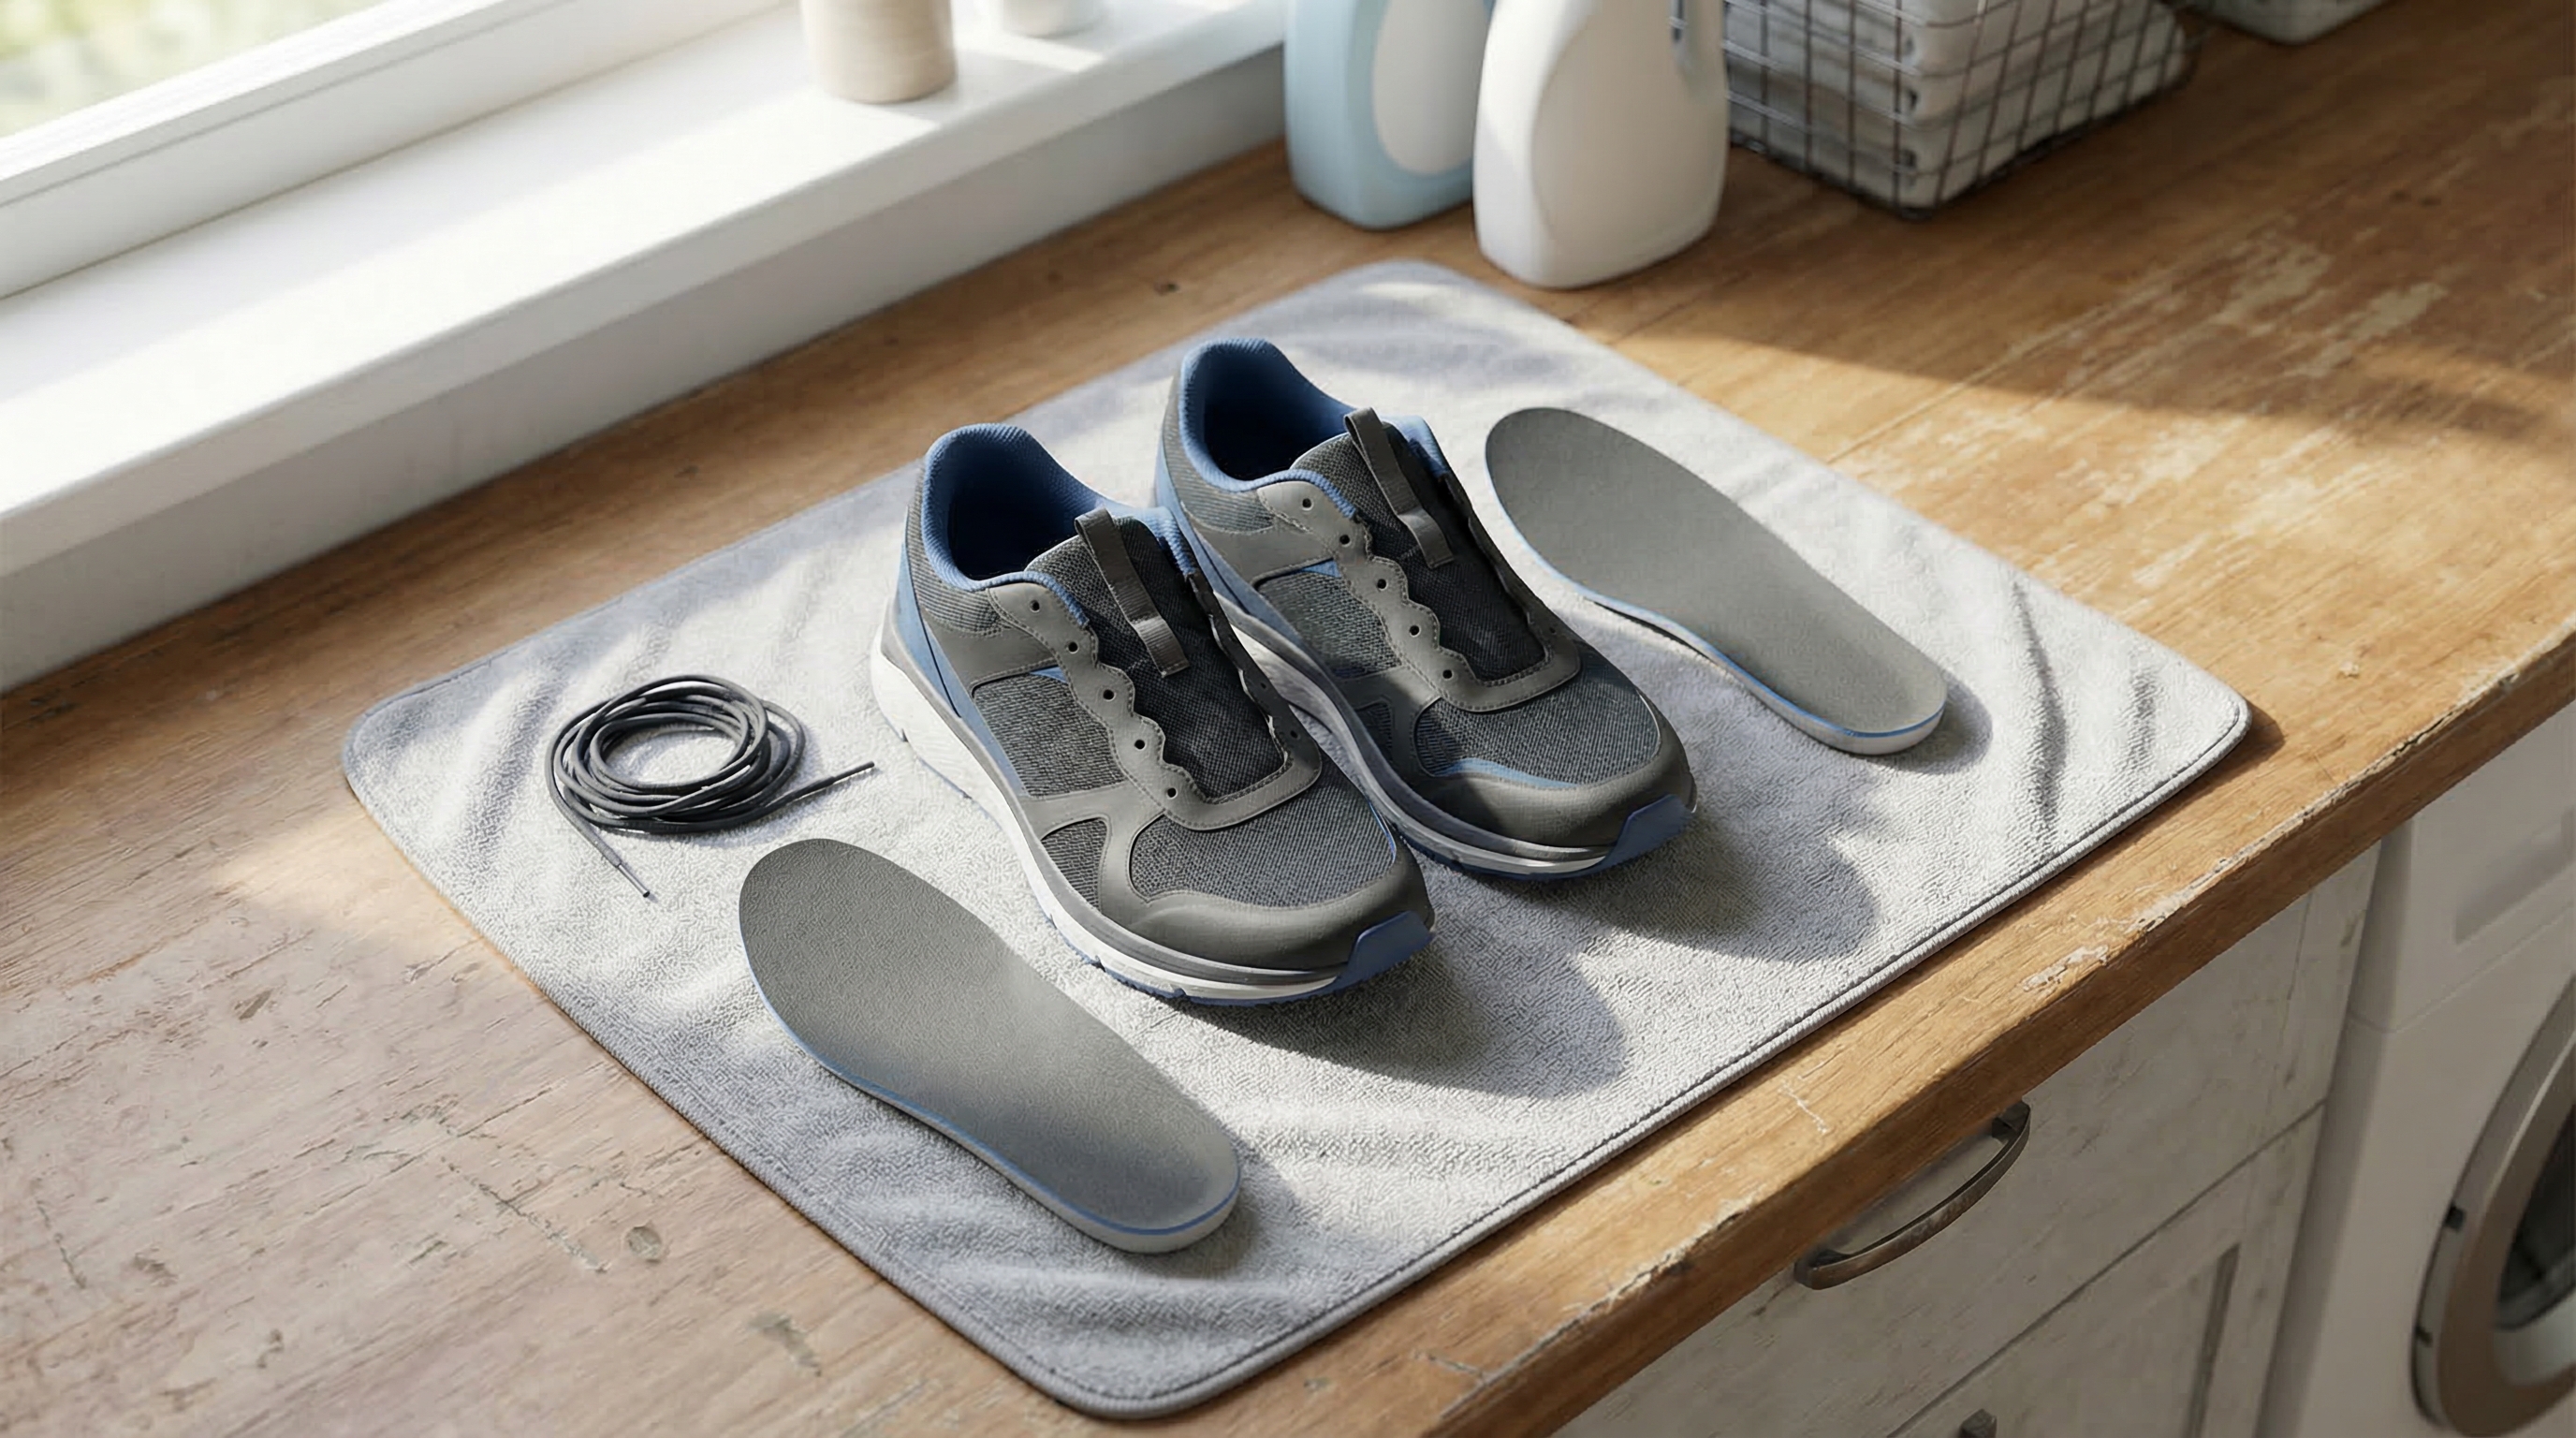
- Remove Components: Take out the insoles and laces to maximize internal airflow.
- Clean Surface Debris: Wipe away mud or grit to prevent stains from setting during the drying process.
- Absorb Internal Moisture: Stuff the shoes with crumpled unprinted packing paper or paper towels.
- Position for Airflow: Place the shoes near a fan or a dehumidifier, avoiding direct heat sources.
- Replace Stuffing: Change the damp paper every 2 to 3 hours to accelerate the process.
- Condition (If Necessary): Apply leather conditioner or suede protector once the shoes are completely dry.
Preparation: The Non-Negotiable First Steps
Before you even think about applying air or heat to your footwear, you must perform a proper “triage.” Most people make the mistake of leaving their shoes fully assembled while they dry, which traps moisture in the darkest corners of the toe box. This is where the mold begins. You must treat the shoe as a collection of individual parts. Start by removing the laces; this opens up the tongue and allows the upper to expand, facilitating better evaporation. Next, pull out the insoles. Insoles are typically made of foam or gel materials that act like sponges, holding onto water long after the rest of the shoe feels dry to the touch.
Cleaning Before Drying
If your shoes are caked in mud, do not let them dry in that state. As water evaporates, it can pull dirt particles deeper into the fabric or leather pores, resulting in permanent staining. Use a soft brush or a damp cloth to remove surface grime. For high-end customized shoe production, maintaining the cleanliness of the upper during the drying phase is essential for preserving the aesthetic finish.
| Material Type | Recommended Cleaning Tool | Action |
|---|---|---|
| Leather | Soft Microfiber Cloth | Wipe gently in circular motions |
| Suede | Crepe Brush | Lightly flick away surface grit |
| Canvas | Nylon Brush | Scrub with mild soap and water |
| Mesh | Soft Toothbrush | Remove debris from knit fibers |
Gravity Drainage
For shoes that are truly “sloshing” with water, give gravity a head start. Hold the shoes upside down and give them a gentle shake. You can also tilt them at a 45-degree angle against a wall, toe-down, for about ten minutes. This allows the bulk of the “free water” to escape before you begin the more technical evaporation methods.
How to Dry Shoes Fast Without Damaging Them?
The “holy grail” of shoe care is speed without sacrifice. But here is the kicker: heat is rarely the answer. While it seems logical that heat would dry things faster, it is actually the movement of air—convection—that does the heavy lifting in a safe manner. By focusing on airflow rather than temperature, you protect the delicate materials while still achieving a dry result in a fraction of the time it would take to simply let them sit in a closet.
The Newspaper Method (The Golden Standard)
This is perhaps the most reliable method used by athletes and outdoor enthusiasts worldwide. Crumpled newspaper (or preferably unprinted packing paper) provides a massive surface area for moisture to migrate into. The paper acts as a wick, drawing water out of the fabric or leather through capillary action.
- Selection: Use unprinted paper if possible. Newspaper ink can transfer to light-colored shoes, leaving permanent gray smudges.
- Crumpling: Crumple the paper into loose balls—do not pack them too tightly, as you want some air pockets to facilitate internal circulation.
- Stuffing: Stuff the shoes from the toe to the heel until they hold their original shape.
- External Wrap: Wrap a layer of paper around the outside of the shoe and secure it with a rubber band to draw moisture from the exterior.
- The Secret Sauce: Replace the paper as soon as it feels damp. In the first hour of a heavy soak, you might need to change it twice.
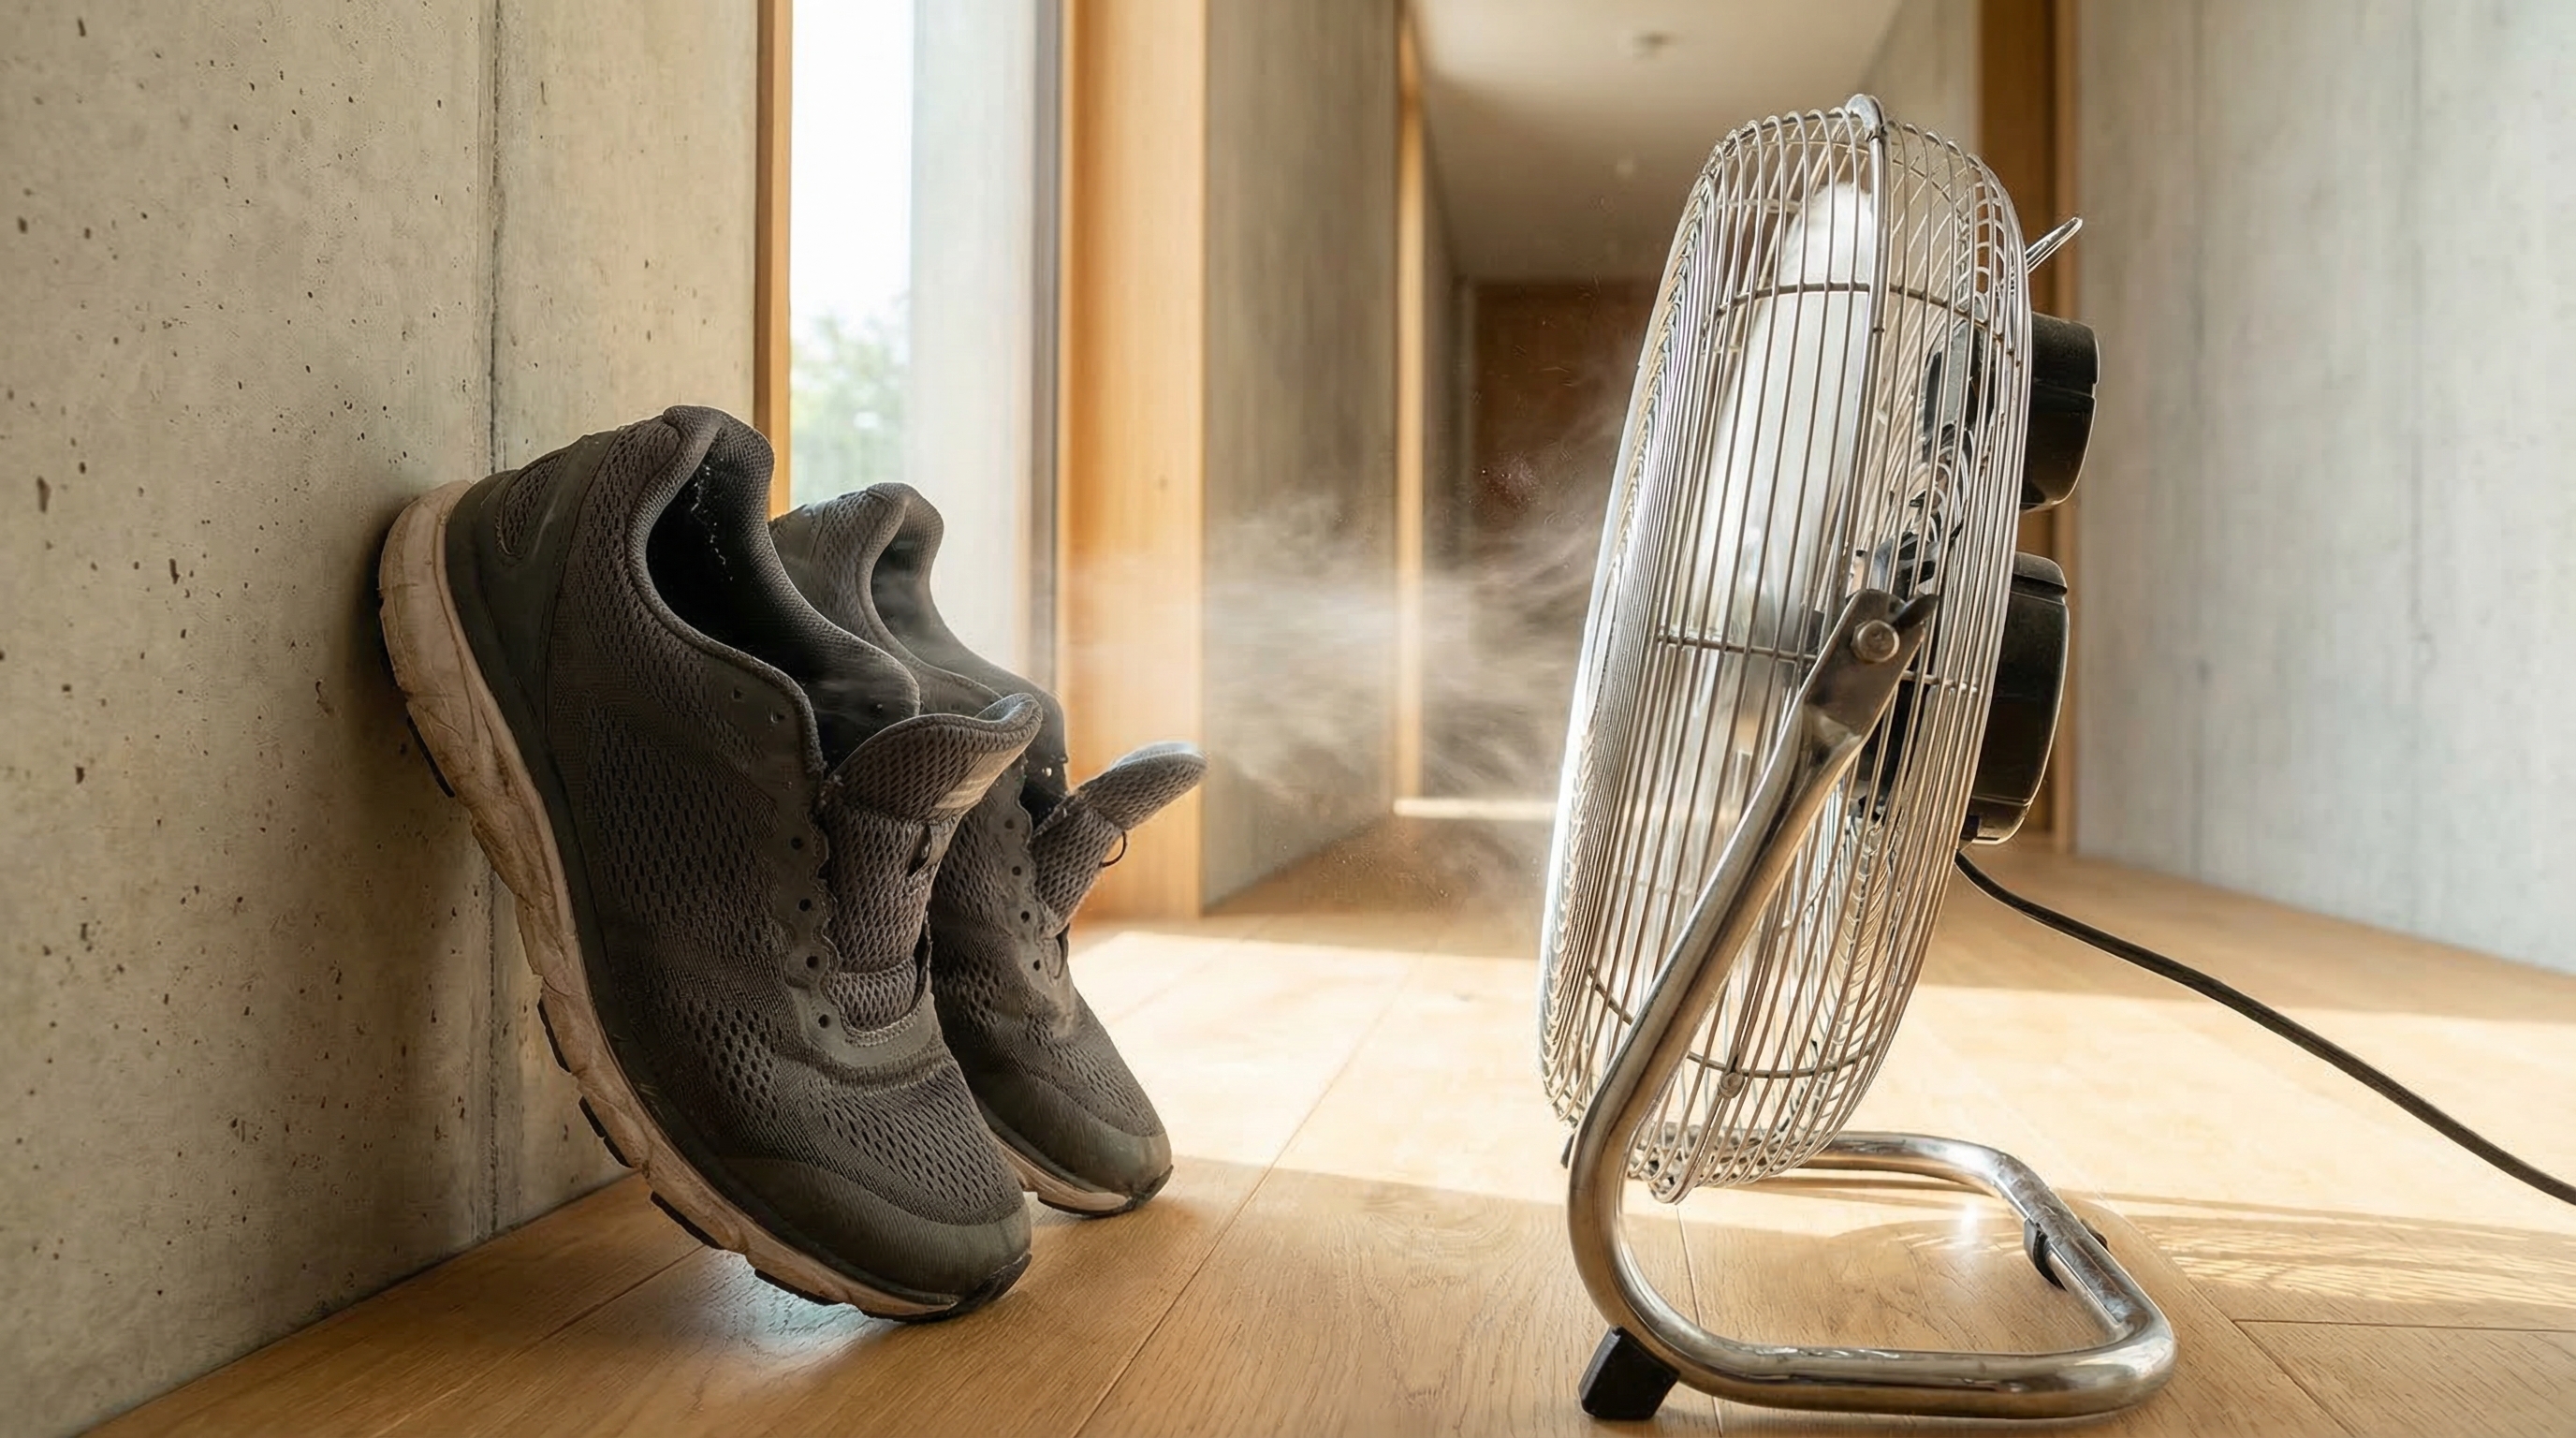
The Fan and Hanger Technique
If you need your shoes ready by the morning, the fan method is your best friend. This utilizes the Bernoulli principle: moving air creates lower pressure, which encourages water molecules to transition from a liquid state to a gas state more quickly.
- Setup: Create a “drying rack” using a common wire coat hanger.
- Bending: Cut the hanger and bend it into two “S” hooks.
- Hooking: Hook one end onto the grill of a floor fan and the other end into the heels of your shoes.
- Airflow: When you turn the fan on high, the air is forced directly into the shoe’s interior.
This constant displacement of humid air with dry air can dry a pair of running shoes in under four hours without any risk of heat damage.
Manufacturer Pro Tip: The Glue Reactivation Danger Zone
In professional footwear manufacturing, we use Thermoplastic Adhesives (TPA) to bond soles. These glues are designed to “reactivate” or soften at temperatures as low as 45°C to 60°C (113°F to 140°F). If you use a high-heat hair dryer or place shoes on a hot radiator, you risk the sole delaminating or the “lasting” (the shape of the shoe) shifting. Always keep drying temperatures below 35°C (95°F).
Can You Put Shoes in the Dryer? Safety First
It is a tempting shortcut, but putting shoes in a tumble dryer is often a gamble that ends in heartbreak. Beyond the rhythmic “thump-thump” that can damage your dryer’s drum and belt, the internal temperature of a standard dryer can easily exceed the safety threshold for most modern footwear. However, if you are in a desperate situation, there is a “least-harm” way to go about it.
The Door-Hanging Trick
If your dryer has a “low heat” or “air fluff” setting, you can use it—but never let the shoes tumble.
- Tie the laces of your shoes together in a large knot.
- Open the dryer door and hang the shoes over the top edge so that the shoes are inside but the laces are caught on the outside.
- Close the door firmly. This keeps the shoes stationary against the glass, preventing the mechanical impact that destroys midsoles and disrupts the dryer’s balance.
Why You Should Avoid the Heat
Most sneakers today rely on Ethylene Vinyl Acetate (EVA) for cushioning. EVA is a foam filled with tiny air bubbles. Excessive heat causes these bubbles to collapse, leading to a “dead” feel in the midsole. Once EVA has been heat-shrunk, it can never be restored. If you are wearing shoes from a leading shoe manufacturer, they likely contain complex multi-density foams that are particularly sensitive to these temperature spikes.
Material-Specific Drying: From Leather to Mesh
Not all shoes are created equal. The way you treat a canvas sneaker should be fundamentally different from how you treat a bespoke leather Oxford. Understanding the molecular makeup of your footwear is the key to longevity.
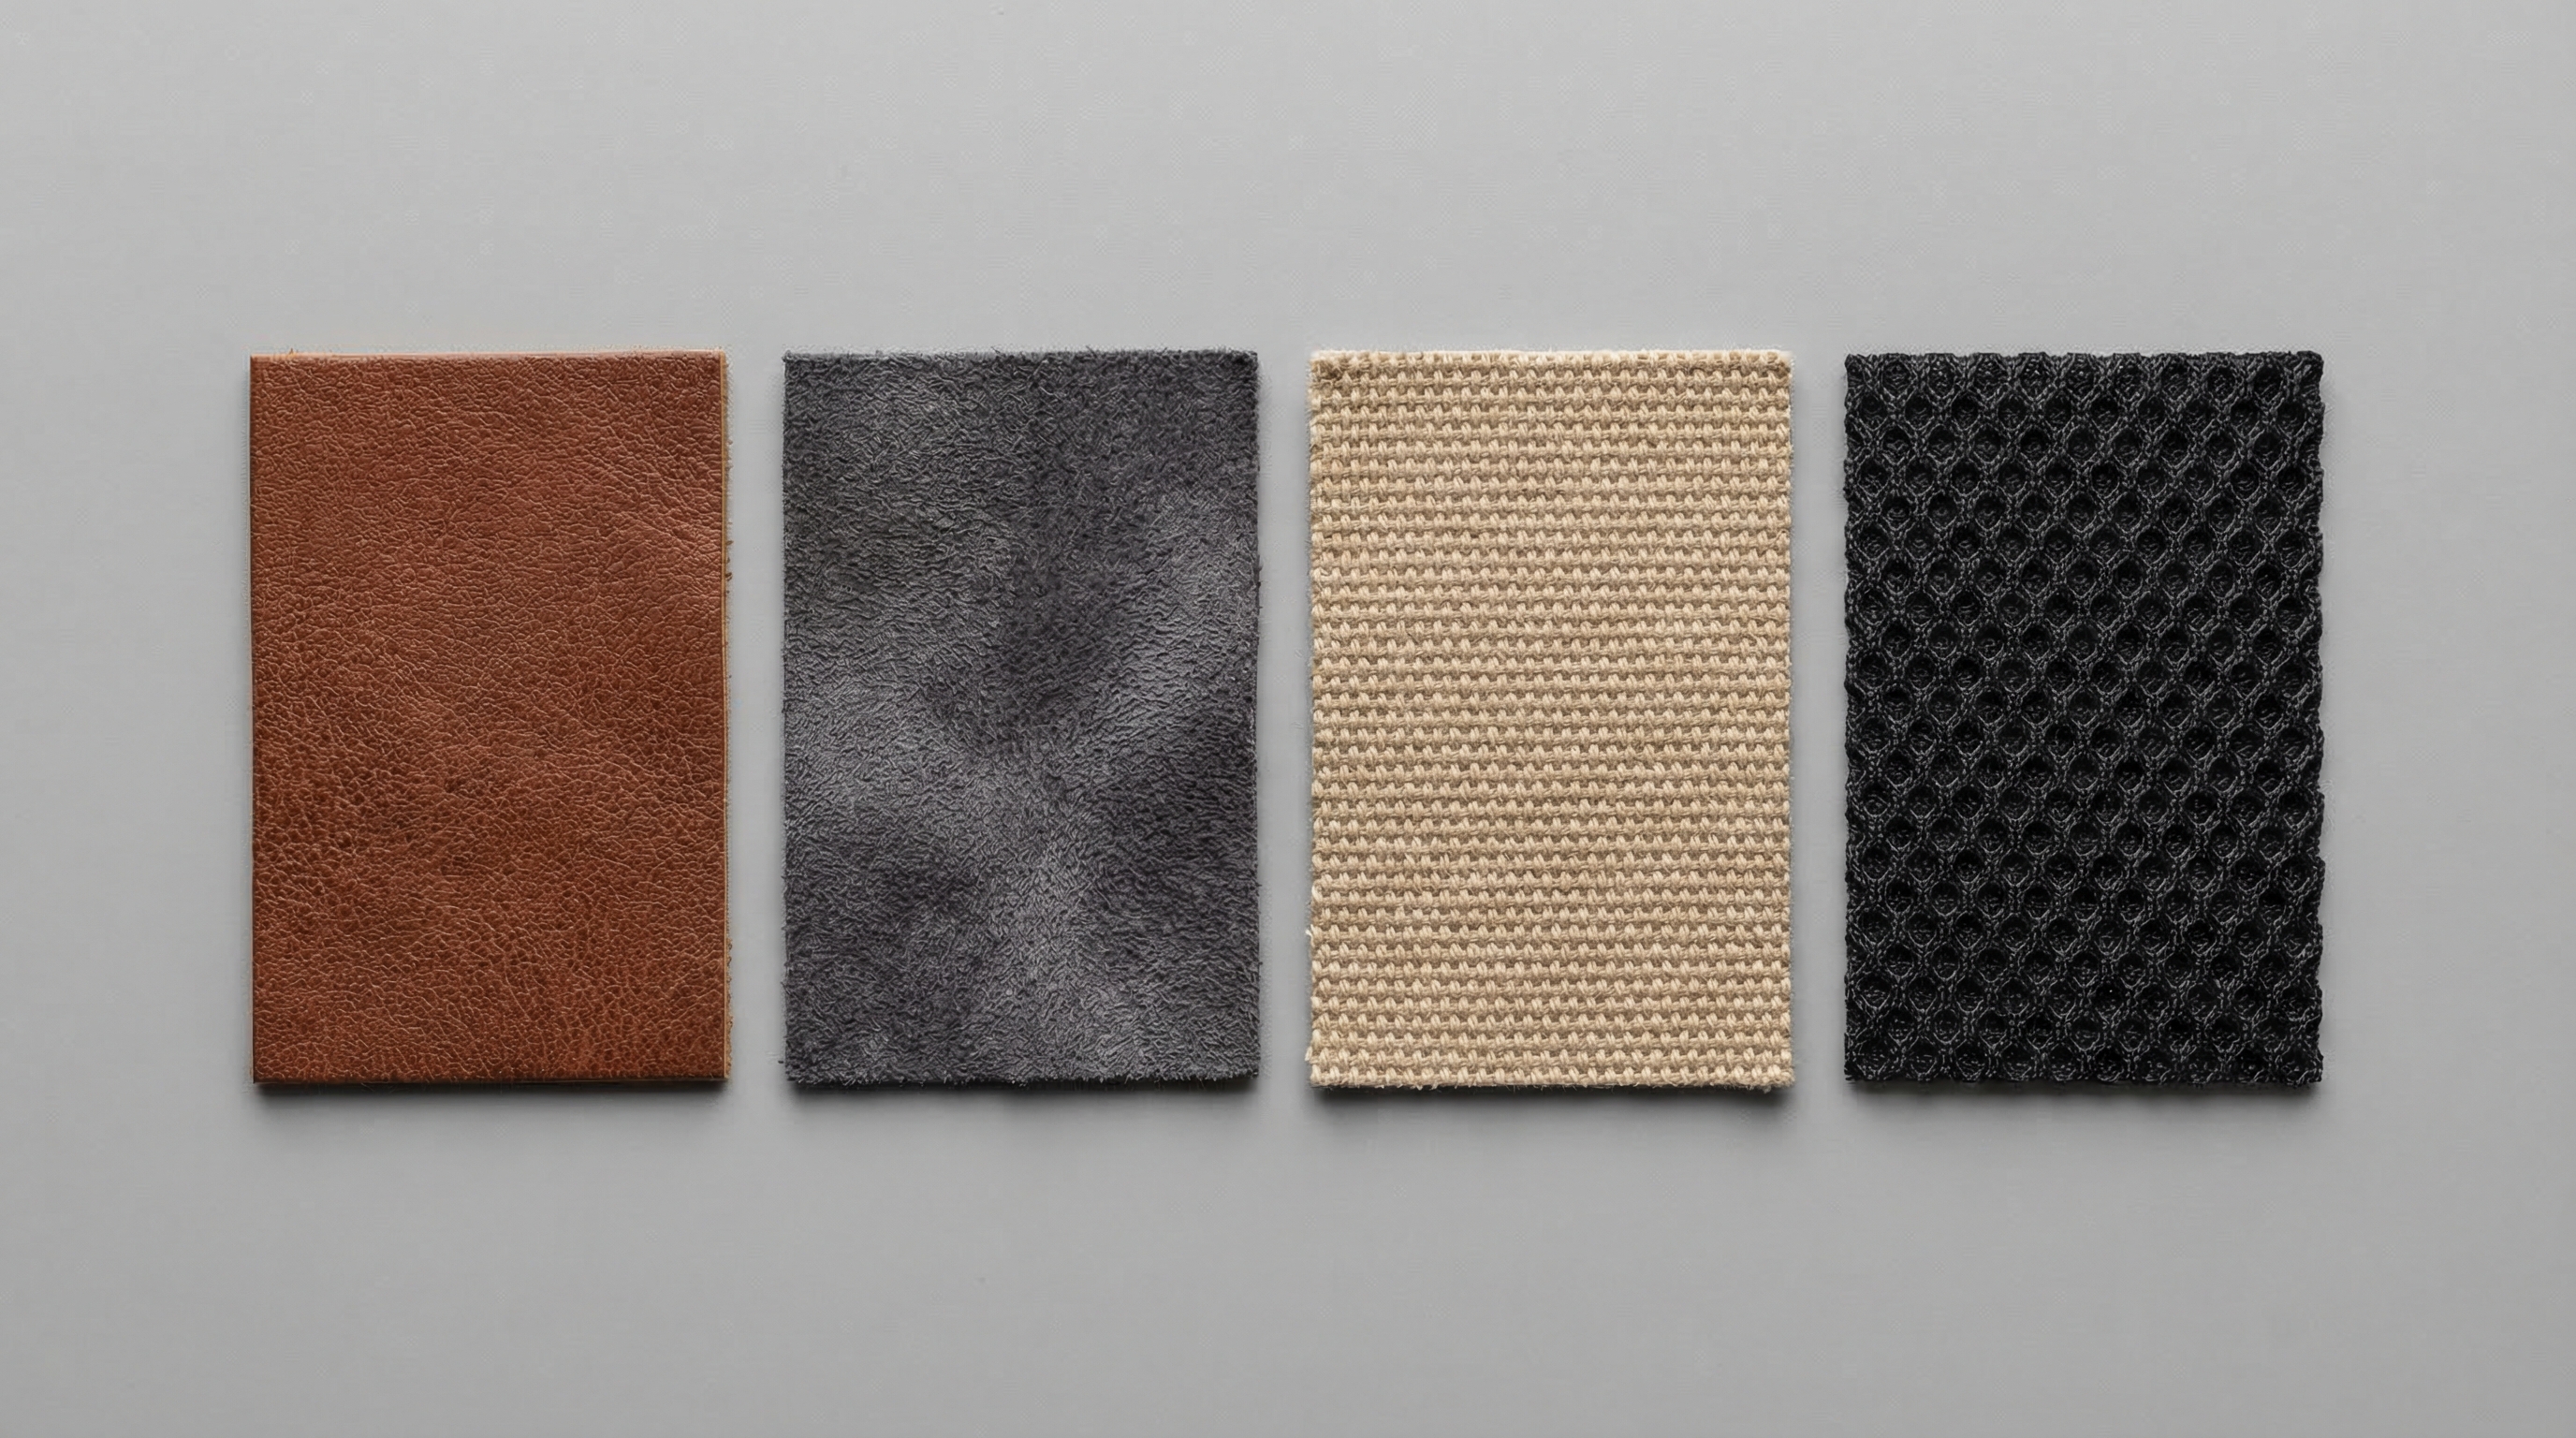
Leather Shoes: The Cedar Tree Method
Leather is a skin, and just like your skin, it can become brittle when it loses its natural oils. When leather gets wet, the water molecules bind with the oils. As the water evaporates, it takes the oils with it. To prevent cracking, never use heat. Instead, use unfinished cedar shoe trees. Cedar is naturally desiccant; it absorbs moisture while helping the shoe retain its original shape.
Suede and Nubuck: The Delicate Touch
Suede is notoriously hydrophobic and prone to water spotting. If your suede shoes are soaked, do not brush them while they are wet. Stuff them with paper to maintain their shape and let them dry naturally. Once—and only once—they are completely dry, use a suede brush to “lift” the nap and restore the texture.
Canvas and Sneakers: Managing the “Yellowing” Effect
White canvas shoes often develop mysterious yellow stains after drying. This is caused by “wicking,” where impurities in the fabric are pulled to the surface as the water evaporates. To prevent this, cover the exterior of the wet canvas shoes with white paper towels (the “mummy method”). The impurities will wick into the paper towel instead of staying on the canvas surface.
Performance Mesh: Airflow is King
Running shoes made of mesh are designed to be breathable, which fortunately means they dry quickly. The main risk here is the breakdown of the synthetic overlays. Avoid the sun, as UV rays can degrade the polymers and cause colors to fade. A simple fan is all you need for mesh.
Manufacturer Pro Tip: Leather Fiber Tension
When leather is saturated, the collagen fibers expand and become highly pliable. If dried too quickly or without internal support (like a shoe tree), the fibers “lock” into a shrunken, distorted state. This creates the “stiff” feeling in dried boots. To avoid this, we recommend a “slow-dry” approach in a humidity-controlled environment to allow fibers to settle gradually.
Using Modern Appliances: Boot Dryers and Dehumidifiers
If you live in a perpetually wet climate or are an avid hiker, investing in a dedicated boot dryer is a wise move. These devices are engineered to provide a low-level, consistent flow of warm air (not hot air) that rises through the shoe.
How Boot Dryers Work
Most quality boot dryers use thermal convection. They have no moving parts and consume very little electricity. You simply slide your shoes onto the tubes, and the device gently warms the air inside. Because the temperature is strictly regulated, it is safe for almost all materials, including Gore-Tex membranes.
Dehumidifiers: The Unsung Heroes
If you don’t want to buy a specific gadget, place your wet shoes in a small room (like a bathroom) with a dehumidifier. Set the dehumidifier to its highest setting. By stripping the moisture out of the air, the dehumidifier creates a “moisture vacuum,” forcing the water in your shoes to evaporate at an accelerated rate without the need for any heat at all.
The Science of Odor Prevention During the Drying Process
Why do shoes smell after they get wet? It’s not the water; it’s the bacteria. Specifically, Brevibacterium and Staphylococcus thrive in warm, damp environments. They consume sweat and dead skin cells, releasing thioesters as a byproduct—that classic “cheesy” foot smell.
Neutralizing Bacteria
To stop the smell before it starts, you can lightly mist the interior of the shoe with a 50/50 mixture of water and white vinegar or a high-percentage isopropyl alcohol. This alters the pH levels and kills the bacteria. Do this while the shoe is still damp but after you have removed the excess water.
Natural Deodorizers
Once the shoe is nearly dry, you can insert a small sachet of baking soda or activated charcoal. These materials are excellent at absorbing volatile organic compounds (VOCs) that cause odors. This is a common practice in high-end customized shoe production facilities to ensure that finished products remain fresh during transit.
Post-Drying Restoration: Bringing Your Shoes Back to Life
So, your shoes are finally dry. You’re done, right? Not quite. The drying process is physically taxing on footwear materials. Think of it like a spa treatment: the drying was the sauna, and now you need the moisturizer.
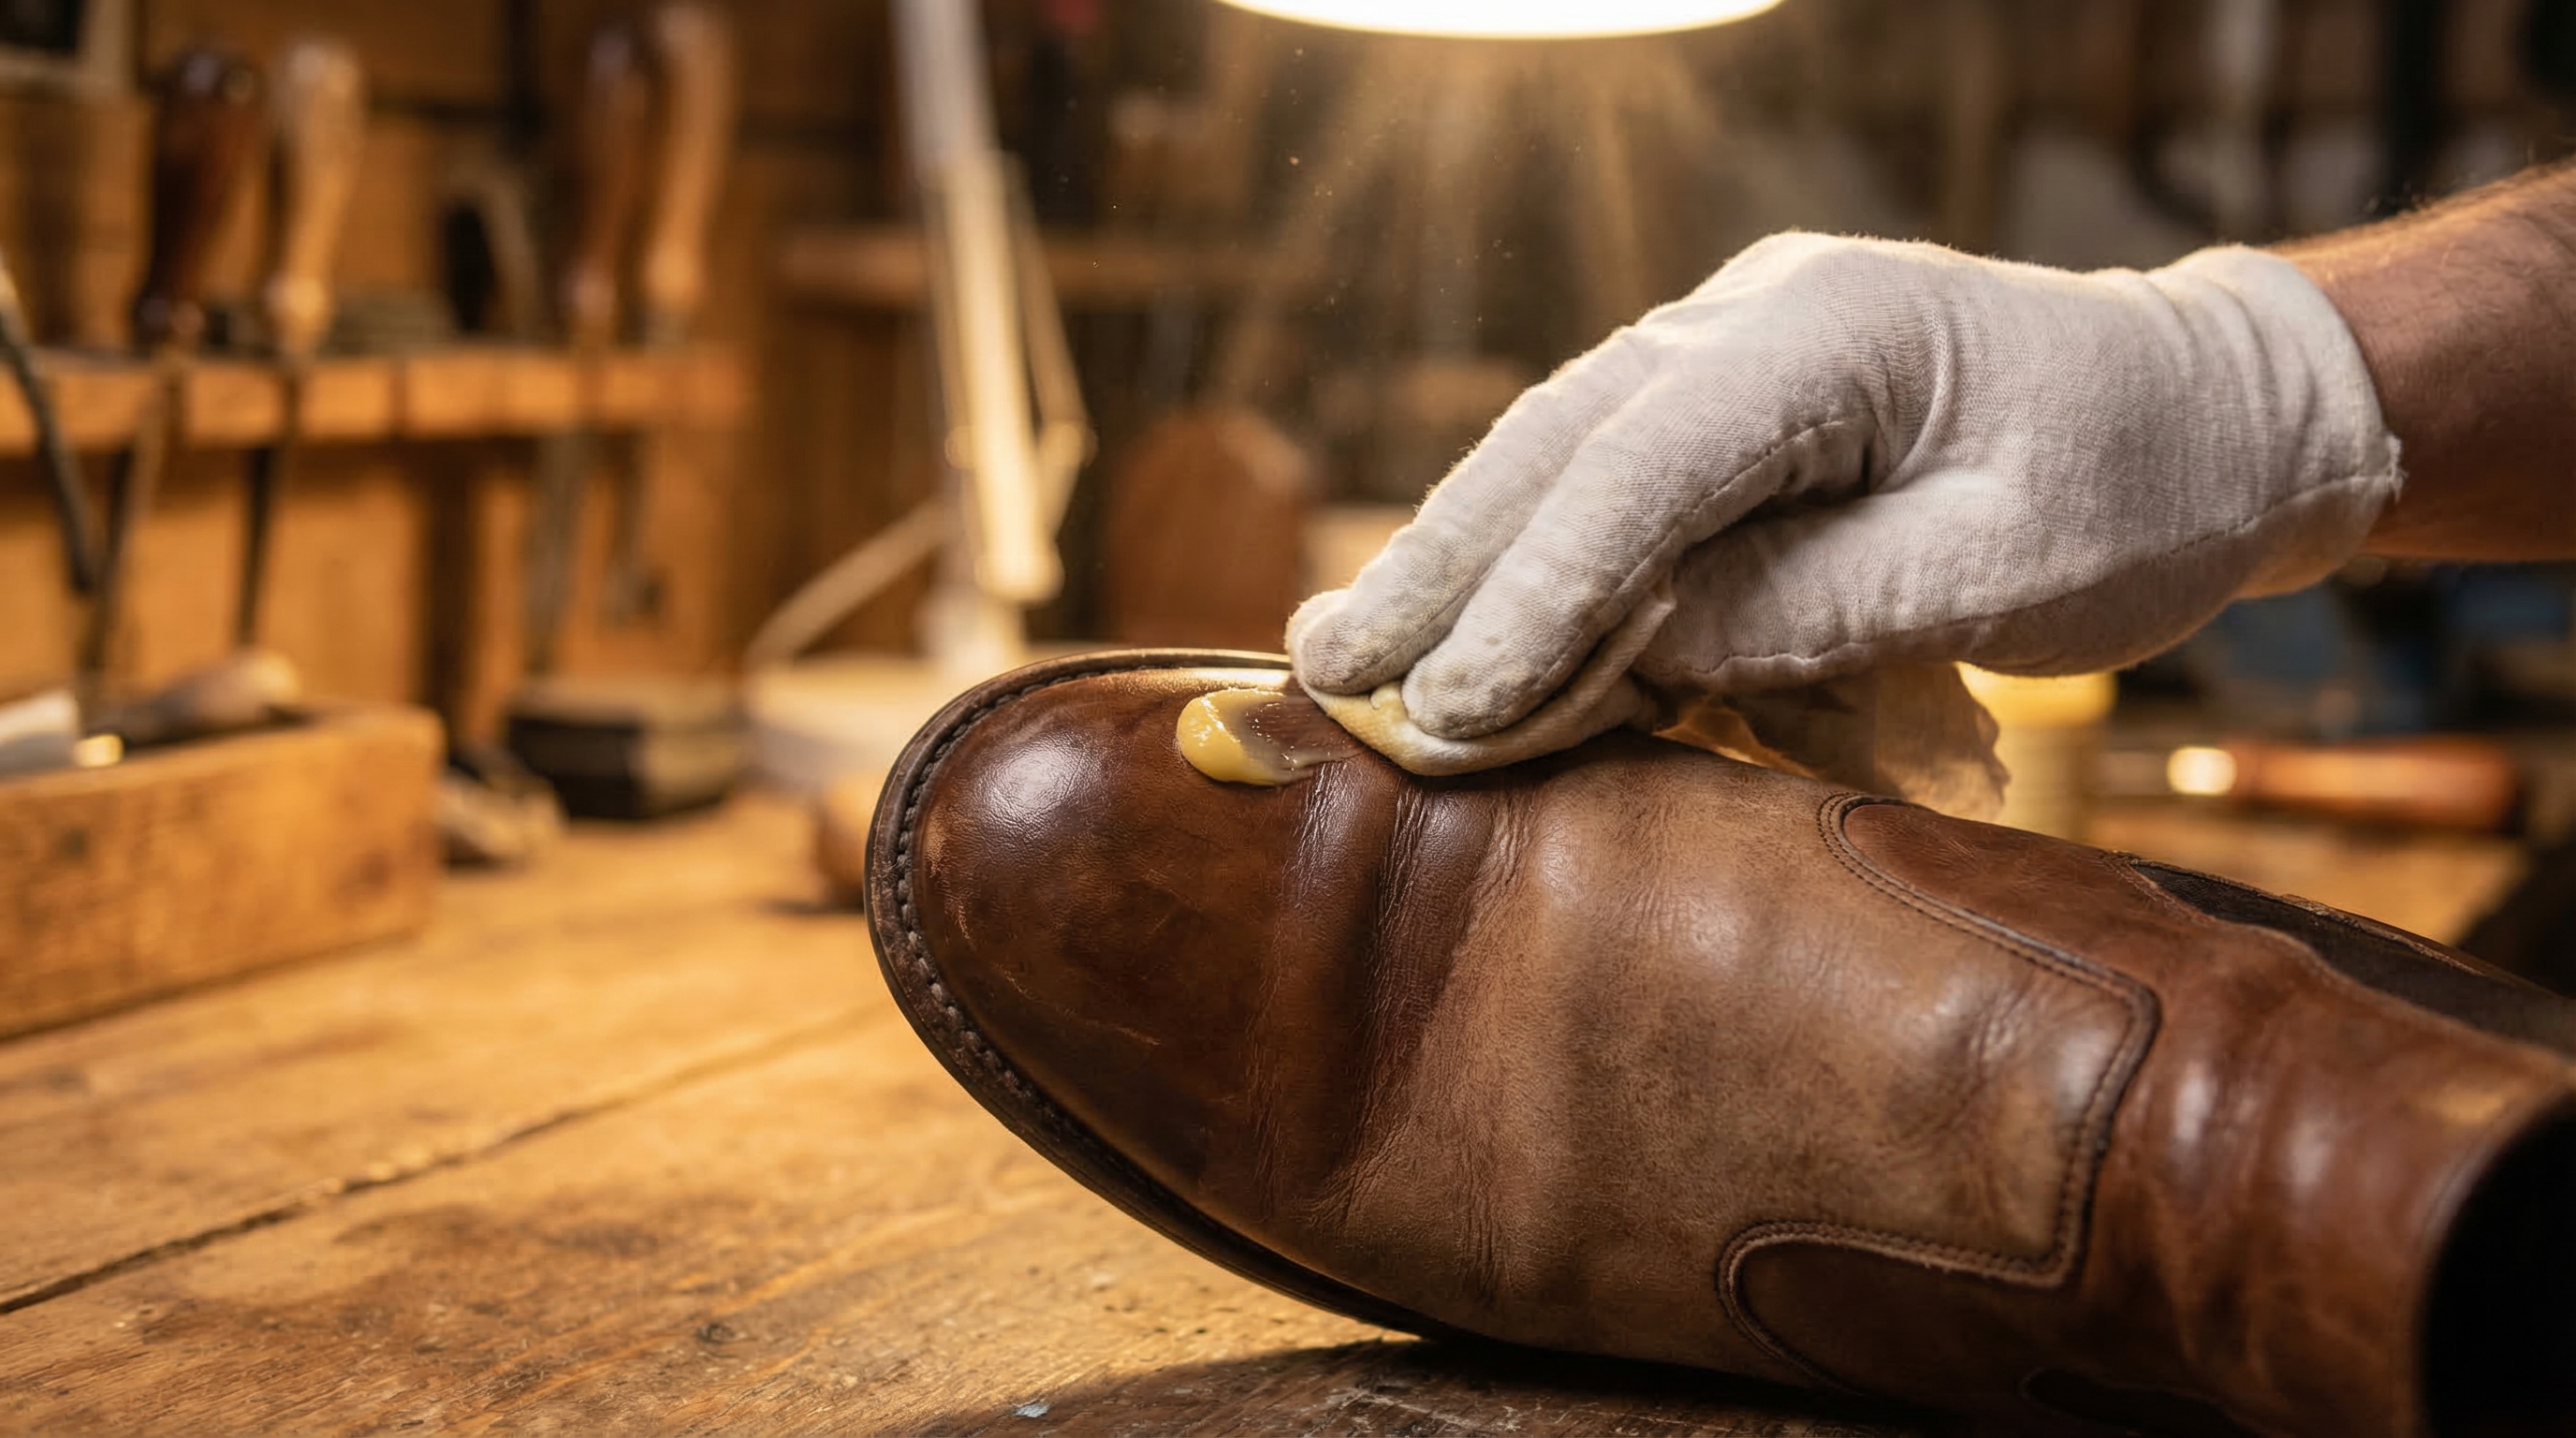
Reconditioning Leather
After a leather shoe has dried, it will likely feel stiff. This is the time to apply a high-quality leather conditioner or cream. The conditioner penetrates the pores and restores the flexibility of the fibers. Apply the conditioner in small, circular motions, let it sit for 15 minutes, and then buff it off with a clean cloth.
Restoring Water Repellency
If your shoes have a Durable Water Repellent (DWR) coating—common on hiking boots and some sneakers—the soaking and drying process may have stripped it away. You can test this by dropping a bit of water on the surface. If it doesn’t bead up, it’s time to re-apply a waterproof spray. This creates a hydrophobic barrier that will make the next drying session much easier.
Manufacturer Pro Tip: EVA Memory and Compression
In the world of athletic footwear, the “rebound” of the midsole is everything. If you wear shoes that are still slightly damp (at a 10-15% moisture level), the EVA foam is more susceptible to permanent compression set. Always ensure your shoes are 100% dry before your next run to maintain the structural integrity of the cushioning.
### Can I use a hair dryer to dry my shoes quickly?
While it is possible to use a hair dryer, it is generally not recommended. If you must use one, keep it on the “cool” setting and hold it at least 6 inches away from the shoe. Never use the high-heat setting, as this can melt the adhesives holding the sole together or cause leather to crack and warp. Constant movement of the dryer is also essential to prevent “hot spots.”
### How long does it usually take for shoes to air dry?
In a standard indoor environment, shoes typically take 24 to 48 hours to air dry completely. However, using the “newspaper and fan” method can reduce this time to 6 to 12 hours. The exact duration depends on the material; mesh sneakers dry much faster than heavy work boots or thick leather dress shoes.
### Is it okay to dry shoes in direct sunlight?
No, you should avoid drying shoes in direct sunlight whenever possible. UV rays act as a catalyst for chemical degradation in both natural and synthetic materials. Sunlight can cause bright colors to fade, white soles to turn yellow, and leather to lose its natural moisture too rapidly, leading to irreparable cracking.
### Why did my shoes turn stiff after they dried?
Stiffness is usually caused by the rapid loss of oils or the “locking” of fibers in leather and canvas. When water evaporates, it leaves behind minerals and pulls out natural lubricants. To fix this, you can manually “flex” the shoe to break the fiber tension and apply a conditioner or fabric softener solution to restore the material’s original suppleness.
### Can I put wet shoes in the microwave to dry them?
Absolutely not. This is extremely dangerous. Most shoes contain metal eyelets, shanks, or internal reinforcements that will spark and catch fire in a microwave. Furthermore, the microwave heats the water molecules so rapidly that it can literally boil the materials from the inside out, destroying the shoe in seconds and potentially ruining your appliance.
Drying your shoes correctly is an essential skill for anyone who wants to protect their footwear and maintain good foot health. By prioritizing airflow over heat and respecting the specific needs of different materials, you ensure that your shoes stay in the rotation for years to come.
For more professional guidance on maintaining your footwear or to explore options for your own brand, feel free to contact our experts.