
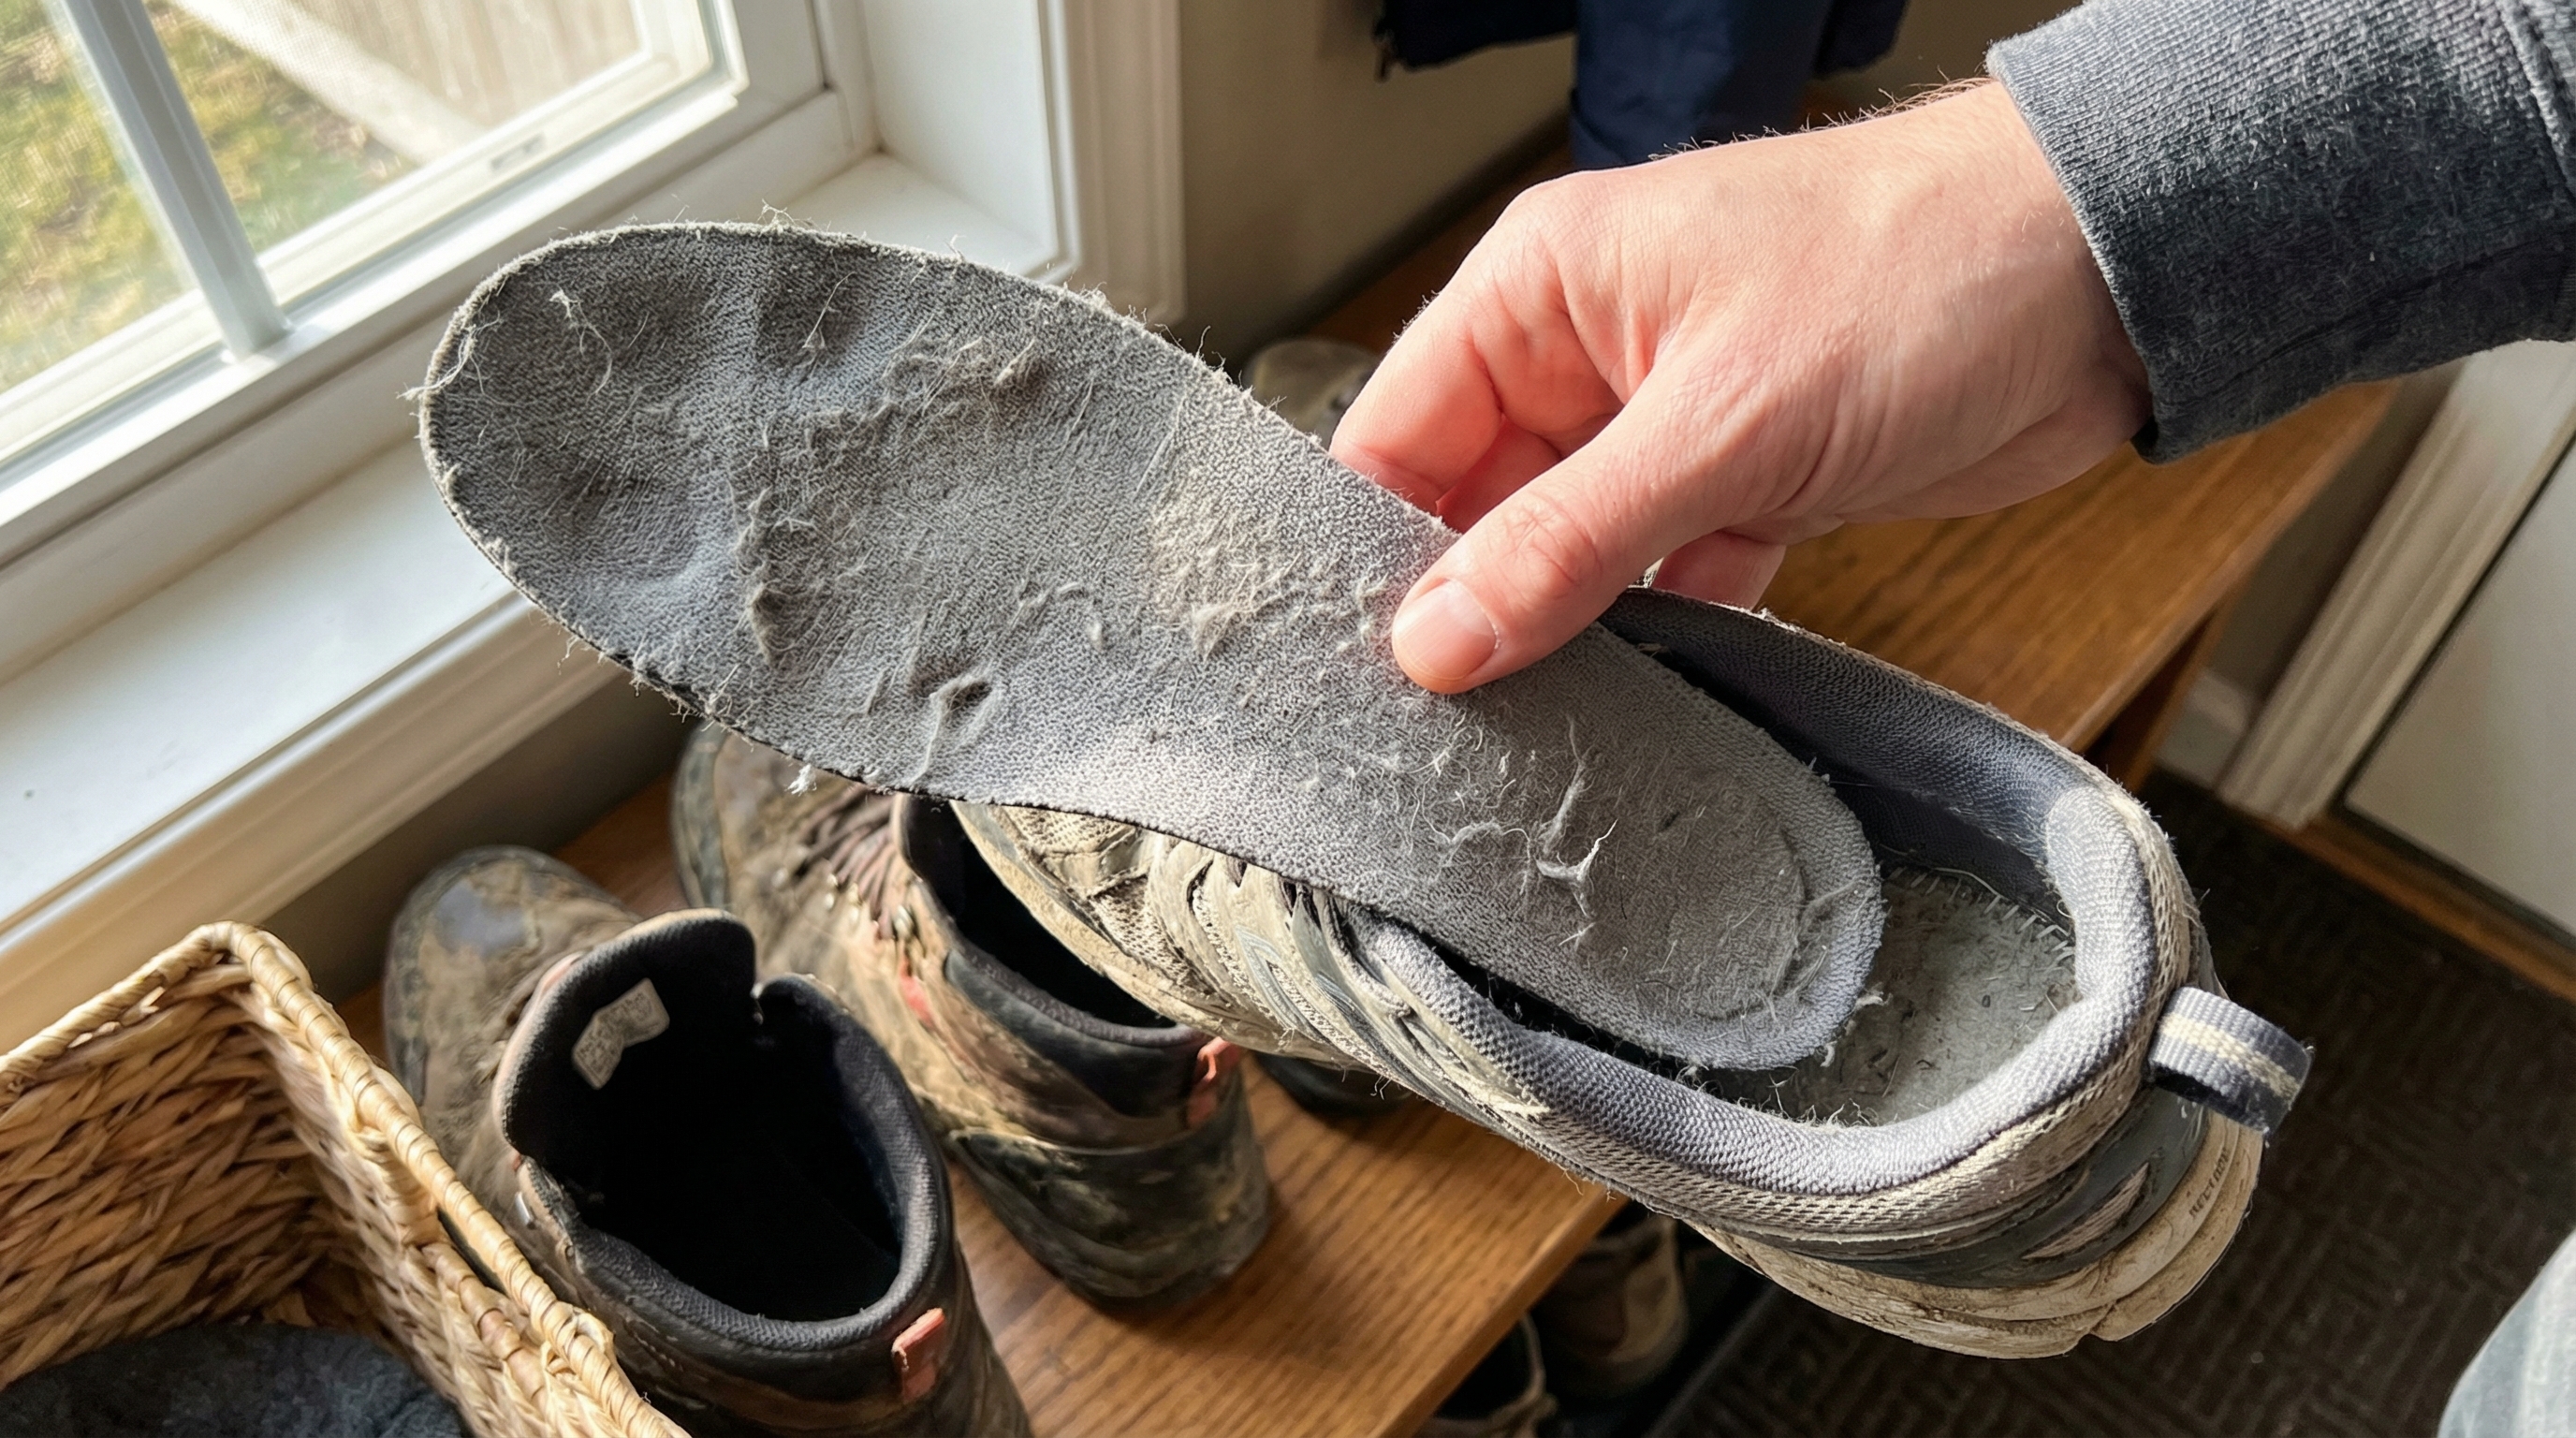
The persistence of a foul odor coming from your favorite pair of sneakers is more than just a social inconvenience; it is a sign of biological accumulation. You might find that even after washing the exterior of your shoes, the interior remains a damp, unpleasant environment that irritates your skin. This agitation is caused by the approximately 250,000 sweat glands in your feet, which produce up to half a pint of moisture daily. While high-quality footwear is often designed with breathability in mind, the insole remains the primary reservoir for this moisture and shed skin cells.
The problem is that most people neglect the one component that actually touches their body for eight hours a day. Over time, the accumulation of sweat, salt, and heat transforms your insoles into a breeding ground for Brevibacterium and various fungal spores. If left untreated, these microorganisms don’t just smell; they degrade the structural integrity of the cushioning and can lead to persistent skin infections like Athlete’s Foot. To resolve this, you must implement a rigorous cleaning protocol that targets the root cause of the bacteria without destroying the structural integrity of the shoe.
Cleaning shoe insoles involves removing the footbed, identifying its material composition, and applying a targeted cleaning agent like mild soap or distilled vinegar. By scrubbing the surface gently with a soft-bristled brush and allowing for a full 24-hour air-dry period, you can effectively neutralize odors and kill fungal spores. This process not only refreshes the scent but also extends the life of the cushioning material significantly.
Quick Steps: The 5-Minute Refresh
If you are short on time but need to sanitize your footwear immediately, follow this rapid-response protocol:
- Remove: Pull the insoles out of the shoes to allow for full airflow.
- Brush: Use a dry, soft brush to flick away loose dirt and skin cells.
- Wipe: Apply a 1:1 mix of water and white vinegar to a cloth and wipe the surface.
- Air Dry: Place them in a ventilated spot, avoiding direct sunlight or heaters.
- Reinsert: Only put them back once they feel bone-dry to the touch.
Why Shoe Insoles Need Regular Cleaning (and What’s Living on Them)
Your insoles are a literal breeding ground for microscopic organisms that thrive in the dark, humid environment of a closed shoe. As we mentioned, the organic matter from your skin provides the perfect “fuel” for bacteria and fungi. But here is the kicker: the smell isn’t actually caused by your sweat itself, which is mostly odorless water and salt. The “cheesy” or “sour” aroma is the byproduct of microbes breaking down the amino acids found in your perspiration.
When these bacteria multiply unchecked, they create a biofilm on the surface of the insole that is nearly impossible to remove with a simple wet wipe. Beyond the biological concerns, the chemical makeup of sweat can physically damage the components of your shoes. Salts and minerals from your body crystallize as the moisture evaporates, which can eventually act like sandpaper against the delicate foam. This process leads to the premature breakdown of the cushioning layers, making the shoes feel hard and unsupportive. Understanding this lifecycle is essential for anyone invested in the longevity of their private label shoes or luxury collections.
Professional Assessment: Determining Your Insole Material
Before you reach for the scrubbing brush, you must identify exactly what your insoles are made of to avoid irreversible damage. Different materials react uniquely to moisture, heat, and chemical cleaners, meaning a “one size fits all” approach often leads to disaster. Most modern footwear uses a combination of synthetic polymers, but high-end or specialized shoes may use organic materials. Taking sixty seconds to assess the texture and flexibility of the footbed will save you from a costly replacement.
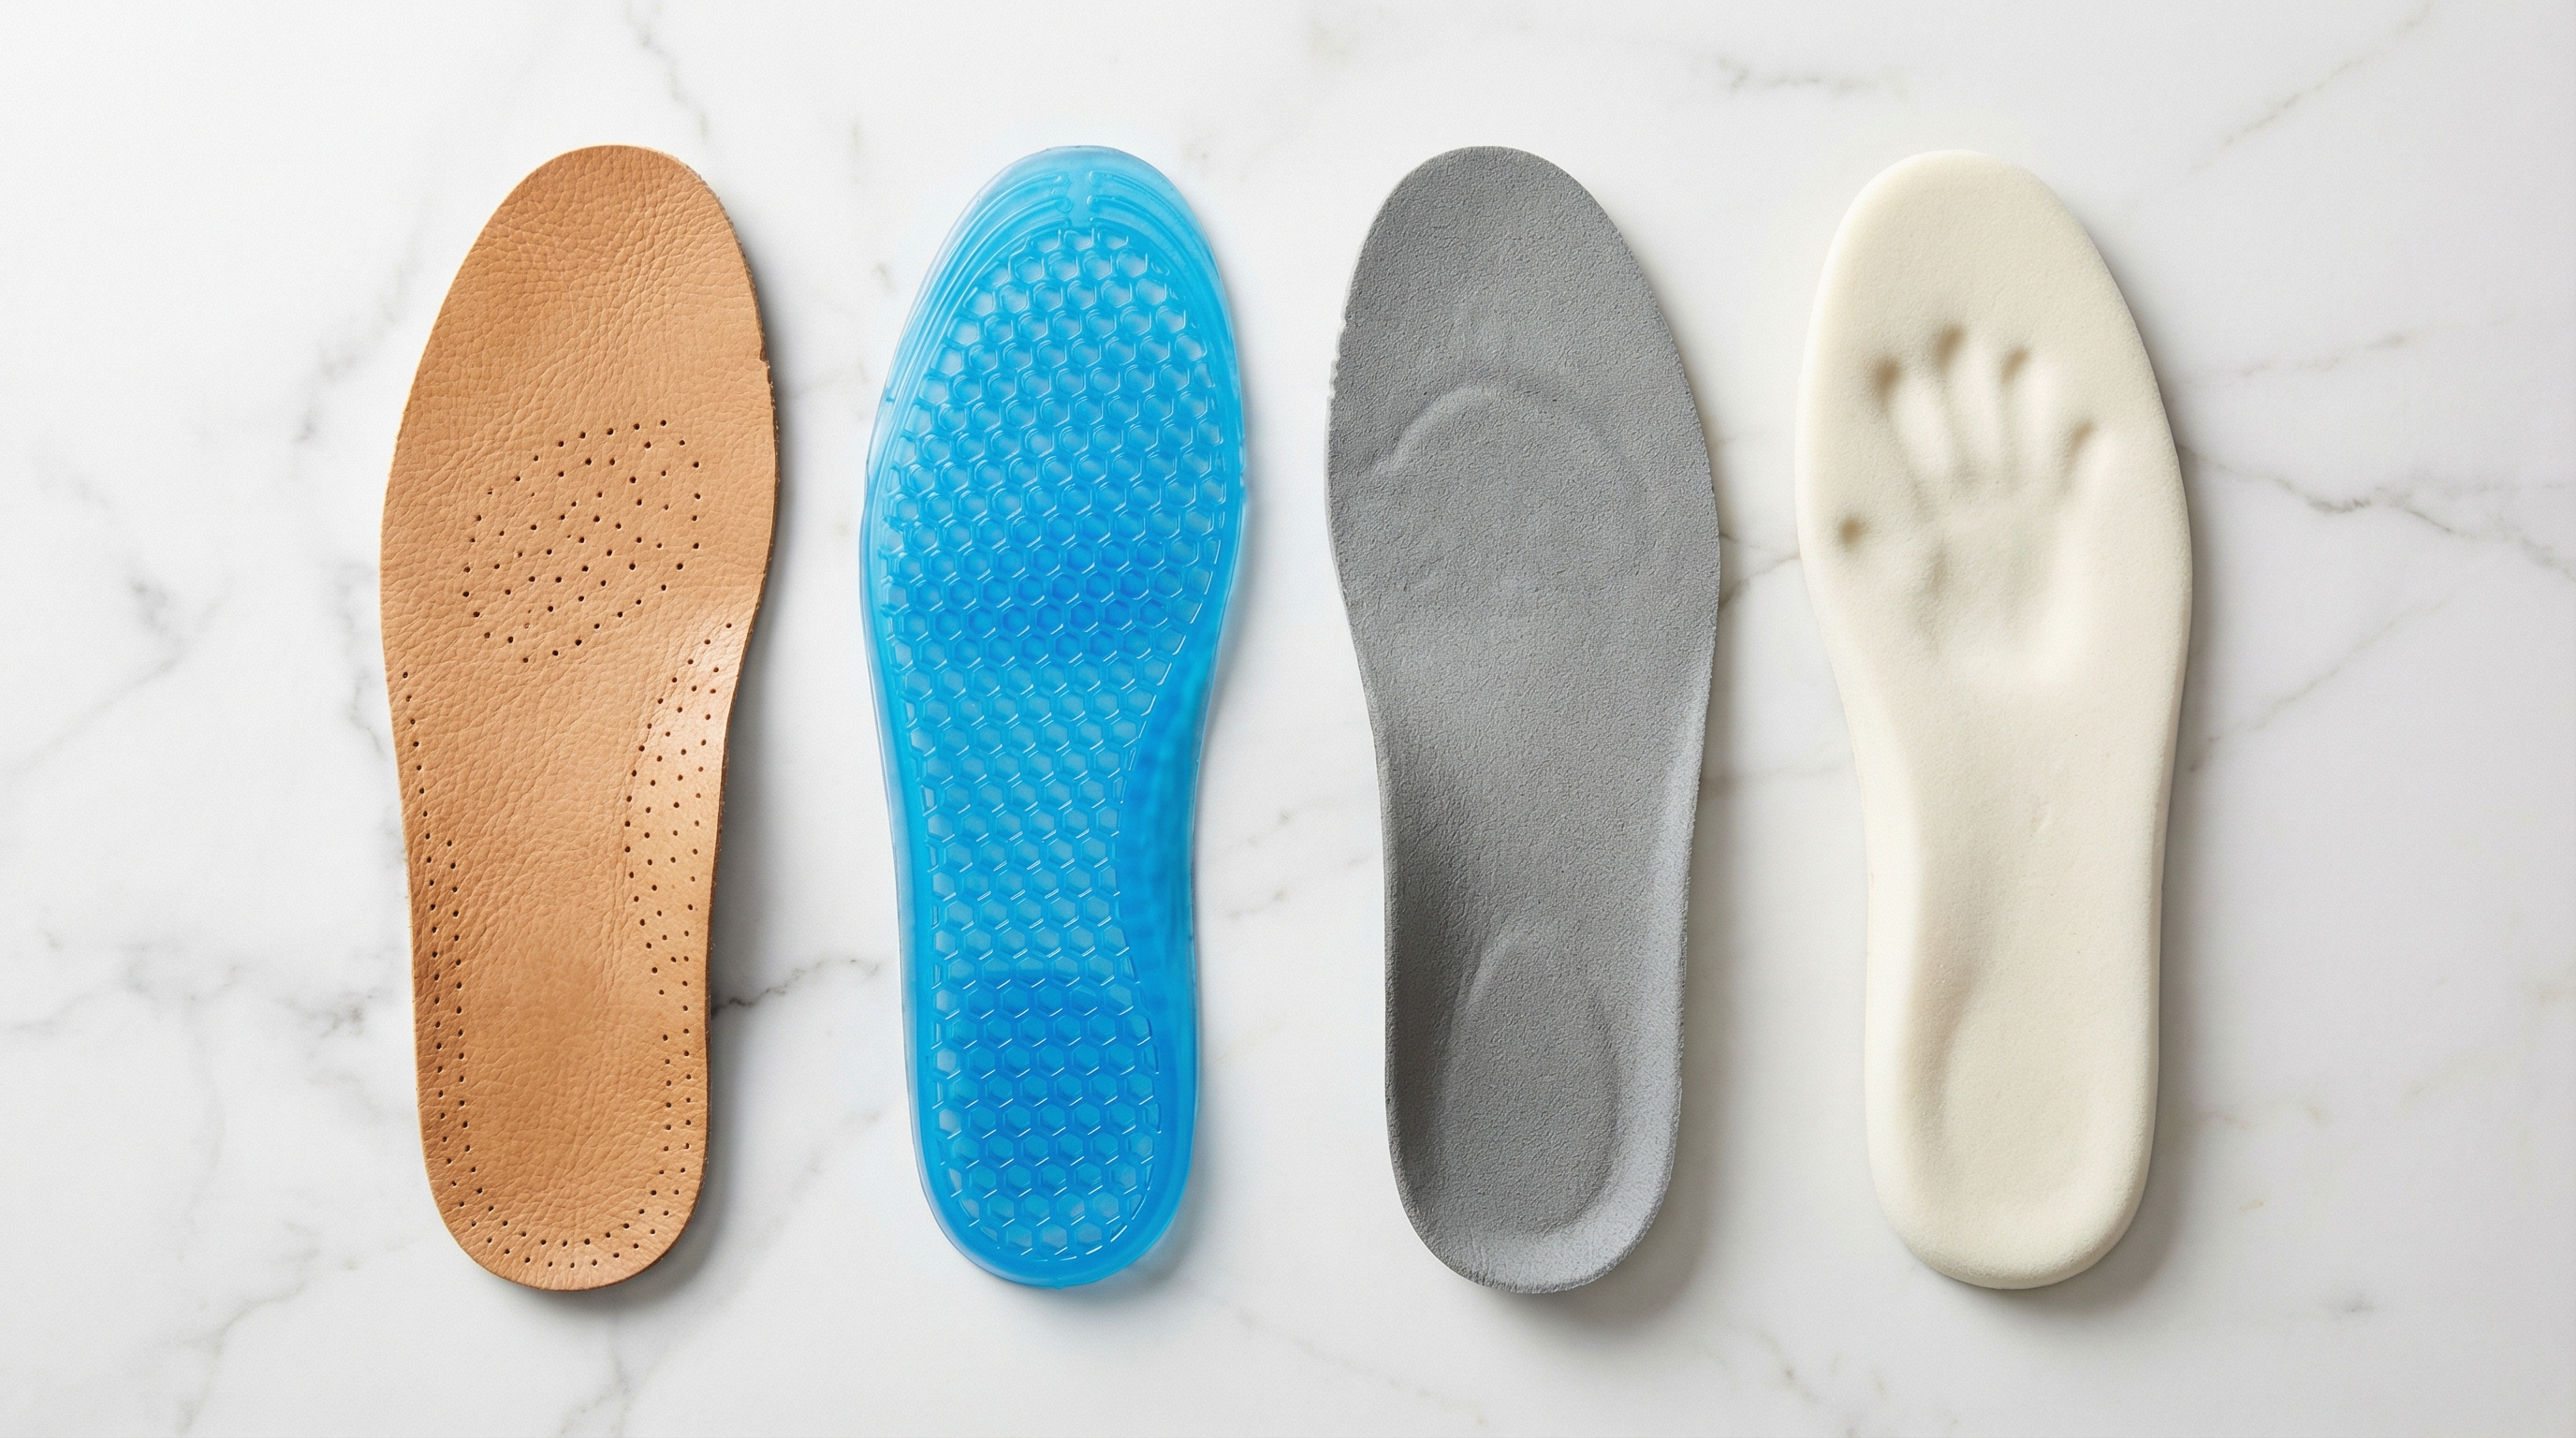
What’s the real story with material diversity? It boils down to how the manufacturer balances comfort with durability. Synthetic foams like EVA (Ethylene-vinyl acetate) are common in athletic shoes because they are highly durable but porous. Memory foam, however, is much more sensitive to saturation and requires minimal water to prevent structural collapse. Leather requires pH-balanced cleaners and is prone to cracking if dried incorrectly. By matching the cleaning method to the material, you ensure the internal support remains intact for hundreds of miles.
The Essential Cleaning Toolkit: What You’ll Need
To achieve a professional-grade clean, you need to move beyond just using a wet rag and some hand soap. A proper toolkit allows you to lift stains and neutralize odors without saturating the core of the insole. Most of these items are already in your household, but using them in the correct sequence is what separates an amateur job from an expert restoration.
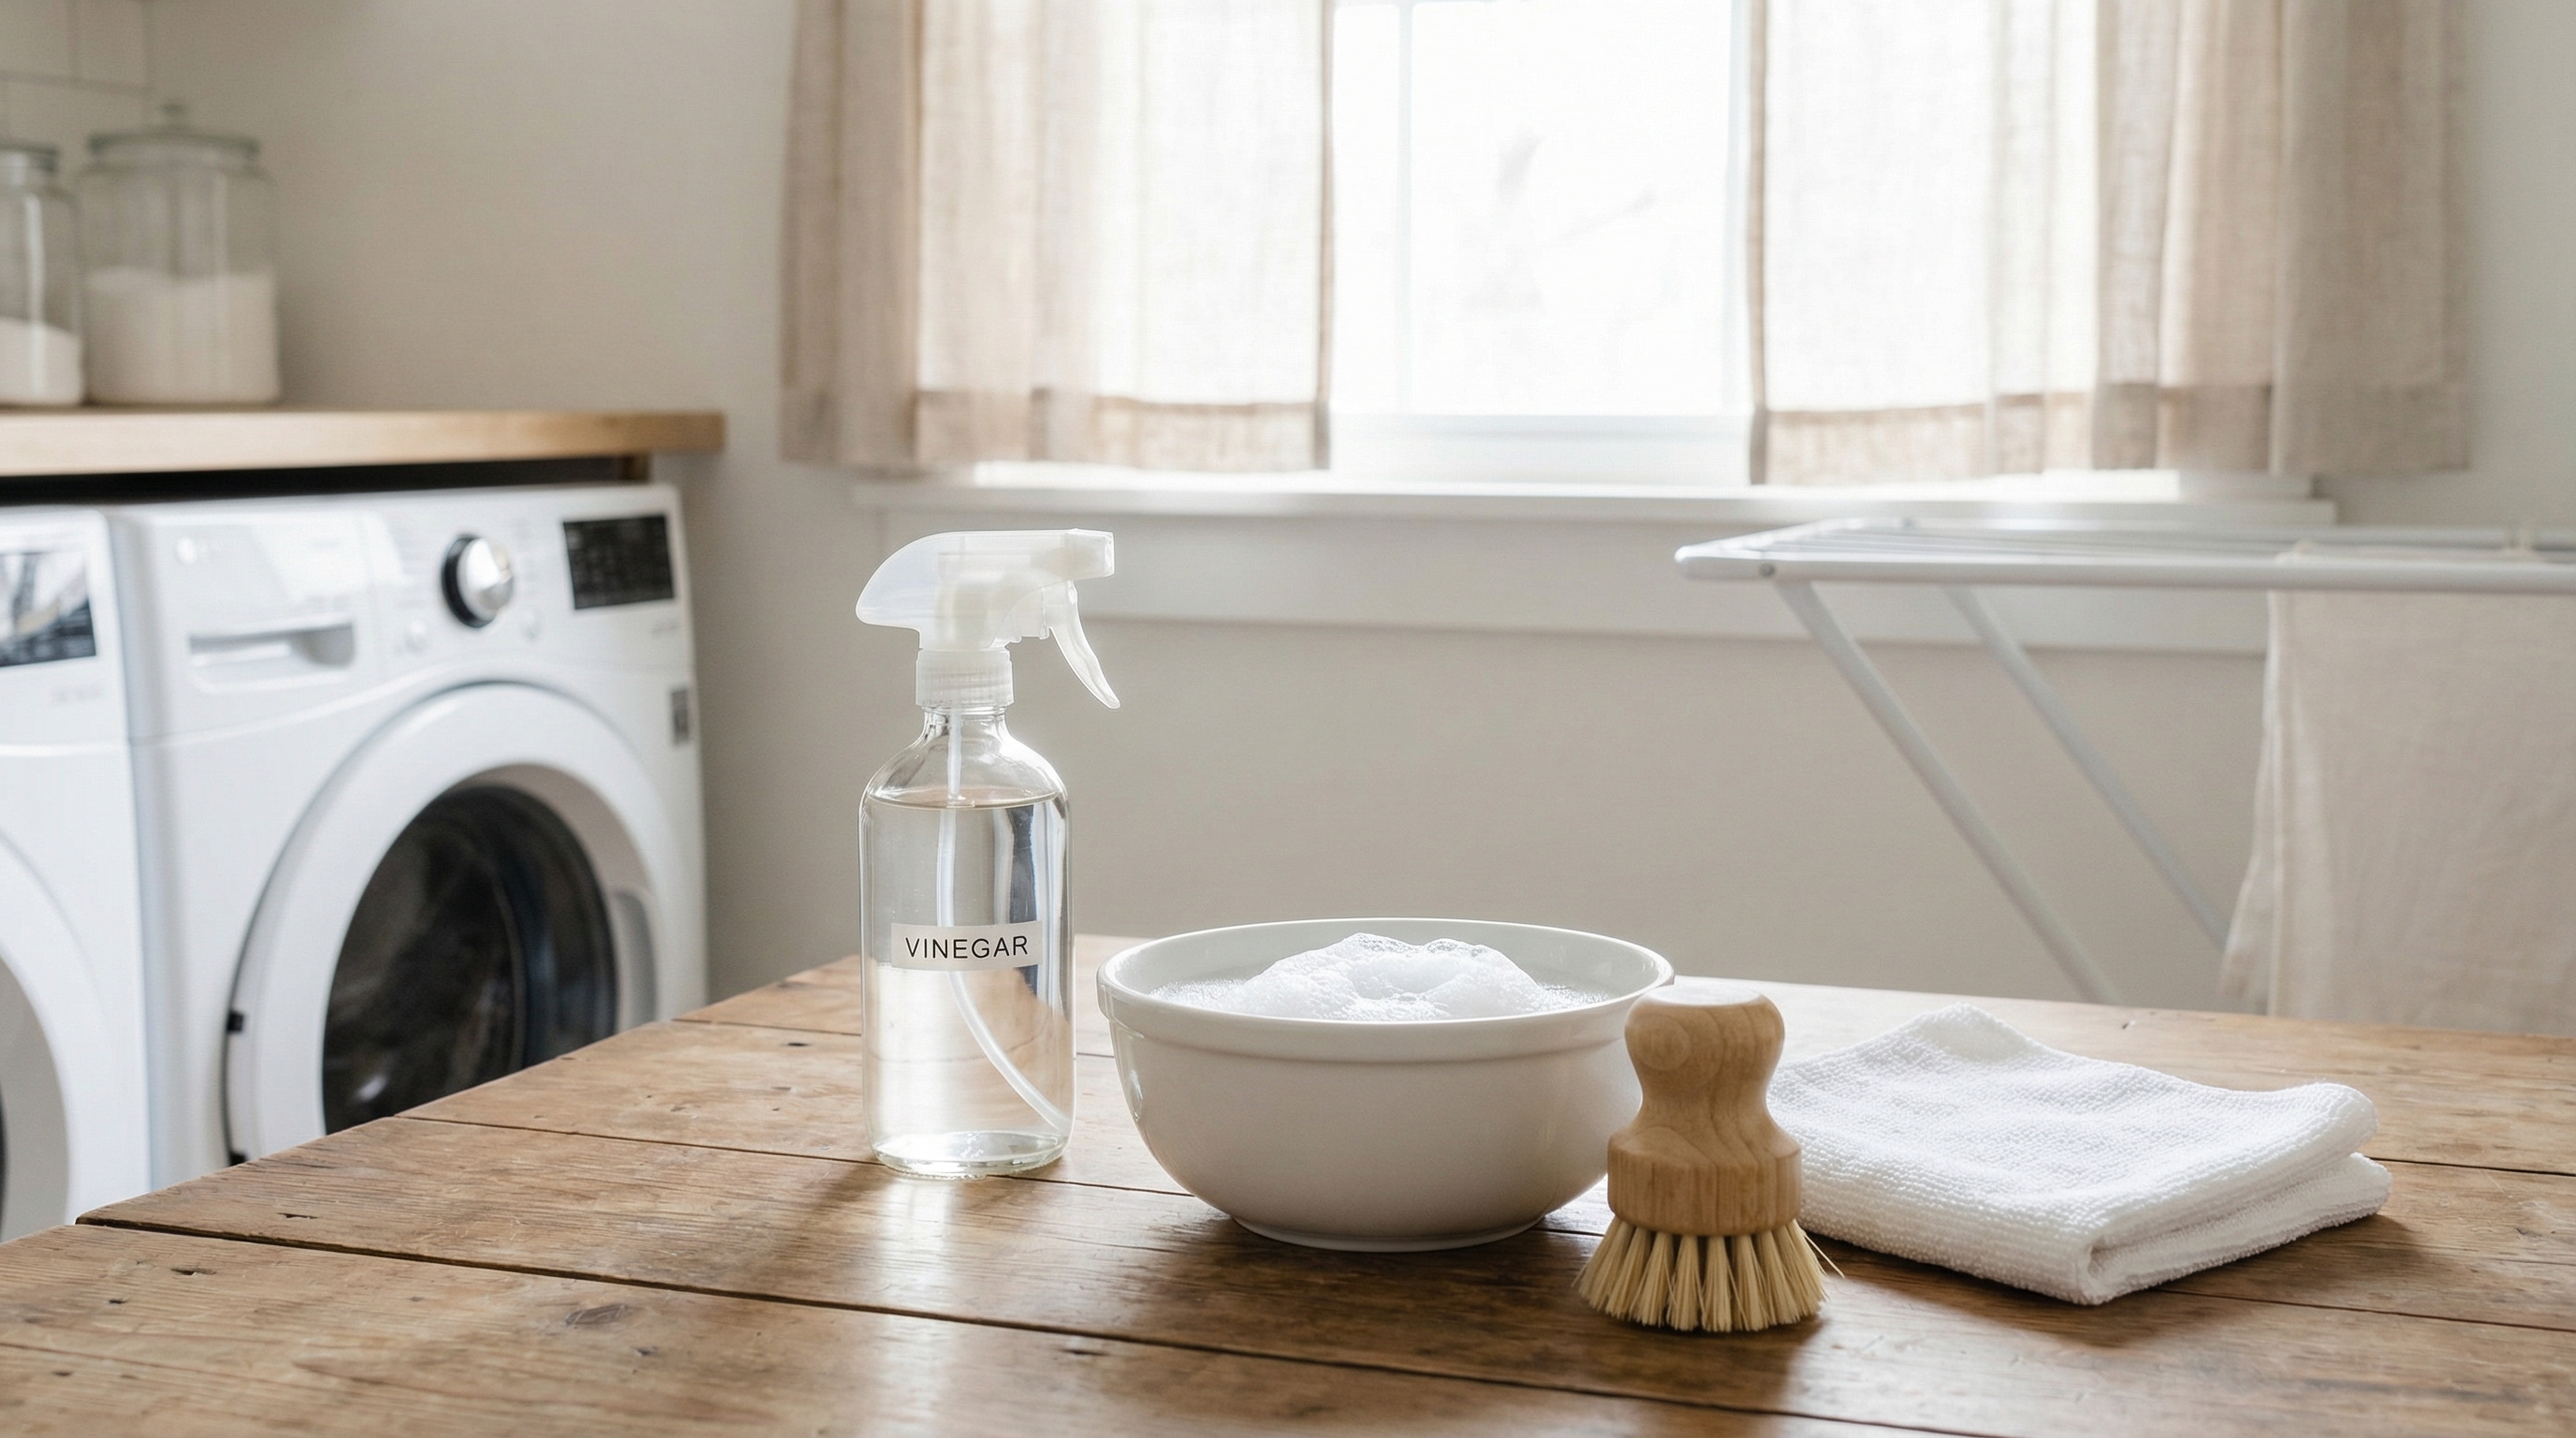
To achieve the best results, gather the following supplies:
- Soft-bristled brush: An old toothbrush or a specialized sneaker brush is perfect for agitation.
- Microfiber cloths: These are essential for wicking away moisture without leaving lint behind.
- Mild detergent: Dye-free dish soap or specialized sneaker cleaner is ideal.
- Distilled white vinegar: This acts as a natural, non-toxic disinfectant that kills 99% of bacteria.
- Baking soda: An alkaline powder that neutralizes acidic odors and absorbs residual dampness.
Think about it: the tools you use are just as important as the chemicals. A stiff brush might be fine for a rugged work boot insole, but it would tear the top fabric of a delicate running shoe. Preparation is the key to ensuring that the cleaning agents do their work without lingering as irritants against your skin.
The Standard Method: Cleaning Removable Insoles with Soap and Water
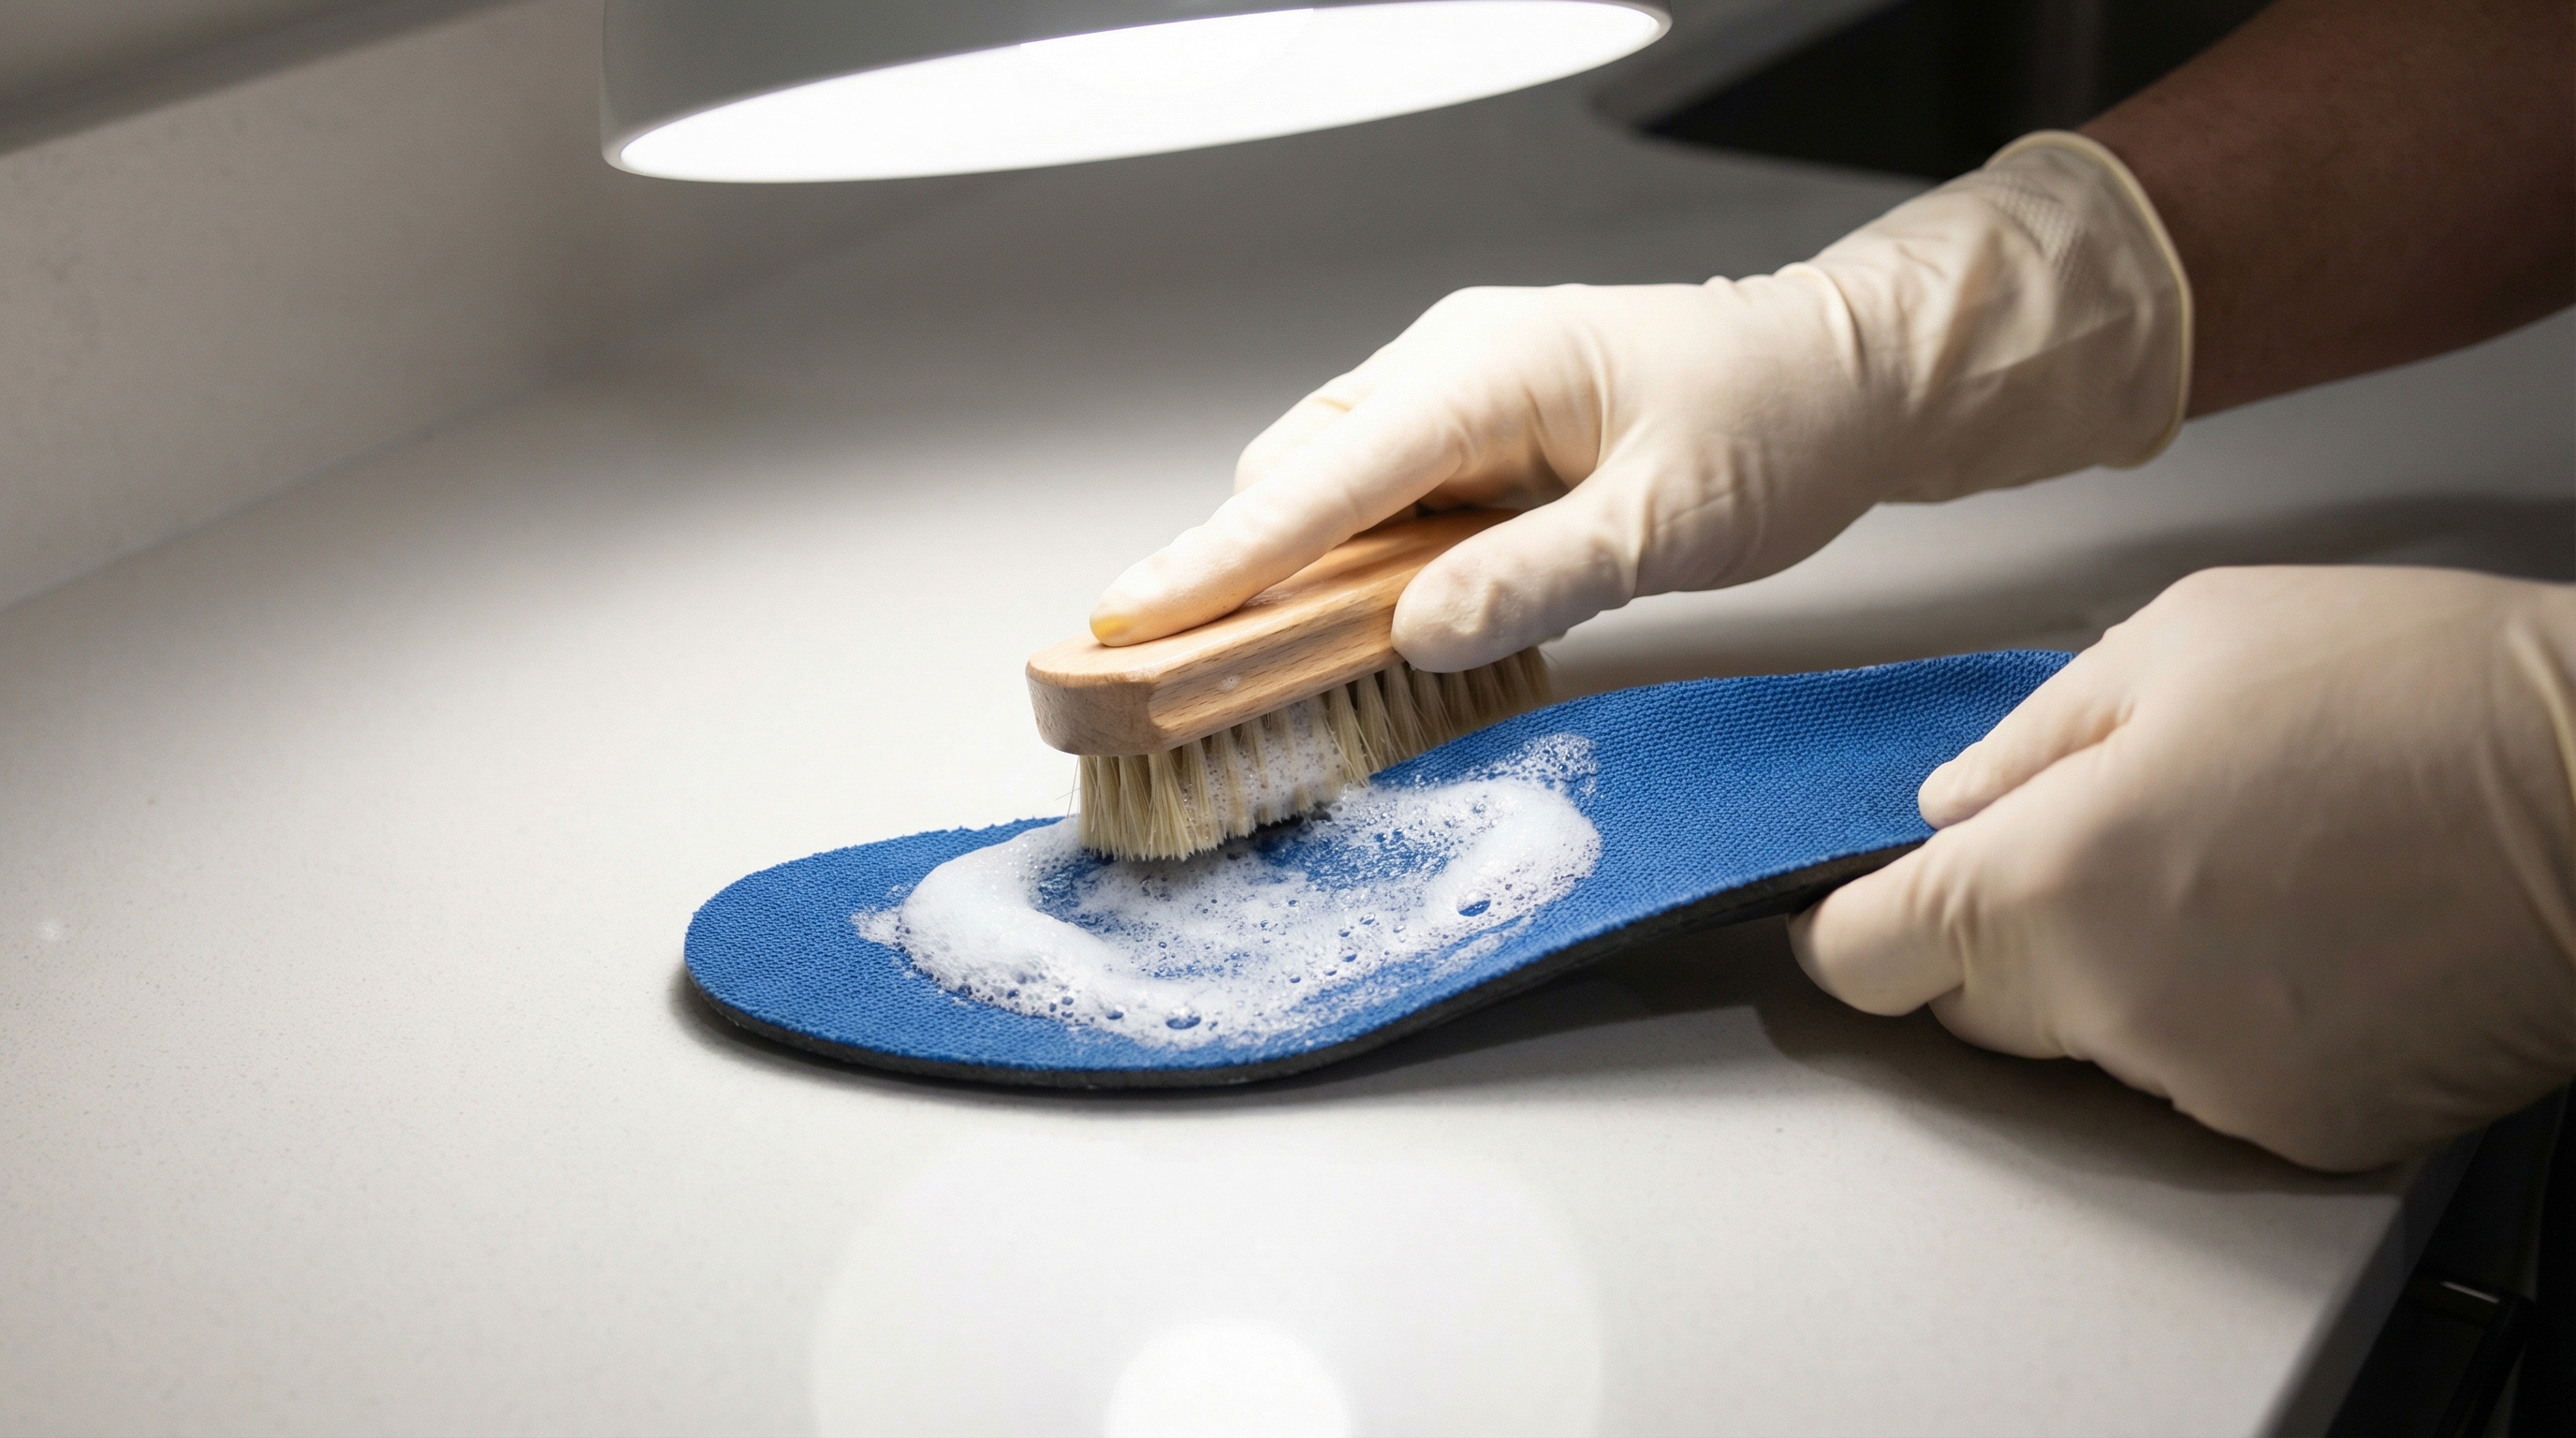
For approximately 90% of casual and athletic shoes, a gentle manual wash with soap and water is the gold standard for hygiene. This method is effective because it physically lifts the grime and skin cells that have become embedded in the top fabric layer. It is crucial, however, to focus on “surface agitation” rather than “deep soaking” to protect the underlying foam structures.
If the foam becomes completely saturated, it can take days to dry, leading to potential mold growth. Follow these steps:
- Preparation: Mix a few drops of mild soap into a bowl of lukewarm water.
- Scrubbing: Dip the brush into the suds and scrub the top fabric layer in circular motions.
- Rinsing: Use a damp microfiber cloth to “rinse” the soap away. Do not hold it under a faucet.
- Pressing: Sandwich the insole between two dry towels and press down firmly to extract moisture.
Manufacturer Pro Tip: Adhesive Sensitivity
Most insoles are constructed using heat-activated or pressure-sensitive adhesives to bond the top fabric to the foam base. Excessive soaking or the use of heavy solvents can dissolve these bonds, leading to “delamination” where the fabric peels away from the support layer. Always use the “damp, not dripping” rule. This is a critical step we emphasize during the shoe manufacturing process to ensure product longevity.
Advanced Sanitization: Using Vinegar to Kill Bacteria and Fungi
When the odor is particularly stubborn, soap alone will not be enough to kill the colonies of bacteria living deep within the fibers. This is where the chemistry of distilled white vinegar becomes an invaluable tool. Vinegar’s acetic acid content makes it a potent, eco-friendly disinfectant that creates an environment hostile to the alkaline-loving bacteria that produce foot odor.
It gets better: unlike bleach, vinegar is safe for the dyes and synthetic materials used in modern footwear design and development and won’t irritate sensitive skin once dry. To use it, create a 50/50 mix of water and white vinegar in a spray bottle. Spray a fine mist over the surface and let it sit for five minutes before wiping it dry. The vinegar smell is strong when wet, but it completely dissipates once dry, taking the bad odors with it.
Odor Elimination: The Power of Baking Soda and Active Charcoal
Sometimes moisture isn’t the primary issue, but a lingering scent remains even after a surface clean. In these cases, dry extraction methods are often more effective than adding more liquid. Baking soda is a weak base that is incredibly effective at neutralizing acidic odor molecules. It also acts as a desiccant, pulling any microscopic traces of moisture out of the deep pores of the foam overnight.
For a deep treatment, place your dry insoles into a large gallon-sized freezer bag with half a cup of baking soda. Shake the bag vigorously and leave it to sit for at least eight to twelve hours. For high-performance sports shoes, placing charcoal inserts into the shoes nightly prevents the buildup that necessitates deep cleaning. By keeping the internal environment dry every single day, you effectively starve the bacteria of the moisture they need to survive.
Deep Dive: Material-Specific Care for Leather, Memory Foam, and Gel
The material of your insole dictates the boundaries of your cleaning efforts. While a standard foam insole can handle a bit of soap, a luxury leather footbed requires an entirely different set of rules. Treating leather like plastic will cause it to shrink and crack, while treating memory foam like leather will leave it a soggy, useless mess.
| Material | Primary Cleaning Agent | Risk Factor | Expert Advice |
|---|---|---|---|
| Leather | Saddle Soap / pH Neutral Cleaner | Cracking/Hardening | Apply a leather conditioner after cleaning. |
| Memory Foam | Microfiber + Light Steam | Structural Collapse | Never wring or twist; it tears the cell walls. |
| Gel | Lukewarm Soap Water | Adhesive Loss | Wipe the gel underside with water only. |
| EVA/PU Foam | Vinegar + Dish Soap | Bacterial Retention | Use a stiff brush to reach into the “pores.” |
But that’s not all—specialty materials like cork or wool require even more care. Cork insoles should be cleaned with a mixture of water and a small amount of rubbing alcohol to kill bacteria without saturating the wood fibers. Wool insoles should only be cleaned with cold water and a dedicated wool wash to prevent shrinking.
The Golden Rule of Drying: Why Heat is Your Insole’s Worst Enemy
Never put insoles in a dryer or on a radiator. This is the single most common mistake that ruins high-end footwear. High temperatures cause the polymers in the foam to shrink and warp. At TL Stage, we emphasize that the “compression set” of an insole—its ability to bounce back—is destroyed by thermal degradation.
The bottom line is that the most effective way to dry insoles is to place them in a cool, shaded area with plenty of natural airflow. Using a simple oscillating fan can cut the drying time in half without the risks associated with heat. If the insoles are non-removable, stuff the shoes with unprinted packing paper to wick moisture from the inside out, changing the paper every few hours as it becomes saturated.
Troubleshooting: How to Clean Non-Removable Insoles
If the insoles are glued down, you must bring the cleaning to them. This presents a challenge, as you cannot easily rinse them or dry them in the open air. In this scenario, you must be extremely careful not to soak the outer materials of the shoe, especially if they are made of suede or delicate leather.
- Vacuum: Use a crevice tool to remove grit and hair from the edges.
- Spot Clean: Use a foam-based cleaner that doesn’t “run” or soak into the footbed deeply.
- Deodorize: Since airflow is restricted, rely more heavily on baking soda treatments to manage moisture.
- Air Flow: Prop the tongue of the shoe open as wide as possible to encourage air exchange.
You may find that non-removable insoles take significantly longer to dry—up to 48 hours in some cases. Avoid wearing the shoes until they are completely dry, as the pressure of your weight will force any remaining internal dampness into the deep layers of the midsole.
Maintenance Tips: Extending the Life of Your Shoes
The best way to clean your insoles is to make sure they never get excessively dirty in the first place. By adopting a few simple habits, you can reduce the frequency of deep cleanings and keep your footwear in “like-new” condition for years.
- Rotation: Never wear the same pair two days in a row. It takes 24 hours for foam to fully decompress and moisture to evaporate.
- Socks: Wear moisture-wicking synthetic or wool socks. Cotton retains moisture against the insole like a wet towel.
- Pre-emptive Spraying: Use a specialized antimicrobial spray once a week to prevent bacterial colonies from forming.
Manufacturer Pro Tip: Material Density
High-density PU (Polyurethane) insoles used in luxury footwear are more resilient to cleaning than low-density EVA. If you find your insoles “flatten out” quickly after cleaning, the material has likely reached its fatigue limit, regardless of how clean it looks. This is a sign that the molecular structure of the foam has collapsed.
When to Replace: Signs Your Insoles are Beyond Cleaning
Cleaning can restore hygiene, but it cannot restore structural integrity. Eventually, every insole reaches the end of its functional life. Continuing to wear worn-out insoles can lead to foot pain, shin splints, or even back issues. Replace your insoles if:
- Permanent Compression: You see a deep, permanent impression of your toes that doesn’t disappear when the shoe is off.
- Persistent Odor: If they smell even after a deep vinegar soak, the bacteria have colonized the deep interior of the foam.
- Physical Damage: Cracks in the foam or peeling fabric layers that cause friction.
- Discoloration: Deep black or green spots indicate mold growth that is unsafe for skin contact.
Investing in a fresh pair of quality insoles is the cheapest way to make an old pair of shoes feel brand new again. For most people, this replacement cycle should happen every six to nine months.
People Also Ask (FAQ)
Can I put my shoe insoles in the washing machine?
While some manufacturers claim their insoles are machine-washable, it is generally not recommended. The mechanical agitation can tear delicate foams, and the spin cycle can warp the shape of the footbed. Furthermore, the heat of the water can weaken the adhesives used to bond the fabric to the foam.
How often should I clean my insoles?
For daily-wear shoes, a light sanitization with a vinegar spray should be done once a week. A deep manual scrub with soap and water is recommended every one to two months, depending on your activity level and how much you sweat.
What is the fastest way to dry shoe insoles?
The fastest safe way to dry them is to blot them thoroughly with a highly absorbent microfiber towel to remove excess water, then place them in front of a high-powered electric fan in a room with low humidity.
Will cleaning insoles stop my shoes from squeaking?
Often, yes. Squeaking is frequently caused by the insole rubbing against the internal midsole of the shoe due to a buildup of dry sweat salts or grit. Cleaning both components and applying a tiny amount of baby powder can eliminate the noise.
Is it safe to use rubbing alcohol on my insoles?
Isopropyl alcohol is an excellent disinfectant and dries quickly, making it safe for most synthetic EVA and PU foams. However, you should avoid using it on leather or suede, as it will strip the natural oils and cause the material to crack.
For more professional insights on footwear maintenance and construction, explore our full range of services or contact our expert team for technical consultations regarding your footwear production needs.