
You have invested significant capital into a pair of high-quality leather shoes, expecting them to last for years, if not decades. However, after only a few months of wear, you notice the vibrant finish fading and fine cracks appearing near the vamp. This degradation is not just aesthetic; the structural integrity of the leather is failing because the natural oils are evaporating. Without a precise intervention, your premium footwear will transform into a brittle, unwearable relic of its former self.
Essentially, the secret to longevity lies in transitioning from basic wiping to a scientific maintenance routine. When leather is neglected, it doesn’t just get dirty; it undergoes a slow chemical breakdown. Dirt particles act like micro-abrasives, grinding into the pores and severing the collagen fibers that provide flexibility. This is why a reactive approach is never enough. You need a proactive strategy that preserves the hide’s biological integrity while maintaining its visual luster.
The most effective way to clean leather shoes involves a systematic four-stage process of dry brushing to remove abrasives, chemical cleaning with a pH-balanced solution, deep conditioning to replenish lost lipids, and applying a wax-based sealant to protect the grain.
| Step | Action | Primary Objective |
|---|---|---|
| 1 | Remove Laces | Ensure access to the tongue and hidden eyelet areas. |
| 2 | Dry Brush | Clear away abrasive dust that can scratch leather during cleaning. |
| 3 | Deep Clean | Use a pH-neutral leather cleaner to lift embedded grime and old wax. |
| 4 | Condition | Rehydrate the collagen fibers to prevent cracking and maintain suppleness. |
| 5 | Polish & Buff | Apply pigment for color and wax for a protective, high-shine barrier. |
The Anatomy of Leather: Why Professional Care is an Investment
Leather is essentially a biological fabric composed of complex collagen fiber networks that have been preserved through the tanning process. Even though the hide is no longer “alive,” it remains a porous, hygroscopic material that reacts to its environment. When leather loses its moisture content, these microscopic fibers become stiff and eventually snap under the mechanical stress of walking. This is why understanding our shoemaking heritage is vital for anyone who values the intersection of craftsmanship and durability.
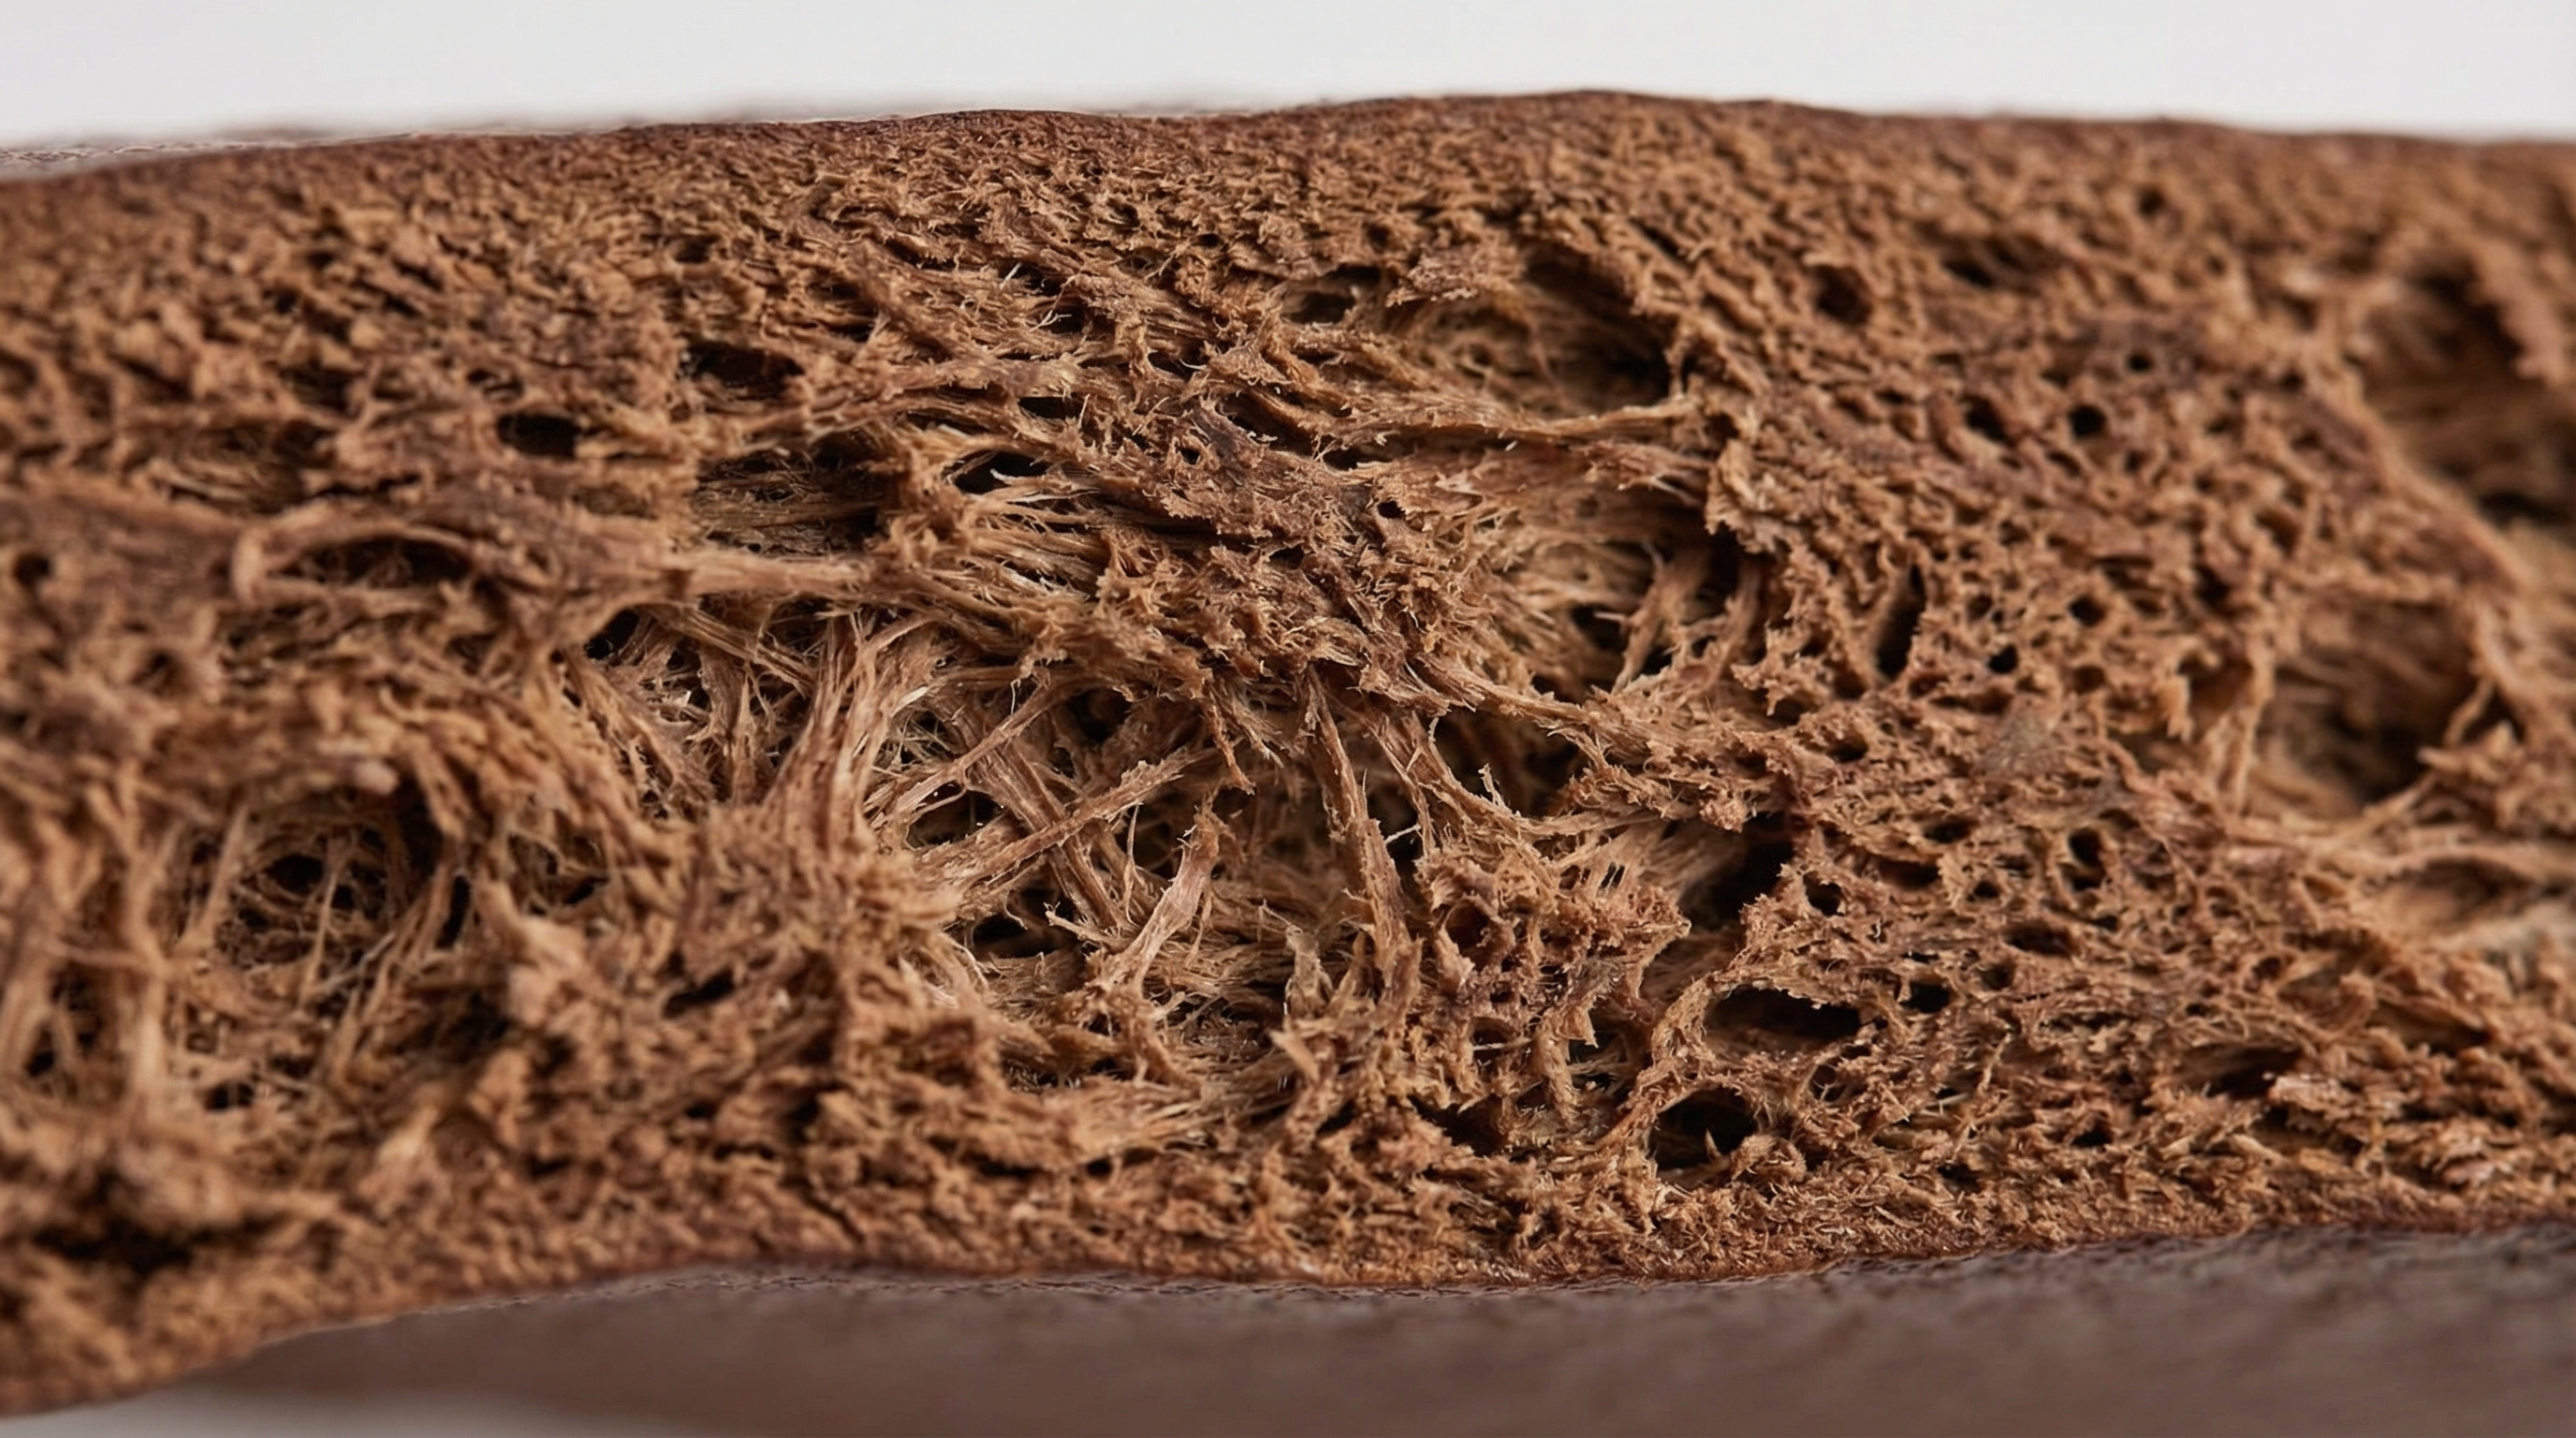
The Biological Matrix of Full-Grain Hides
The lifespan of a leather shoe is dictated by the quality of the “fat liquor” within its pores. During the tanning stage, oils are forced into the hide to ensure flexibility and strength. Over time, environmental factors like UV rays, road salt, and simple evaporation deplete these oils. If you fail to replenish them, the leather undergoes a process of desiccation. But here is the catch: without regular conditioning, even the finest full-grain leather will eventually succumb to environmental rot.
Furthermore, leather shoes face constant chemical warfare from the urban environment. Industrial pollutants and acidic rain can alter the leather’s surface pH, leading to premature aging. Professional care is not merely about making the shoe look “shiny” for a meeting. Instead, it is a preservation strategy designed to keep the collagen matrix intact against the rigors of daily use. By adopting a proactive stance, you are effectively protecting a high-value asset from avoidable depreciation.
The Chemistry of Leather Cleaners
What is the real story behind “leather-safe” cleaners? Most off-the-shelf soaps are highly alkaline, which is catastrophic for the acidic nature of tanned hides. Leather sits at a pH of approximately 4.5 to 5.0, and introducing a standard detergent with a pH of 9.0 will cause a violent chemical reaction. This reaction strips the internal surfactants and fats that keep the fibers lubricated. Consequently, you must choose products that are specifically buffered to maintain this equilibrium.
Modern leather cleaners utilize non-ionic surfactants that surround dirt particles without binding to the leather fibers themselves. This allows the grime to be lifted away without dragging the essential oils out with it. High-quality formulas often include a small percentage of lanolin to provide a “pre-conditioning” effect during the wash phase. This ensures that the leather never reaches a state of total dehydration during the cleaning process. It is a sophisticated dance of chemistry designed to preserve the hide’s natural integrity.
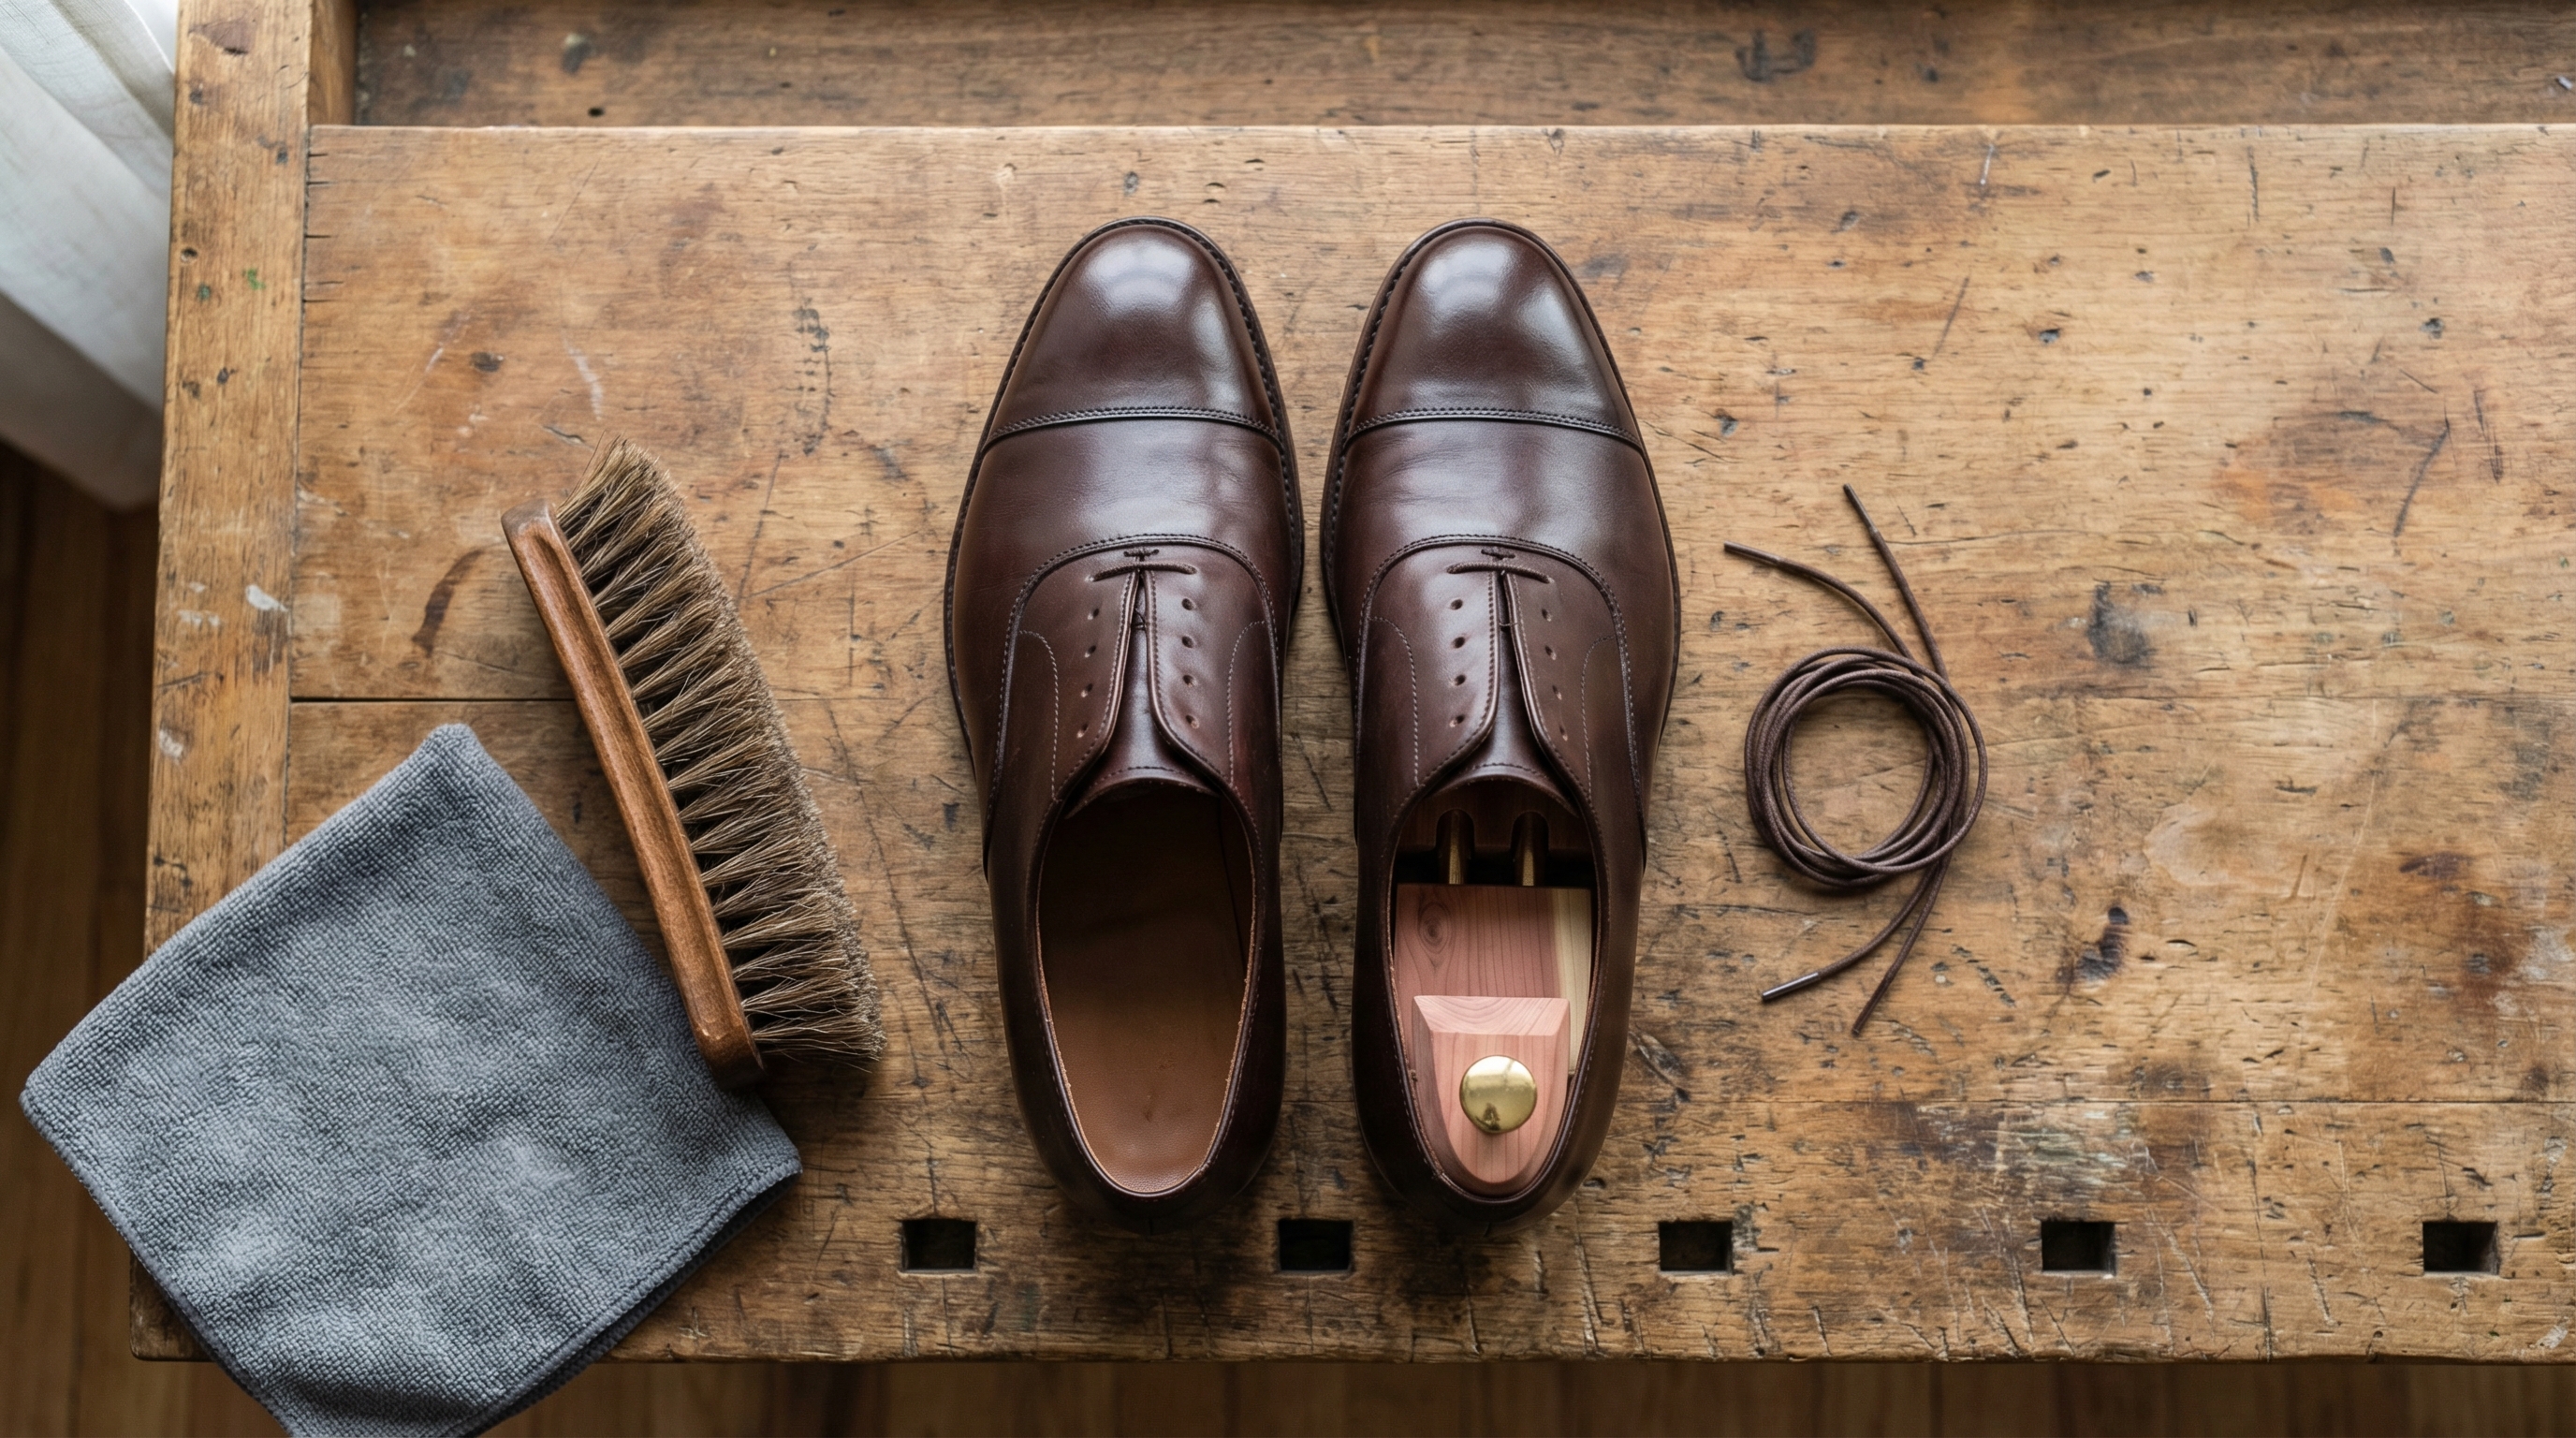
The Essential Toolkit: Supplies Every Owner Needs
To achieve professional results, you must move beyond the generic “all-in-one” kits found in supermarkets. A dedicated toolkit starts with a variety of brushes, specifically those made from genuine horsehair. Horsehair is preferred because it is soft enough to avoid scratching delicate calfskin but firm enough to dislodge stubborn dirt. You will also need a range of high-quality microfiber cloths that do not shed lint during the polishing phase. Meanwhile, your chemical selection should focus on specialized cleaners rather than household detergents.
Your kit must also include a premium leather conditioner, often referred to as a “renovateur” in high-end circles. These products are usually water-based or contain natural mink oil or shea butter to provide deep hydration without clogging the pores. For the finishing stages, you should stock both cream polishes for color restoration and hard wax polishes for water resistance. But here’s the catch: using the wrong type of wax can create a suffocating layer that prevents the leather from breathing.
Manufacturer Pro Tip: Brush Density and pH Balance
Industrial-grade shoe maintenance relies on two critical metrics: brush hair density and chemical pH. For smooth calfskin, a brush with a density of at least 30,000 hairs per square inch ensures a uniform distribution of polish without damaging the grain. Additionally, always select cleaners with a pH between 4.5 and 5.5 to match the natural acidity of tanned leather; alkaline soaps will strip the “acid mantle” of the hide, causing irreversible brittleness.
| Tool Type | Recommended Material | Best Used For |
|---|---|---|
| Applicator Brush | Pig Bristle / Stiff Horsehair | Working cream into seams and broguing details. |
| Buffing Brush | Long-tail Horsehair | Creating friction for a high-gloss finish. |
| Cleaning Cloth | 300 GSM Microfiber | Removing excess cleaner and initial wiping. |
| Polishing Cloth | High-thread-count Cotton | Achieving a mirror shine (Glaçage). |
Specialized Applicators for Detail Work
The choice of applicator is often overlooked, but it dictates the uniformity of the finish. Using a sponge may seem convenient, but sponges often absorb more product than they apply, leading to waste and uneven saturation. Natural pig bristle brushes are superior for applying cream polishes because the stiff bristles can penetrate the welt and broguing. This ensures that every square millimeter of the shoe receives the same level of protection. Investing in high-grade tools is the foundation of professional-grade maintenance.
Beyond brushes, the quality of your cleaning cloth matters immensely. A standard kitchen rag is too abrasive for high-grade calfskin. Instead, look for microfibers with a high GSM (grams per square meter) rating. These cloths are engineered to trap dirt within their microscopic hooks, lifting it away from the surface rather than dragging it across the grain. This subtle difference is what prevents the swirl marks often seen on poorly maintained footwear.
The Definitive Step-by-Step Guide to Cleaning Smooth Leather
The process begins with the removal of the laces to prevent them from becoming stained by cleaning agents or polish. Once the shoes are “naked,” insert high-quality cedar shoe trees to maintain the shape and provide a firm surface to work against. Start with a thorough dry brushing to remove the “invisible” dust that accumulates in the creases. If you skip this step and move straight to a wet cleaner, those dust particles act like sandpaper, micro-scratching the finish as you rub.
The Wet Cleaning Phase
Next, apply a small amount of pH-neutral leather cleaner to a damp microfiber cloth. Use small, circular motions to work the cleaner into the leather, focusing on areas with visible salt stains or grime buildup. It is crucial to avoid oversaturating the leather; you want to lift the dirt, not soak the hide. After cleaning, allow the shoes to air dry at room temperature for at least 20 minutes. Essentially, this allows the moisture to evaporate naturally before you introduce oils back into the material.
If you are working with professional shoe production standards, you might notice that some shoes require a “stripping” phase. This involves using a stronger solvent to remove years of old, caked-on wax that has turned grey or white. This step is only necessary for shoes that have been over-polished without being cleaned. Once the surface is clean and the old wax is gone, the leather will look dull, but it is now perfectly prepared to absorb fresh nutrients.
The Importance of Natural Drying
What is the real story behind heat and leather? Many people are tempted to place their wet shoes near a radiator to speed up the process. This is a critical mistake. Accelerated drying causes the moisture to leave the leather fibers too quickly, leading to shrinkage and brittle structures. By allowing the shoe to dry at a natural pace, you ensure the collagen fibers settle back into their original alignment. This patience is what differentiates an amateur from a connoisseur.
Restoring Antique Leather and Vintage Footwear
What’s the real story when dealing with vintage or antique footwear? These items often suffer from “dry rot,” where the collagen fibers have completely separated due to decades of neglect. Cleaning such items requires a much more conservative approach to avoid causing further mechanical damage. Instead of a standard liquid cleaner, you should use a saddle soap with high glycerin content. Glycerin acts as a humectant, slowly drawing moisture back into the desiccated fibers without overwhelming them.
Stabilizing Fragile Grain Patterns
Restoration also involves the careful removal of oxidized waxes that have become “fossilized” on the surface. These layers can be brittle and may require a specialized leather deglazer to dissolve without damaging the underlying grain. You must work in very small sections, perhaps only two square inches at a time, to monitor the leather’s reaction. But here is the catch: some antique leathers are simply too far gone for a full restoration. In these cases, the goal shifts from “new” to “stable,” ensuring the item does not deteriorate further.
When restoring older leather, you must also be mindful of the “spew” or “spue”—white fatty deposits that migrate to the surface. This is often mistaken for mold, but it is actually the internal oils crystallizing. A gentle heat source or a specialized fatty acid cleaner can redistribute these oils back into the hide. Understanding these microscopic movements allows you to resurrect shoes that others might consider beyond saving. It is a meticulous process that rewards the patient owner with a piece of wearable history.
The Role of Pigmented Creams in Restoration
Vintage leather often loses its original dye due to UV exposure. To bring back the depth of color, a pigmented cream is essential. Unlike wax, which sits on top, cream carries the pigment deep into the pores. This doesn’t just “paint” the surface; it re-dyes the top layer of the grain. For antique shoes, choosing a shade slightly lighter than the original leather can create a beautiful “patina” effect, highlighting the natural variations of the hide rather than masking them.
Material Scenarios: Handling Suede, Nubuck, and Patent Leather
Suede and nubuck require a fundamentally different philosophy because they lack the protective “grain” layer of smooth leather. Water is the primary enemy here, as it can cause the delicate nap to mat down and lose its velvety texture. Instead of liquid cleaners, use a suede stone or a brass-bristle brush to gently “comb” the fibers and lift away surface dust. For localized stains, a specialized suede eraser is the most effective tool for mechanical removal without altering the color.
The Sensitivity of Patent Finishes
Patent leather, on the other hand, is essentially leather coated in a thick layer of plastic or lacquer. Because of this coating, conditioners cannot penetrate the surface, and traditional waxes will simply slide off. Cleaning patent leather involves a simple wipe with a damp cloth followed by a specialized patent cleaner that maintains the high gloss. What’s the real story? While patent leather is the easiest to clean, it is the most prone to permanent scuffing that cannot be “buffed out” like smooth leather.
Exotic leathers, such as alligator or ostrich, also require specific attention due to their unique scale structures. These skins have deep crevices where dirt can hide and moisture can get trapped, leading to rot. You should use a very soft brush and a conditioner specifically formulated for exotics, which usually has a thinner consistency to prevent buildup between the scales. Understanding these nuances is a hallmark of quality footwear resources and ensures your collection remains in peak condition regardless of the material.
Managing Scales and Pores in Exotics
The challenge with exotic leathers often lies in their varied absorption rates. Alligator scales are virtually non-porous, while the skin between the scales is highly absorbent and sensitive. If you apply too much product, the interstitial skin will darken significantly while the scales remain unchanged, leading to a blotchy appearance. Therefore, you must use a “less is more” approach, applying thin layers and allowing them to dry fully. This meticulousness is what separates a novice from a seasoned collector of luxury footwear.
Crisis Management: Removing Salt, Grease, and Ink Stains
Winter weather presents a unique threat in the form of road salt, which creates unsightly white rings on the leather. If left untreated, these salt crystals pull moisture out of the hide, causing it to harden and eventually crack. To fix this, create a solution of one part white vinegar and two parts water. Gently dab the salt-stained area with this solution until the crystals dissolve, then immediately follow up with a leather-safe cleaner to neutralize the acidity.
The Science of Absorption for Grease
Grease and oil stains require a dry-absorption method rather than a wet-scrubbing approach. If you spill oil on your shoes, immediately cover the spot with a thick layer of cornstarch or talcum powder. Leave it to sit overnight; the powder will draw the oil out of the leather pores through capillary action. In the morning, brush the powder away and evaluate the spot. But here’s the catch: if the oil has already set, you may need a specialized degreaser, which should only be used as a last resort.
Manufacturer Pro Tip: The Salt Neutralization Protocol
When dealing with heavy salt saturation, timing is everything. Once salt crystals dry, they expand and tear the internal collagen fibers. Always neutralize salt stains while the leather is still slightly damp. Use a solution with a pH of roughly 3.0 to 4.0 (like diluted vinegar) to break the bond between the salt and the leather fibers. This prevents the “salt burn” that leads to permanent bubbling of the grain.
What is the real story regarding the chemical damage caused by winter de-icing agents? Road salt is typically sodium chloride or calcium chloride, both of which are highly hygroscopic. This means they possess an insatiable “thirst” for water, and when they contact leather, they perform a process similar to osmosis. They draw the internal moisture and oils out of the collagen fibers to satisfy their own chemical bond. This leaves the leather structurally compromised at a microscopic level.
Internal Mechanical Damage from Crystals
Furthermore, the salt crystals that form inside the leather pores are sharp and abrasive. Every time you take a step, these internal crystals act like tiny knives, severing the collagen bonds from the inside out. This is why “salt burn” often looks like white, bubbly ridges that feel crunchy to the touch. The damage is not just on the surface; it is a total breakdown of the leather’s mechanical structure. Immediate neutralization is the only way to halt this destructive cycle before it becomes permanent.
The Science of Conditioning: Rehydrating Collagen Fibers
Conditioning is the most critical step in the maintenance cycle, as it directly impacts the mechanical longevity of the shoe. A good conditioner works by delivering lipids—fats and oils—back into the collagen matrix. When you apply the conditioner, the leather will often appear darker as it absorbs the liquid. This is a sign that the fibers are “drinking” the nutrients they have lost through wear and environmental exposure. Essentially, you are restoring the internal lubrication that allows the leather to flex without breaking.
Determining the Hydration Frequency
The frequency of conditioning depends largely on your climate and how often you wear the shoes. In dry, arid environments, you may need to condition your shoes every four to six weeks. In more humid areas, once every three months might be sufficient. But how do you know if your shoes are “thirsty”? A simple test is to run your finger across the leather; if it feels stiff, dry, or “papery,” it is time for a deep conditioning session.
Manufacturer Pro Tip: The Heat Method
To maximize the penetration of high-quality conditioners, professionals often use the “Heat Method.” After applying a thin layer of conditioner, use a hair dryer on its lowest, coolest setting to gently warm the leather from a distance of 12 inches. The slight warmth expands the pores and decreases the viscosity of the oils, allowing them to migrate deeper into the leather’s core rather than sitting on the surface.
Beyond basic hydration, conditioning serves to maintain the leather’s tensile strength. During the manufacturing process, leather is subjected to “fat-liquoring,” where it is tumbled in a drum of oils. Over time, the physical movement of walking “squeezes” these oils out of the fiber bundles. Regular conditioning acts as a manual fat-liquoring process, ensuring the fibers can slide past one another without friction. This is why a well-conditioned shoe feels more comfortable and requires less “break-in” time.
Polishing for Depth: Achieving the Perfect Mirror Shine (Glaçage)
Polishing serves two purposes: restoring the aesthetic depth of the color and providing a sacrificial layer against the elements. Cream polishes contain high concentrations of pigment and are designed to soak into the leather to cover scuffs and “refresh” the hue. Wax polishes, conversely, contain hard waxes like Carnauba and are designed to sit on top of the leather. For a standard shine, apply a cream polish first to restore the color, let it dry, and then buff it to a soft glow.
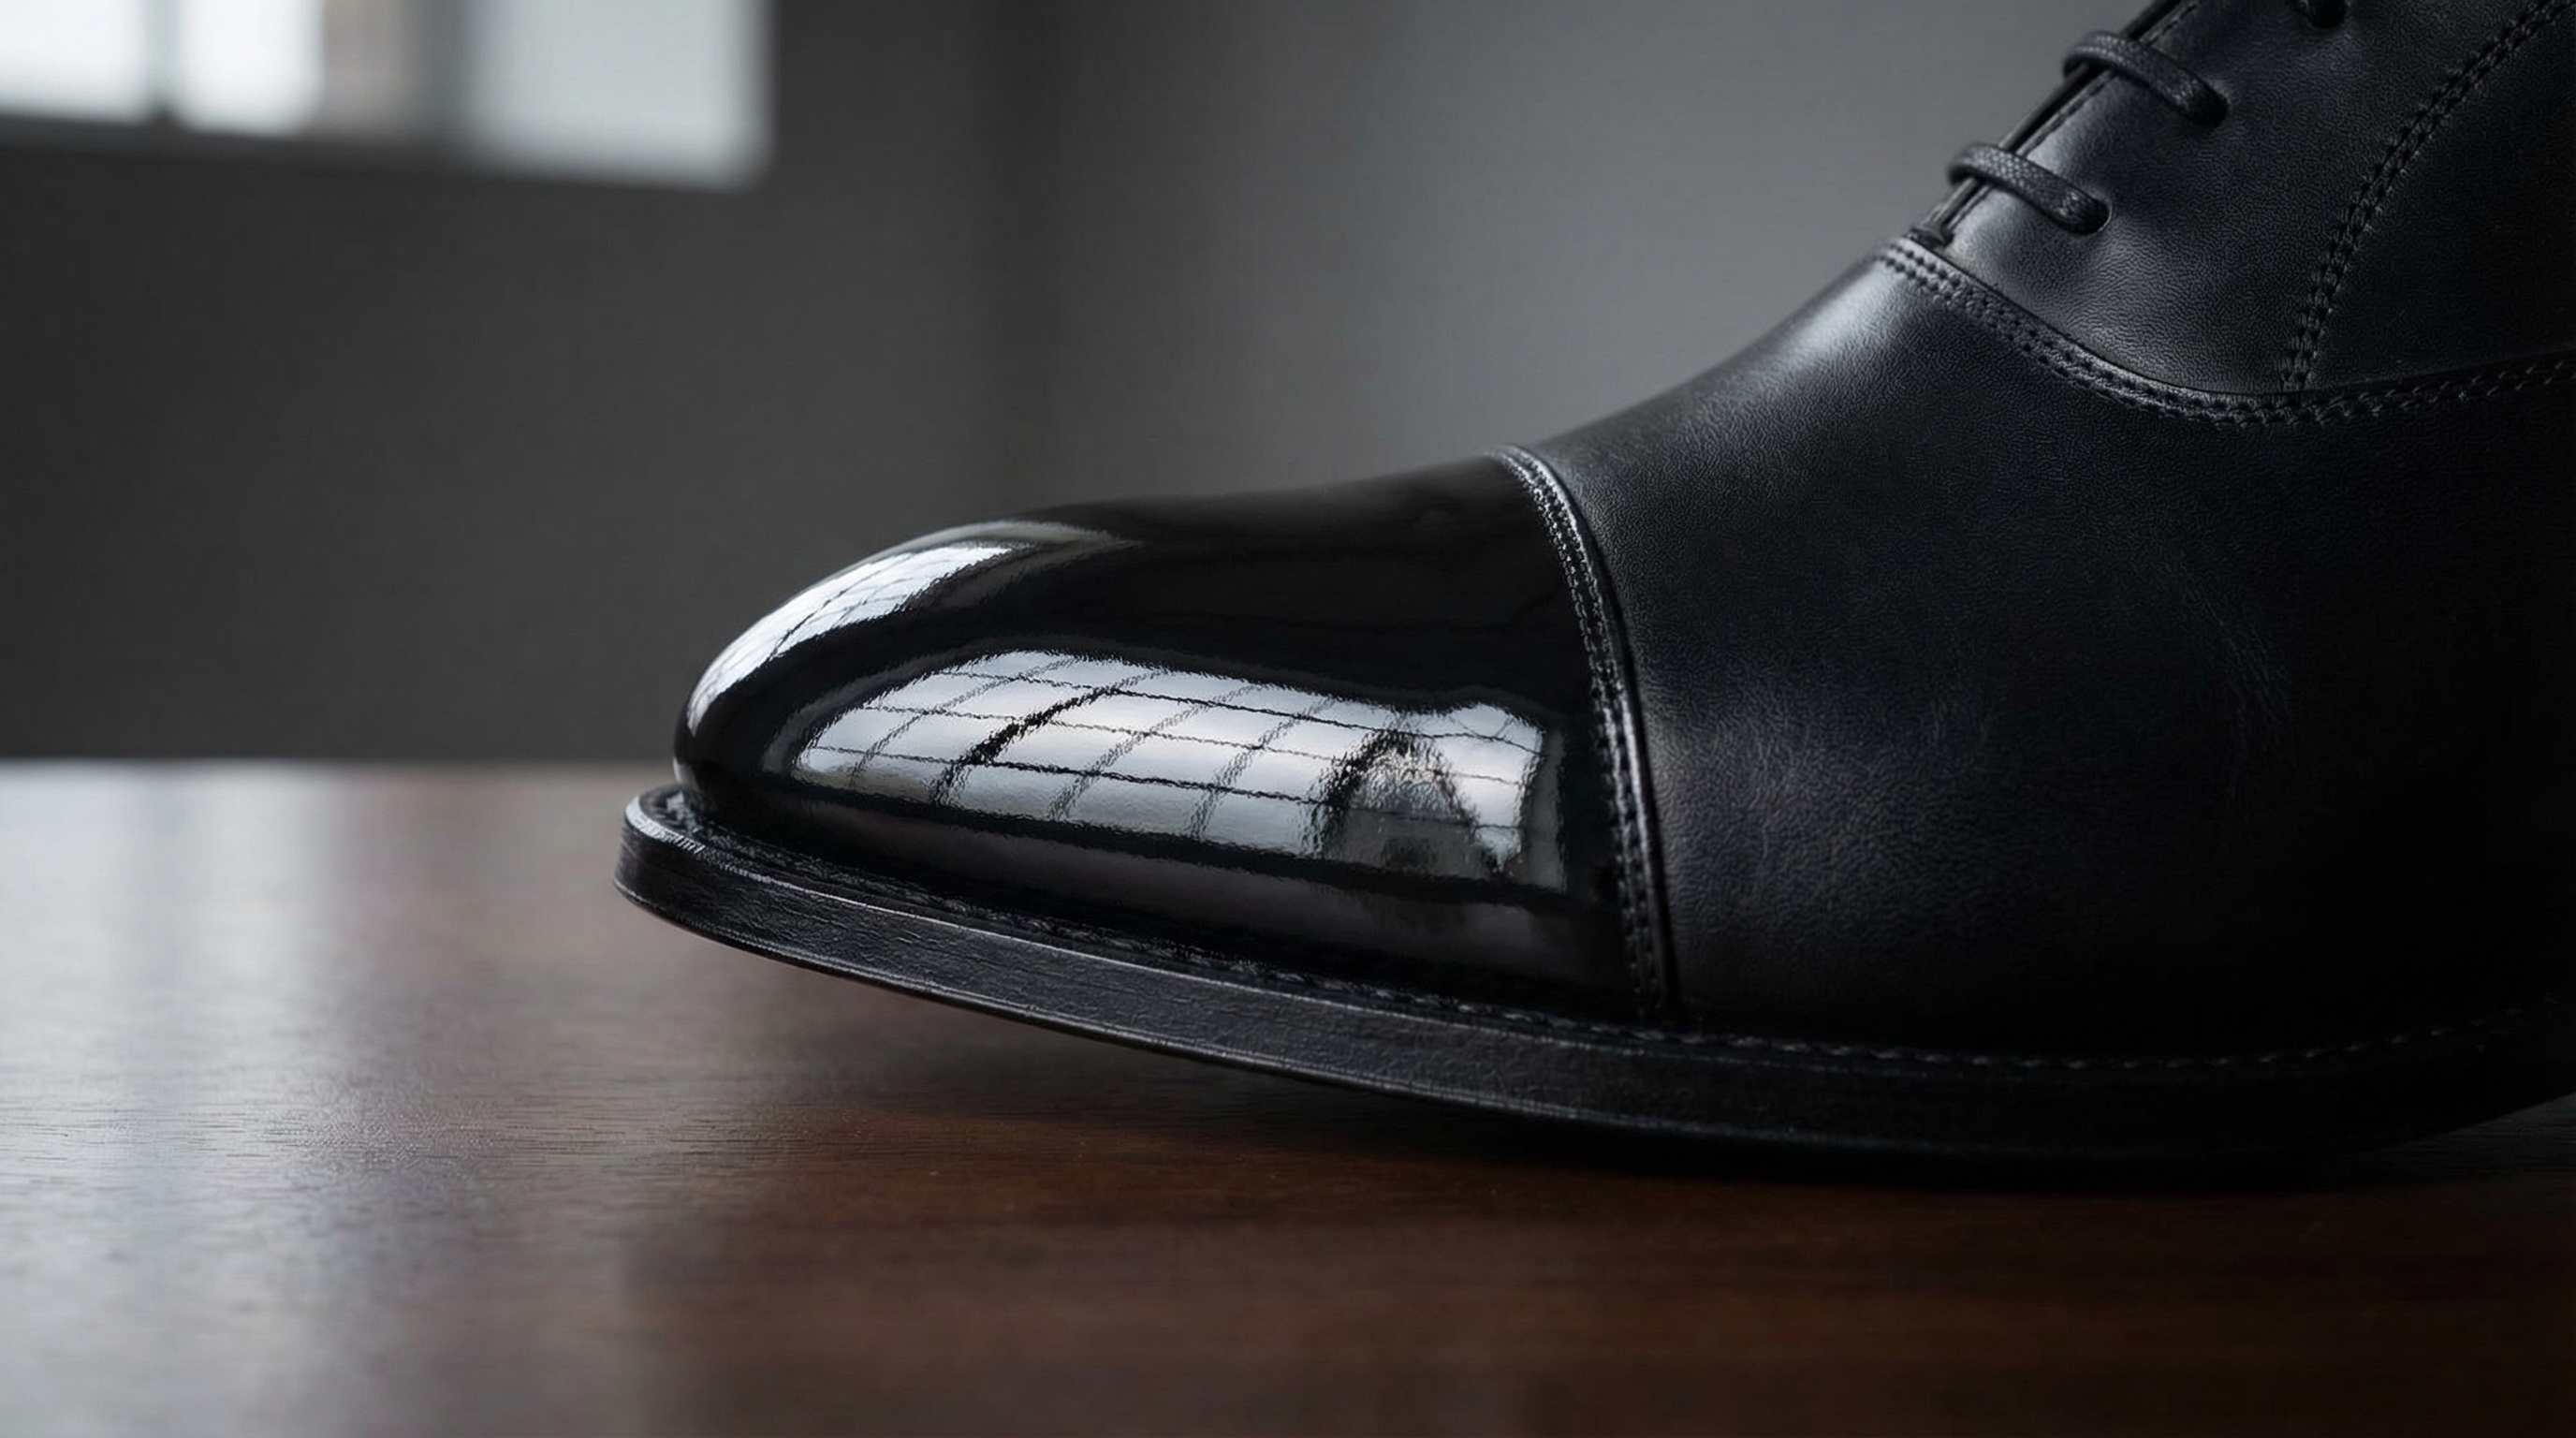
The Technique of Glaçage
For those seeking a “Mirror Shine” or “Glaçage,” the technique becomes much more labor-intensive. This involves applying multiple ultra-thin layers of hard wax to the toe cap and heel counter—the stiff parts of the shoe that don’t flex. You must use a tiny drop of water with each layer of wax to act as a lubricant, slowly filling in the microscopic “valleys” of the leather grain. What’s the real story? A true mirror shine can take upwards of an hour per shoe, but it provides an unparalleled level of water resistance and formality.
| Polish Type | Pigment Level | Finish Type | Water Resistance |
|---|---|---|---|
| Cream Polish | High | Matte to Satin | Low |
| Wax Polish | Low | High Gloss | High |
| Liquid Polish | Variable | Plastic-like | Minimal |
Achieving a mirror finish is as much about patience as it is about chemistry. The water used during the process helps to harden the wax almost instantly, creating a crystalline structure that reflects light perfectly. However, you must avoid applying wax to the “flex points” of the shoe, such as the vamp where the toes bend. If wax is applied here, it will crack into unsightly white flakes as you walk. Focus your artistic efforts on the structured areas for the best visual impact.
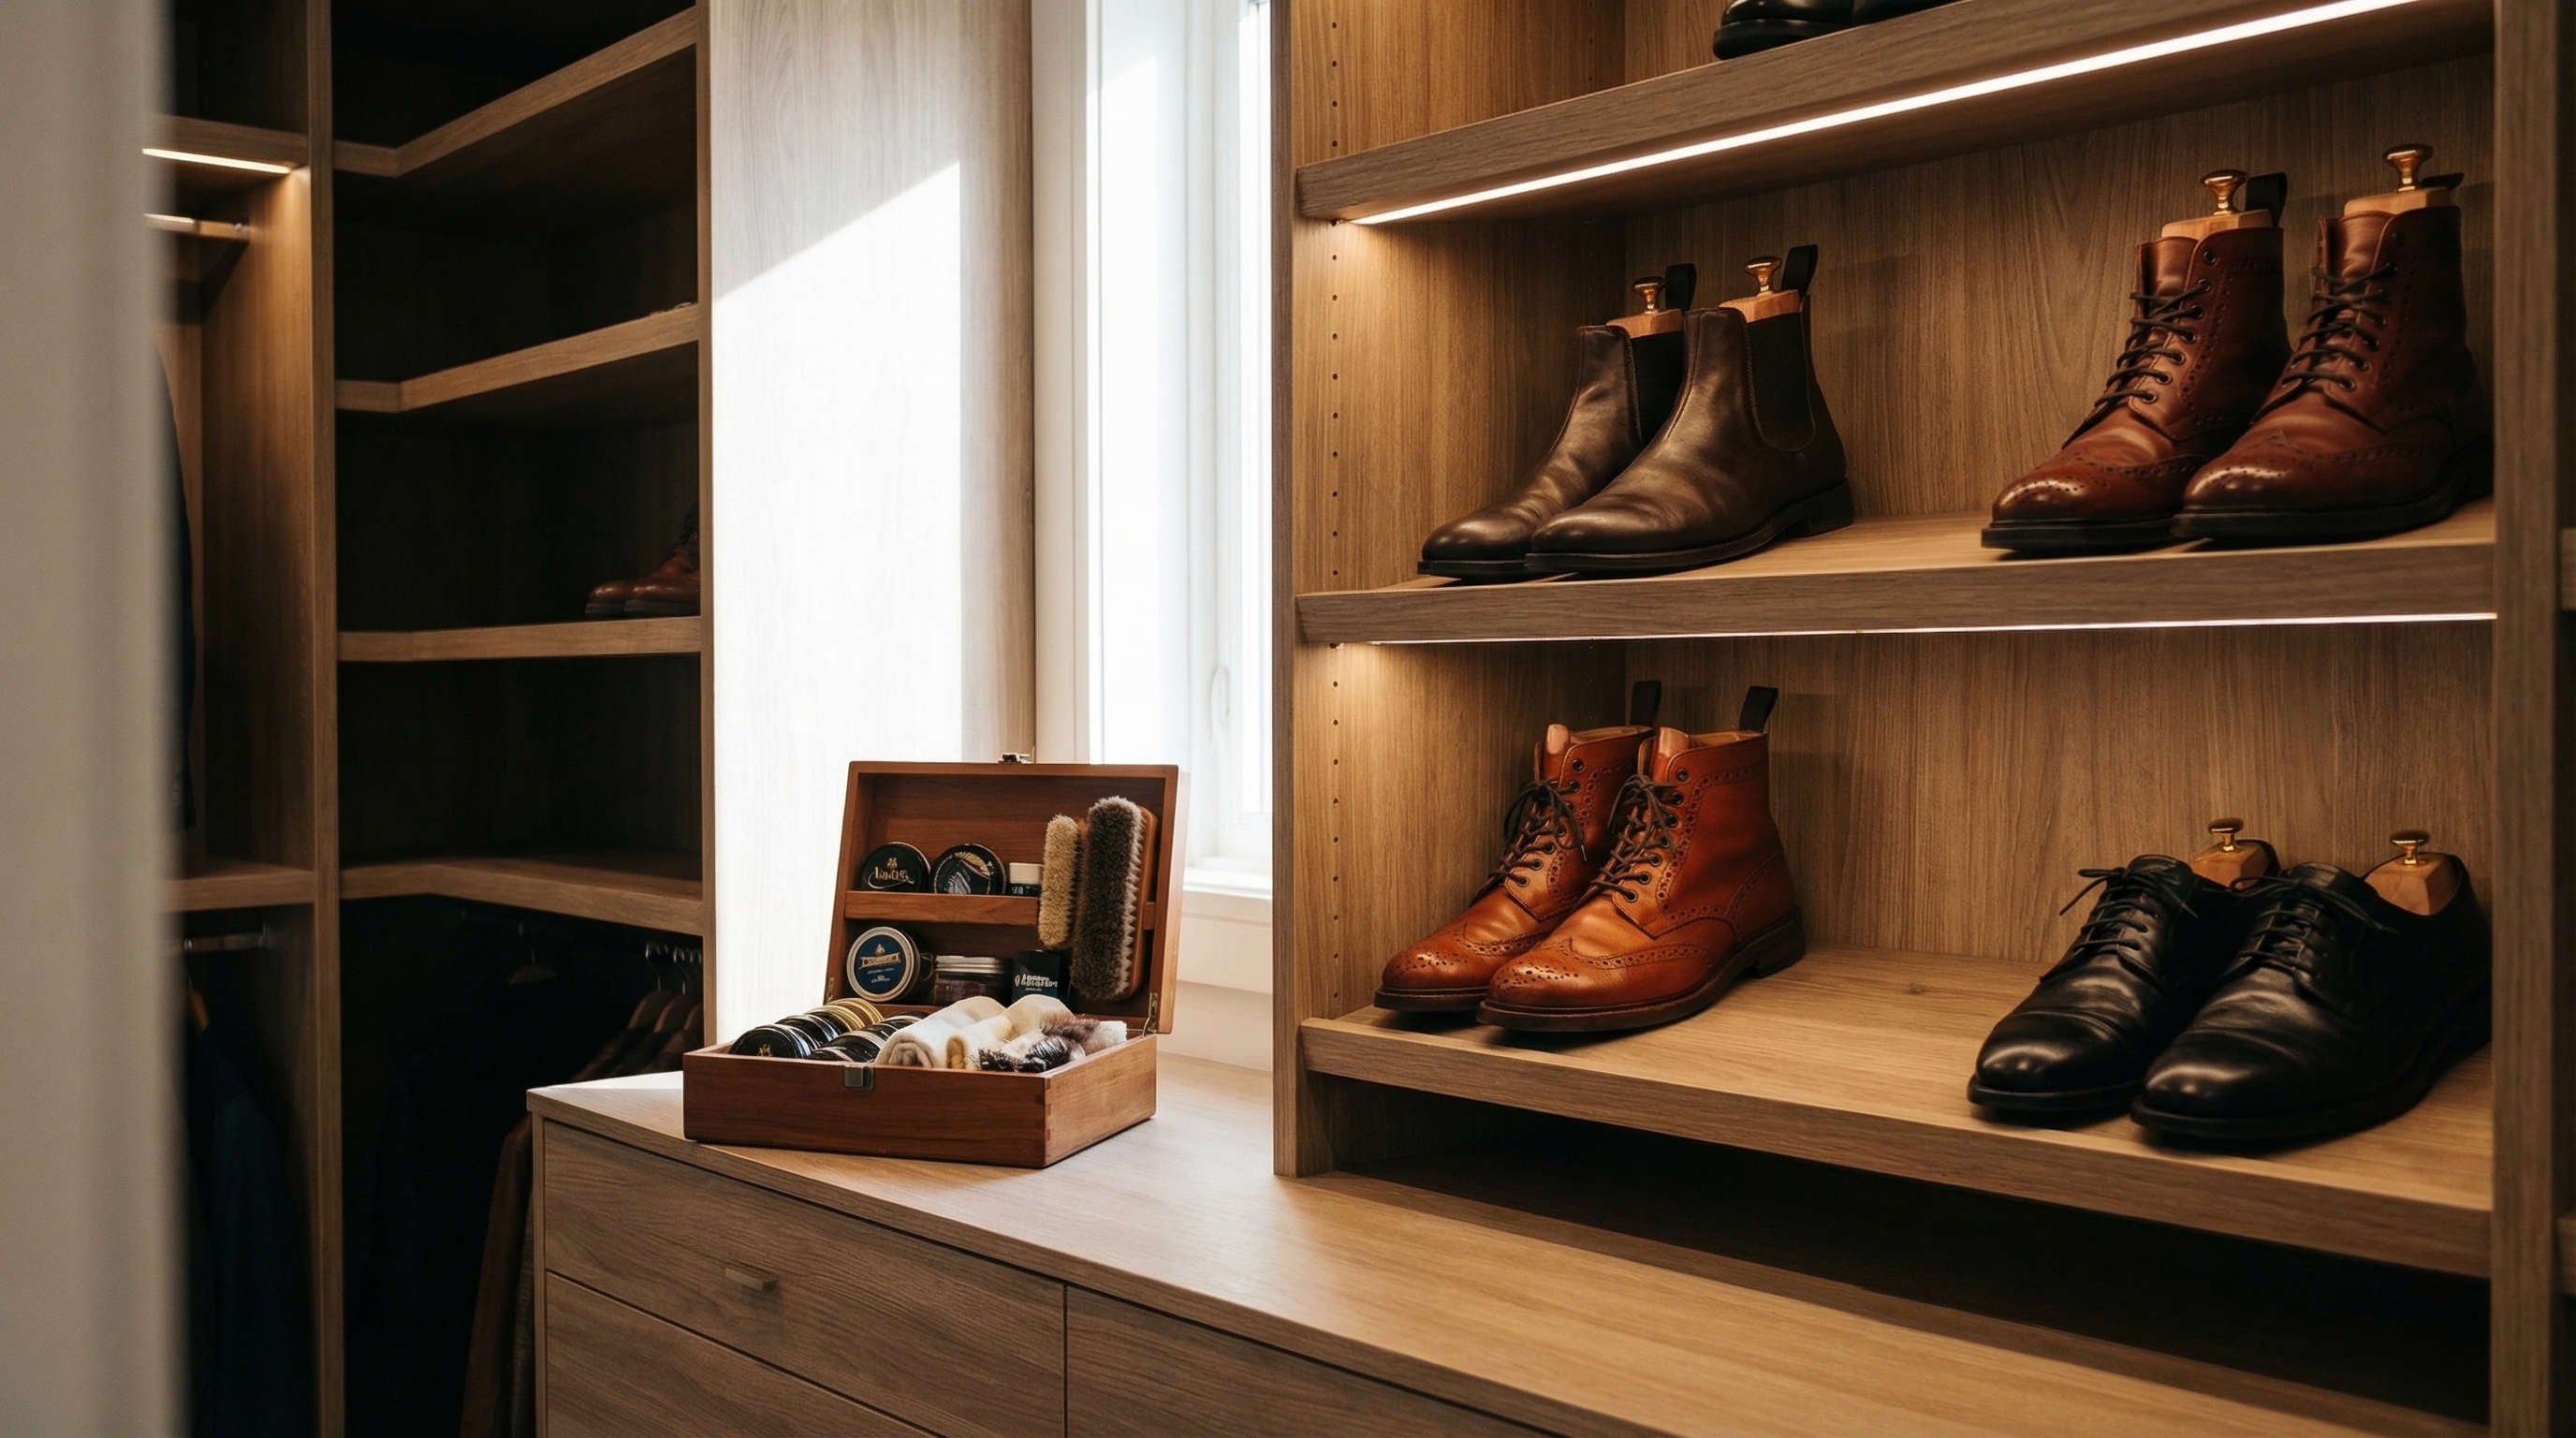
Preservation Tactics: Storage, Rotation, and Moisture Control
The most effective maintenance happens when you aren’t even wearing the shoes. Leather needs time to “rest” and expel the moisture it absorbs from your feet—which can be up to half a cup of perspiration per day. This is why the 24-hour rule is non-negotiable: never wear the same pair of leather shoes two days in a row. By rotating your footwear, you allow the leather to dry completely, preventing the growth of bacteria and the breakdown of the internal liners.
The Critical Role of Cedar Shoe Trees
Storage is equally important for maintaining the structural silhouette of the shoe. As soon as you take your shoes off, insert aromatic cedar shoe trees. The cedar serves two purposes: it provides a physical form to prevent the leather from collapsing and wrinkling, and it naturally absorbs moisture and odors. Without shoe trees, the toe of the shoe will eventually “curl” upward, a permanent deformity that can ruin the aesthetic of even the most expensive footwear.
Proper storage also means keeping your shoes away from direct heat sources like radiators. If your shoes get soaked in a rainstorm, do not use a hairdryer or place them by a fire to speed up the drying process. High heat will cook the leather, making it brittle and prone to cracking almost instantly. Instead, stuff them with newspaper to absorb the bulk of the water and let them dry naturally at room temperature. For more personalized advice on long-term care, you can always get a care guide from our experts.
Building Your Maintenance Routine: A Seasonal Checklist
A consistent routine is the hallmark of a true footwear enthusiast. Rather than waiting for your shoes to look “dirty,” you should follow a scheduled maintenance plan that adjusts for the seasons. In the winter, your focus should be on moisture protection and salt removal, whereas in the summer, you should focus on hydration to combat the drying effects of the sun. By staying ahead of the damage, you ensure that your shoes never reach a point of “no return.”
Long-Term Preservation Habits
What’s the real story? Most owners fail because they treat shoe care as a chore rather than a ritual. If you dedicate just ten minutes every weekend to a quick brush and buff, you will rarely need to perform a “deep clean.” This proactive approach not only saves you money in the long run but also ensures that you are always stepping out with the confidence of a well-groomed professional. For more information on maintaining high-standard footwear, explore our expert consultation services.
Manufacturer Pro Tip: Fat-Liquor Ratios and Stress Testing
At the tannery level, high-performance leather is engineered with a specific fat-liquor ratio of 12% to 18% by weight to withstand a minimum of 50,000 flex cycles. Once this ratio drops below 8% due to environmental exposure, the mechanical stress of walking induces “grain-burst” where the surface layer delaminates. To prevent this, professional maintainers use a digital moisture meter to ensure the hide maintains an internal humidity level between 10% and 12%, preventing the fibers from becoming brittle.
- Weekly: Brush after every wear and wipe down with a damp cloth if exposed to dust.
- Monthly: Perform a light conditioning and apply a fresh coat of cream polish.
- Quarterly: Strip old wax layers, perform a deep clean, and apply a full wax polish.
- Bi-Annually: Inspect the soles and heels for wear and take them to a cobbler for preventative maintenance.
Building this routine into your lifestyle transforms shoe care from a reactive necessity into a proactive art form. By understanding the biological and chemical needs of the leather, you move beyond superficial cleaning into the realm of true preservation. Your shoes are a reflection of your attention to detail and your respect for quality craftsmanship. Treat them with the scientific care they deserve, and they will support you faithfully for decades to come.
Expert FAQ: Debunking Common Leather Care Myths
Can I use olive oil or coconut oil to condition my shoes?
While these oils will technically “soften” the leather, they are not formulated for tanned hides and will eventually go rancid. Rancid oils create a permanent unpleasant odor and can actually rot the collagen fibers from the inside out. Always stick to professional-grade conditioners designed specifically for footwear.
Is it true that toothpaste can fix scuffs on leather?
This is a persistent myth that can actually damage your shoes. Toothpaste contains abrasives and bleaching agents that can strip the finish and change the color of the leather. If you have a scuff, the only proper fix is a pigmented cream polish or a professional touch-up dye.
Do I really need to use a shoehorn?
Absolutely. Using a shoehorn is the simplest way to preserve the heel counter of your shoe. If you “stomp” your foot into your shoe, you will eventually crush the internal stiffener, leading to a collapsed heel that provides no support and looks unsightly. Essentially, a shoehorn is a five-second habit that adds years to your shoe’s life.
How often should I strip the old polish off?
But here is the catch: most people never strip their shoes, leading to a “caked” look that obscures the leather’s natural beauty. You should perform a full strip with a specialized cleaner once every twelve to eighteen months. This allows you to inspect the grain for damage and ensures that your conditioner can actually reach the leather fibers.
Is saddle soap safe for all leather types?
Saddle soap is highly effective for heavy-duty boots but can be too alkaline for delicate dress shoes. For high-end calfskin, a dedicated pH-neutral leather cleaner is a safer choice. If you do use saddle soap, ensure you rinse it thoroughly and follow up with a strong conditioner to balance the pH.
For more information on maintaining high-standard footwear, explore our expert consultation services.