
You step out for an important meeting or a formal evening, and while your suit is tailored to perfection, your eyes drift downward. Your once-pristine leather oxfords are now a map of scuffs, dull patches, and dust. This isn’t just a minor cosmetic flaw; it is a signal of neglect that compromises both your professional image and the structural integrity of your investment. When leather loses its luster, it is often a sign that the hide is dehydrating. Without intervention, this leads to irreversible cracking, deep-set creases, and a permanent loss of form that no amount of late-stage buffing can fix.
The agitation of ruined leather goes beyond aesthetics. High-quality footwear is an investment in your personal brand and comfort. Allowing salt, dirt, and dryness to persist effectively “suffocates” the leather, causing the fibers to become brittle and eventually snap under the mechanical stress of walking. The financial cost of replacing premium footwear every two years—rather than maintaining a single pair for a decade—is a direct result of ignoring basic maintenance. You deserve a wardrobe that lasts, and that longevity begins with the ritual of the shine.
Fortunately, the solution is not a mystery known only to professional valets. By mastering the art of the polish, you effectively “reset” the leather’s condition, sealing in essential moisture while creating a resilient barrier against the elements. This guide provides the definitive roadmap to transforming your footwear from neglected relics into a refined reflection of your standards. Whether you are aiming for a soft satin glow or a high-gloss mirror finish, the principles of leather science remain the same.
To polish shoes effectively, you must clean the surface, apply a nourishing cream for color, and finish with a hard wax to create a protective, high-gloss shine.
- Clean: Remove laces and brush away all surface debris.
- Condition: Apply a leather renovator to restore essential oils.
- Polish: Layer cream polish for color and wax for protection.
- Buff: Use a horsehair brush to create friction and heat.
- Finish: Wipe with a cotton cloth for a final, streak-free glow.
Essential Tools: Building Your Professional Shoe Care Kit
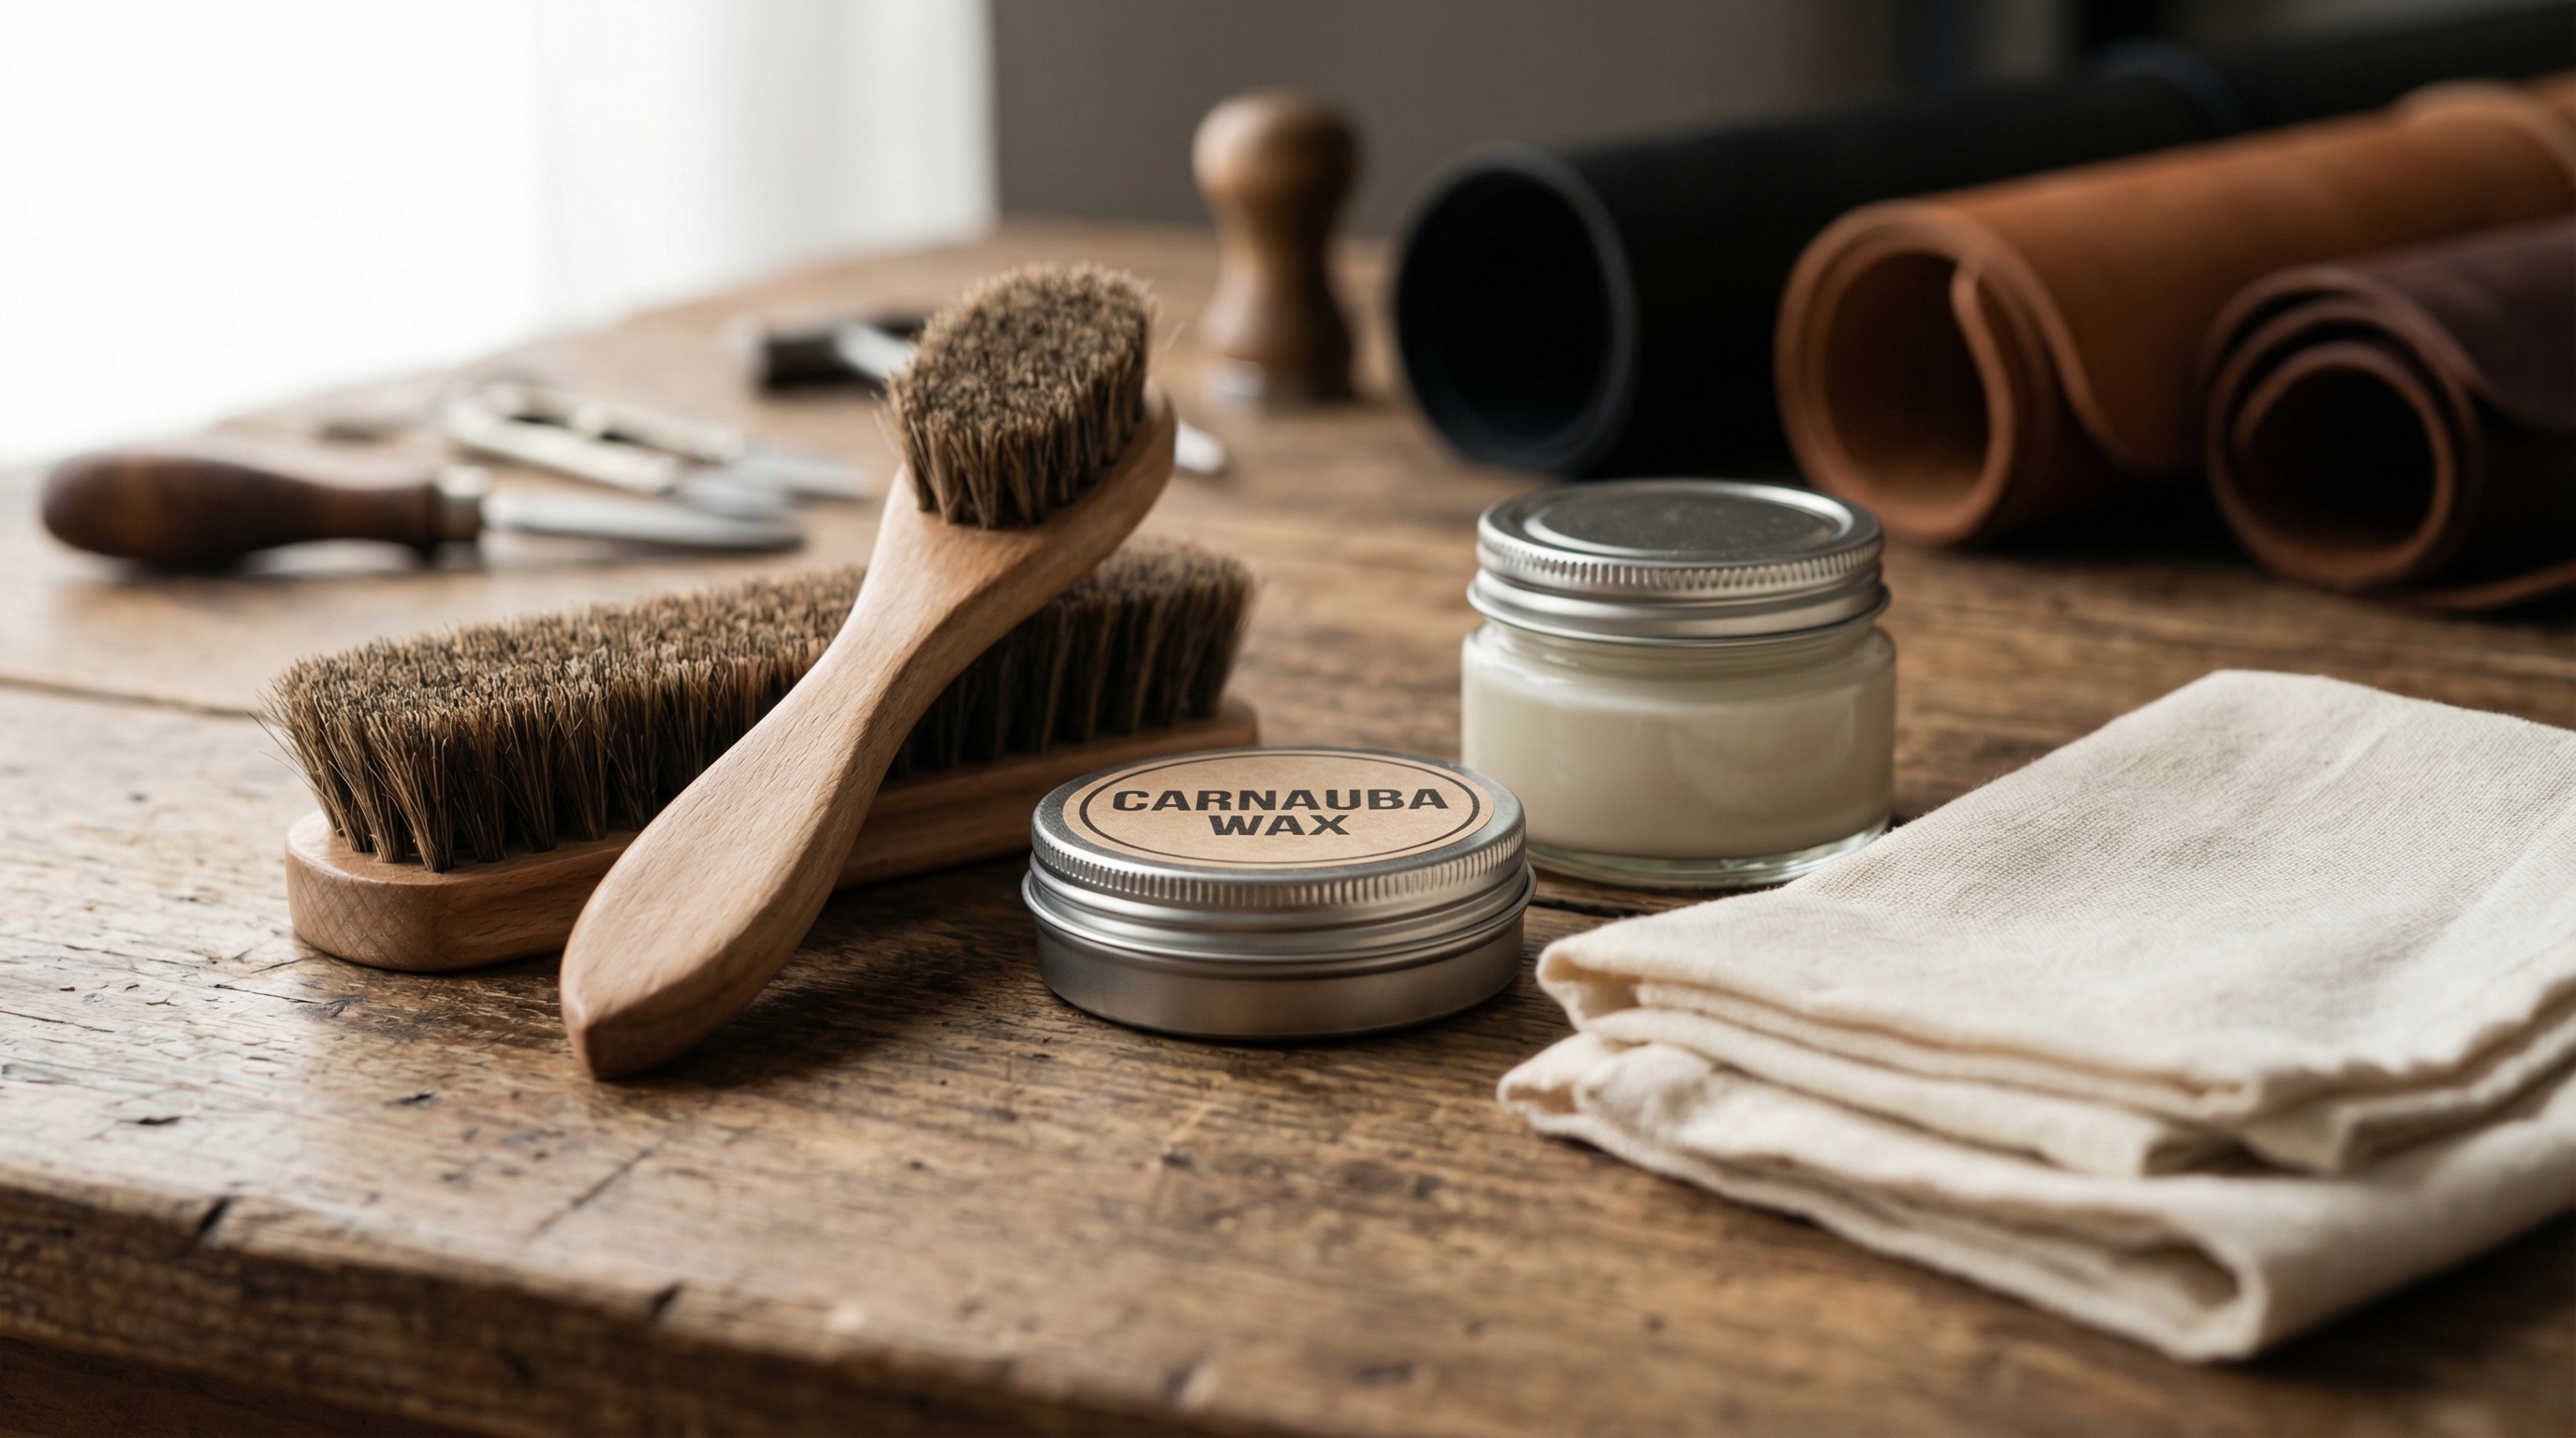
Before you begin the process, you must understand that the quality of your tools dictates the longevity of the results. Using cheap, silicone-based “instant shine” products is perhaps the most common mistake made by modern consumers. These products create a plastic-like film that prevents the leather from breathing, eventually causing the leather to suffocate and rot from the inside out. A professional kit focuses on natural ingredients and specialized applicators designed for precision and leather health.
The Foundation: Horsehair Brushes
The most critical component is a high-quality horsehair brush. Horsehair is the gold standard because it is soft enough not to scratch the leather’s grain but firm enough to create the friction necessary to melt wax into the pores. You should ideally have two: one for cleaning (removing dust) and a dedicated, cleaner one for the final buffing. For those with a professional shoe manufacturing background, the choice of brush density is a key metric in achieving a uniform finish.
Applicators and Cloths
You will also need “dauber” brushes—small, circular brushes with handles—for applying polish into hard-to-reach areas like the welt (where the upper meets the sole) and the tongue. For the actual polishing, a 100% cotton cloth is indispensable. Many enthusiasts prefer an old t-shirt, but a dedicated chamois or high-thread-count cotton flannel will provide a more even application without leaving lint behind.
Product Selection: Creams vs. Waxes
Your chemical arsenal should include a leather cleaner (saddle soap or a pH-balanced liquid), a pigmented cream polish, and a hard carnauba wax. Pigmented creams are essential for restoring the “depth” of the leather’s color and filling in small scuffs. Hard waxes, on the other hand, provide the hydrophobic barrier and the high-gloss finish.
Table 1: Essential Brush Type Comparison
| Brush Type | Bristle Material | Primary Function | Why It Matters |
|---|---|---|---|
| Cleaning Brush | Stiff Horsehair/Pig Hair | Removing dried mud and dust | Prevents scratching during polishing |
| Dauber Brush | Soft Horsehair | Applying cream to the welt/seams | Reaches areas a cloth cannot |
| Buffing Brush | Long, Dense Horsehair | Generating heat via friction | Melts wax for a smooth finish |
| Suede Brush | Brass or Crepe | Raising the nap of suede | Standard brushes will ruin suede texture |
Preparing Your Shoes: Stripping Debris and Setting the Last
Preparation is the step where most amateurs fail, yet it is the most vital for achieving a professional finish. If you apply polish over a layer of dust, you are essentially creating a sandpaper paste that will abrade the leather as you buff. You must start with a clean canvas to ensure the polish can bond directly with the leather fibers rather than sitting on top of a layer of grime.
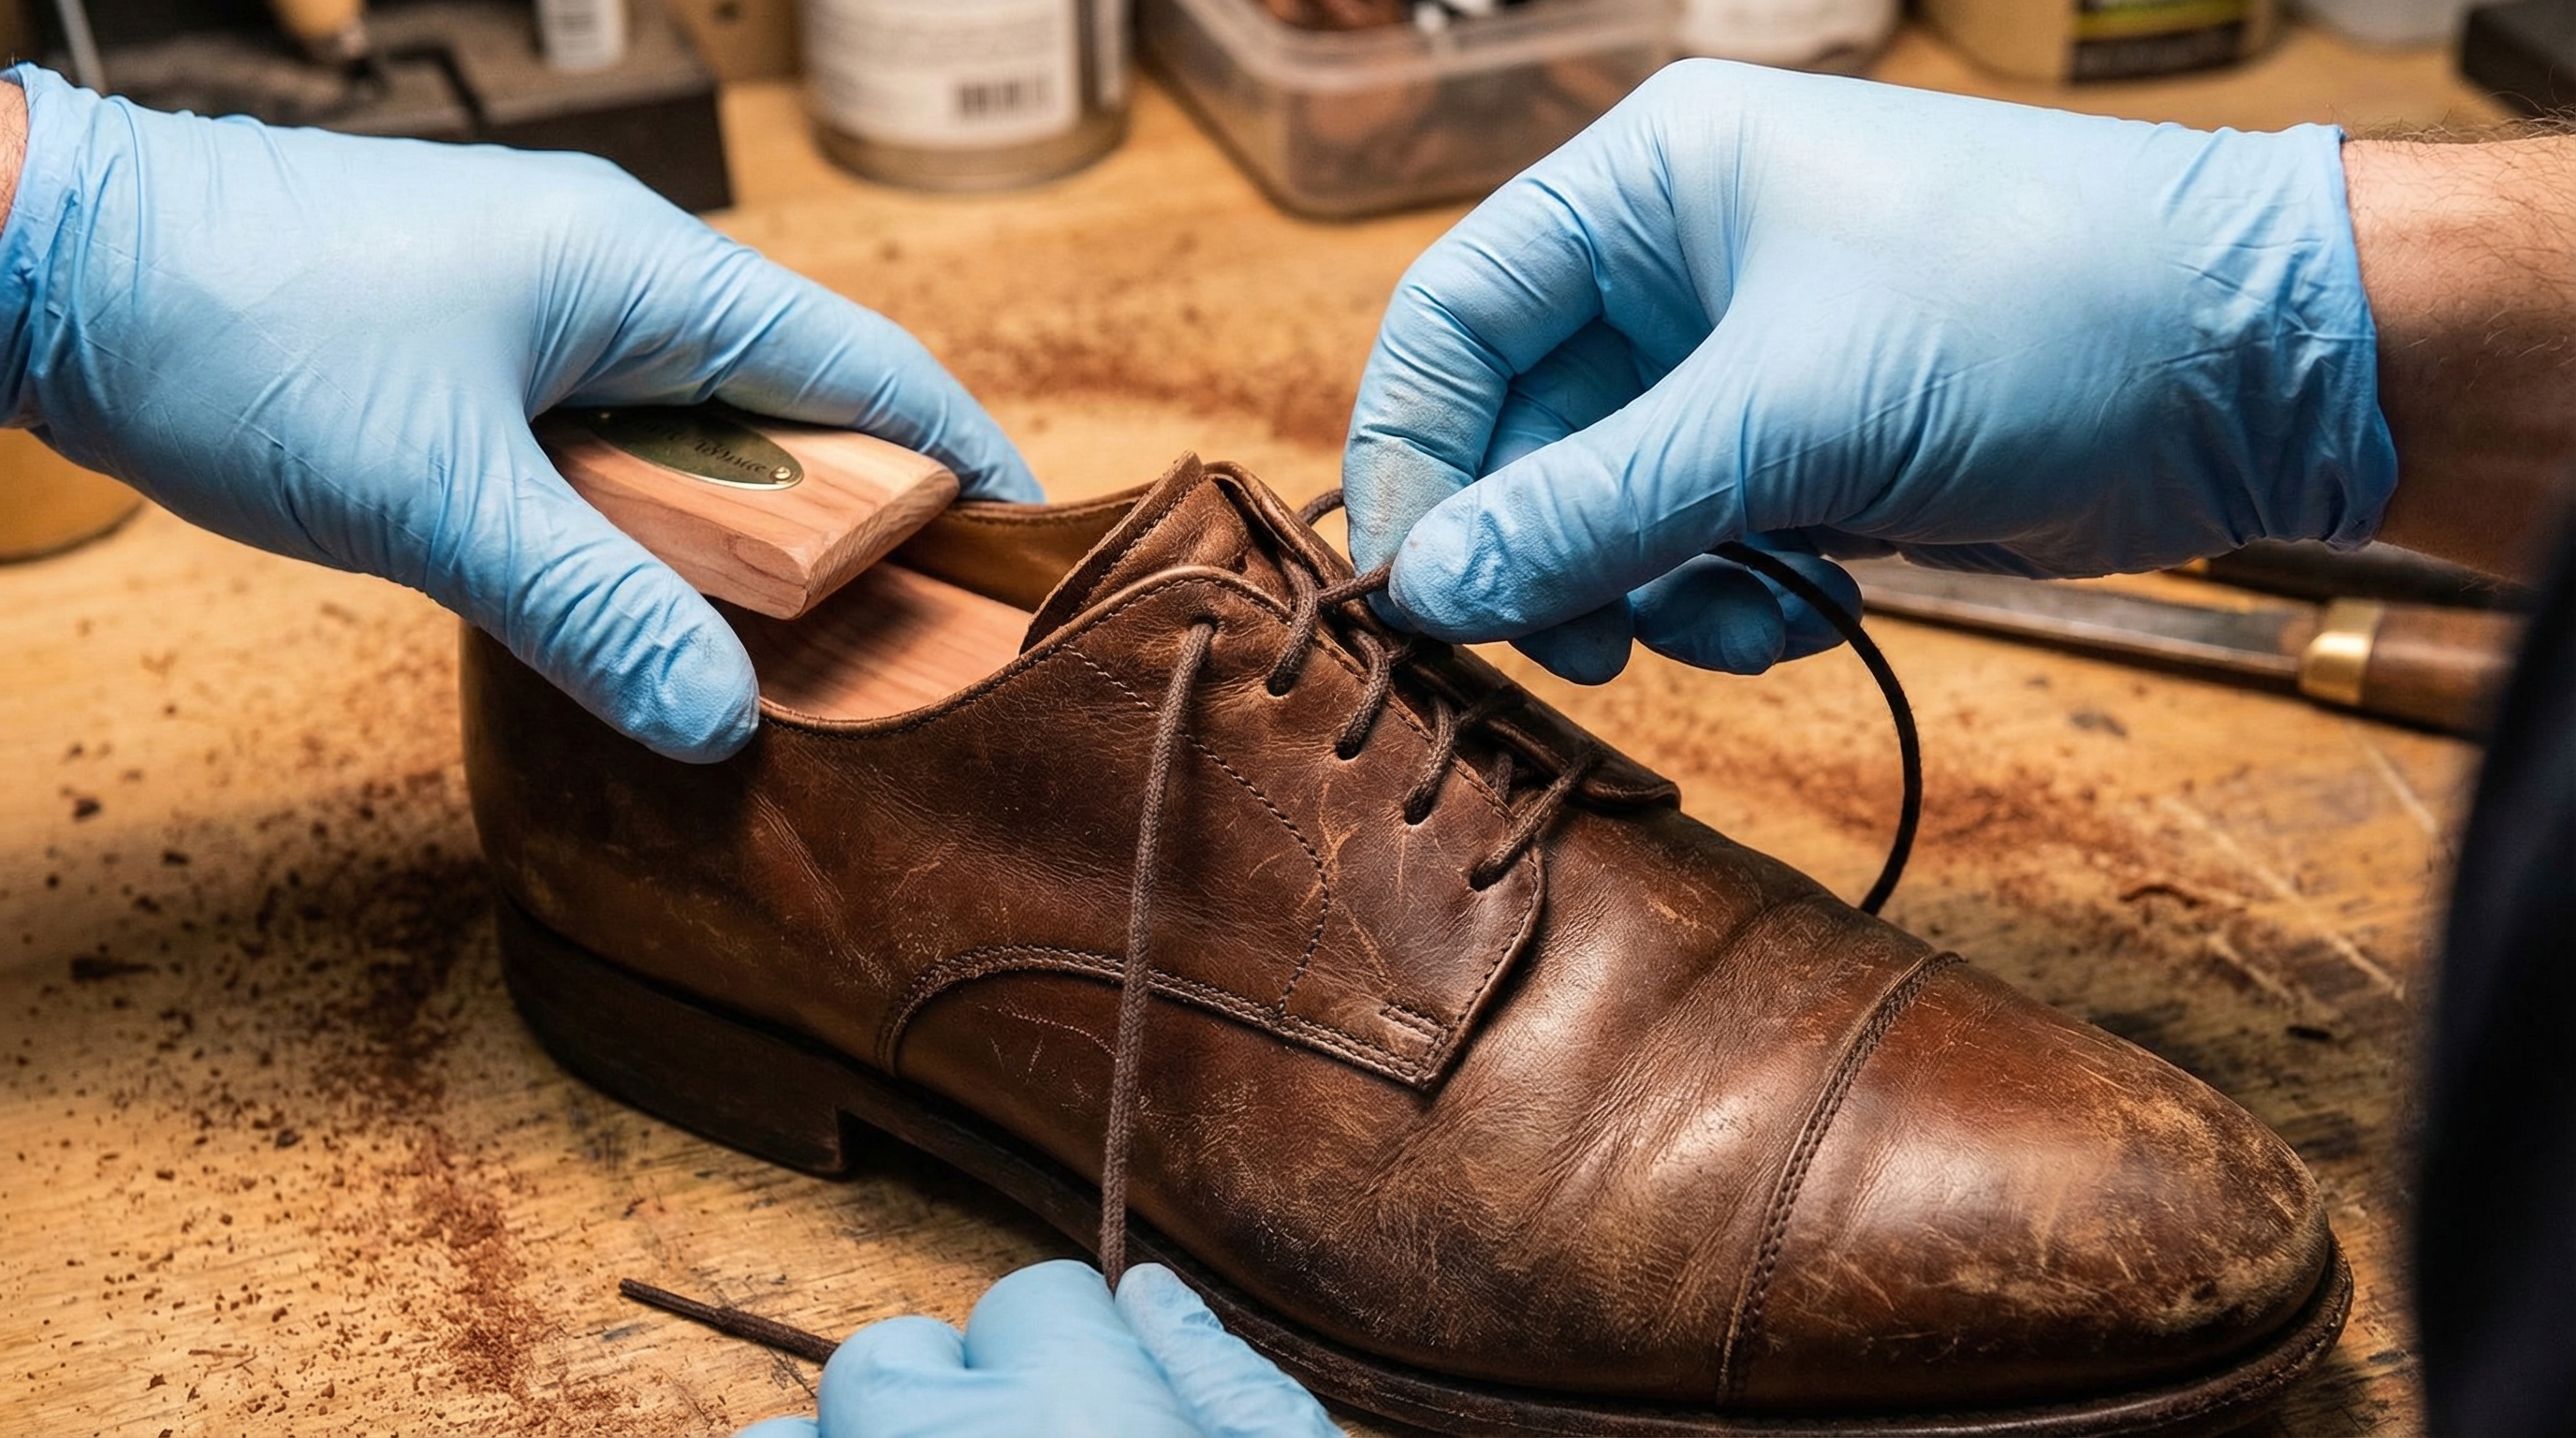
Removing Obstructions and Inserting Trees
First, remove the shoelaces entirely. This prevents polish from staining the laces and ensures you can reach the leather hidden underneath the eyelets and the tongue. Next, insert high-quality cedar shoe trees. These act as a “last,” providing internal resistance so that the shoe maintains its shape during the heavy pressure of buffing. Furthermore, cedar trees absorb residual moisture and smooth out creases in the vamp, allowing you to clean the deepest recesses of the leather.
The Deep Clean and Drying Process
Use your cleaning horsehair brush to vigorously remove all loose dirt from the upper and the welt. If the shoes have significant wax buildup or salt stains from winter wear, use a damp cloth and a specialized leather cleaner to strip the surface back to its natural state. Wait, there’s more: it is vital to let the shoes dry naturally at room temperature. But here’s the catch: never use a hairdryer or place them near a heater, as intense heat will cause the leather to dry out and crack instantly.
Manufacturer Pro Tip: The Science of Leather Pores
Leather is essentially skin with its pores still intact. Just as your skin requires hydration, leather needs to “breathe” to remain resilient. In professional footwear industry expertise, we ensure that the tanning process leaves the pores open. When polishing, avoid over-saturating the leather with heavy waxes, as this can trap moisture inside, leading to mold or fiber rot.
Step-by-Step Polishing: A Masterclass in Application
Now that your shoes are clean and dry, you are ready to apply the products that will restore their character. This phase requires a gentle touch and a focus on thin, even layers. Many people think that applying a thick layer of polish will yield a better shine, but the opposite is true. Thick layers take forever to dry and often result in a “cakey” finish that cracks as soon as you walk.
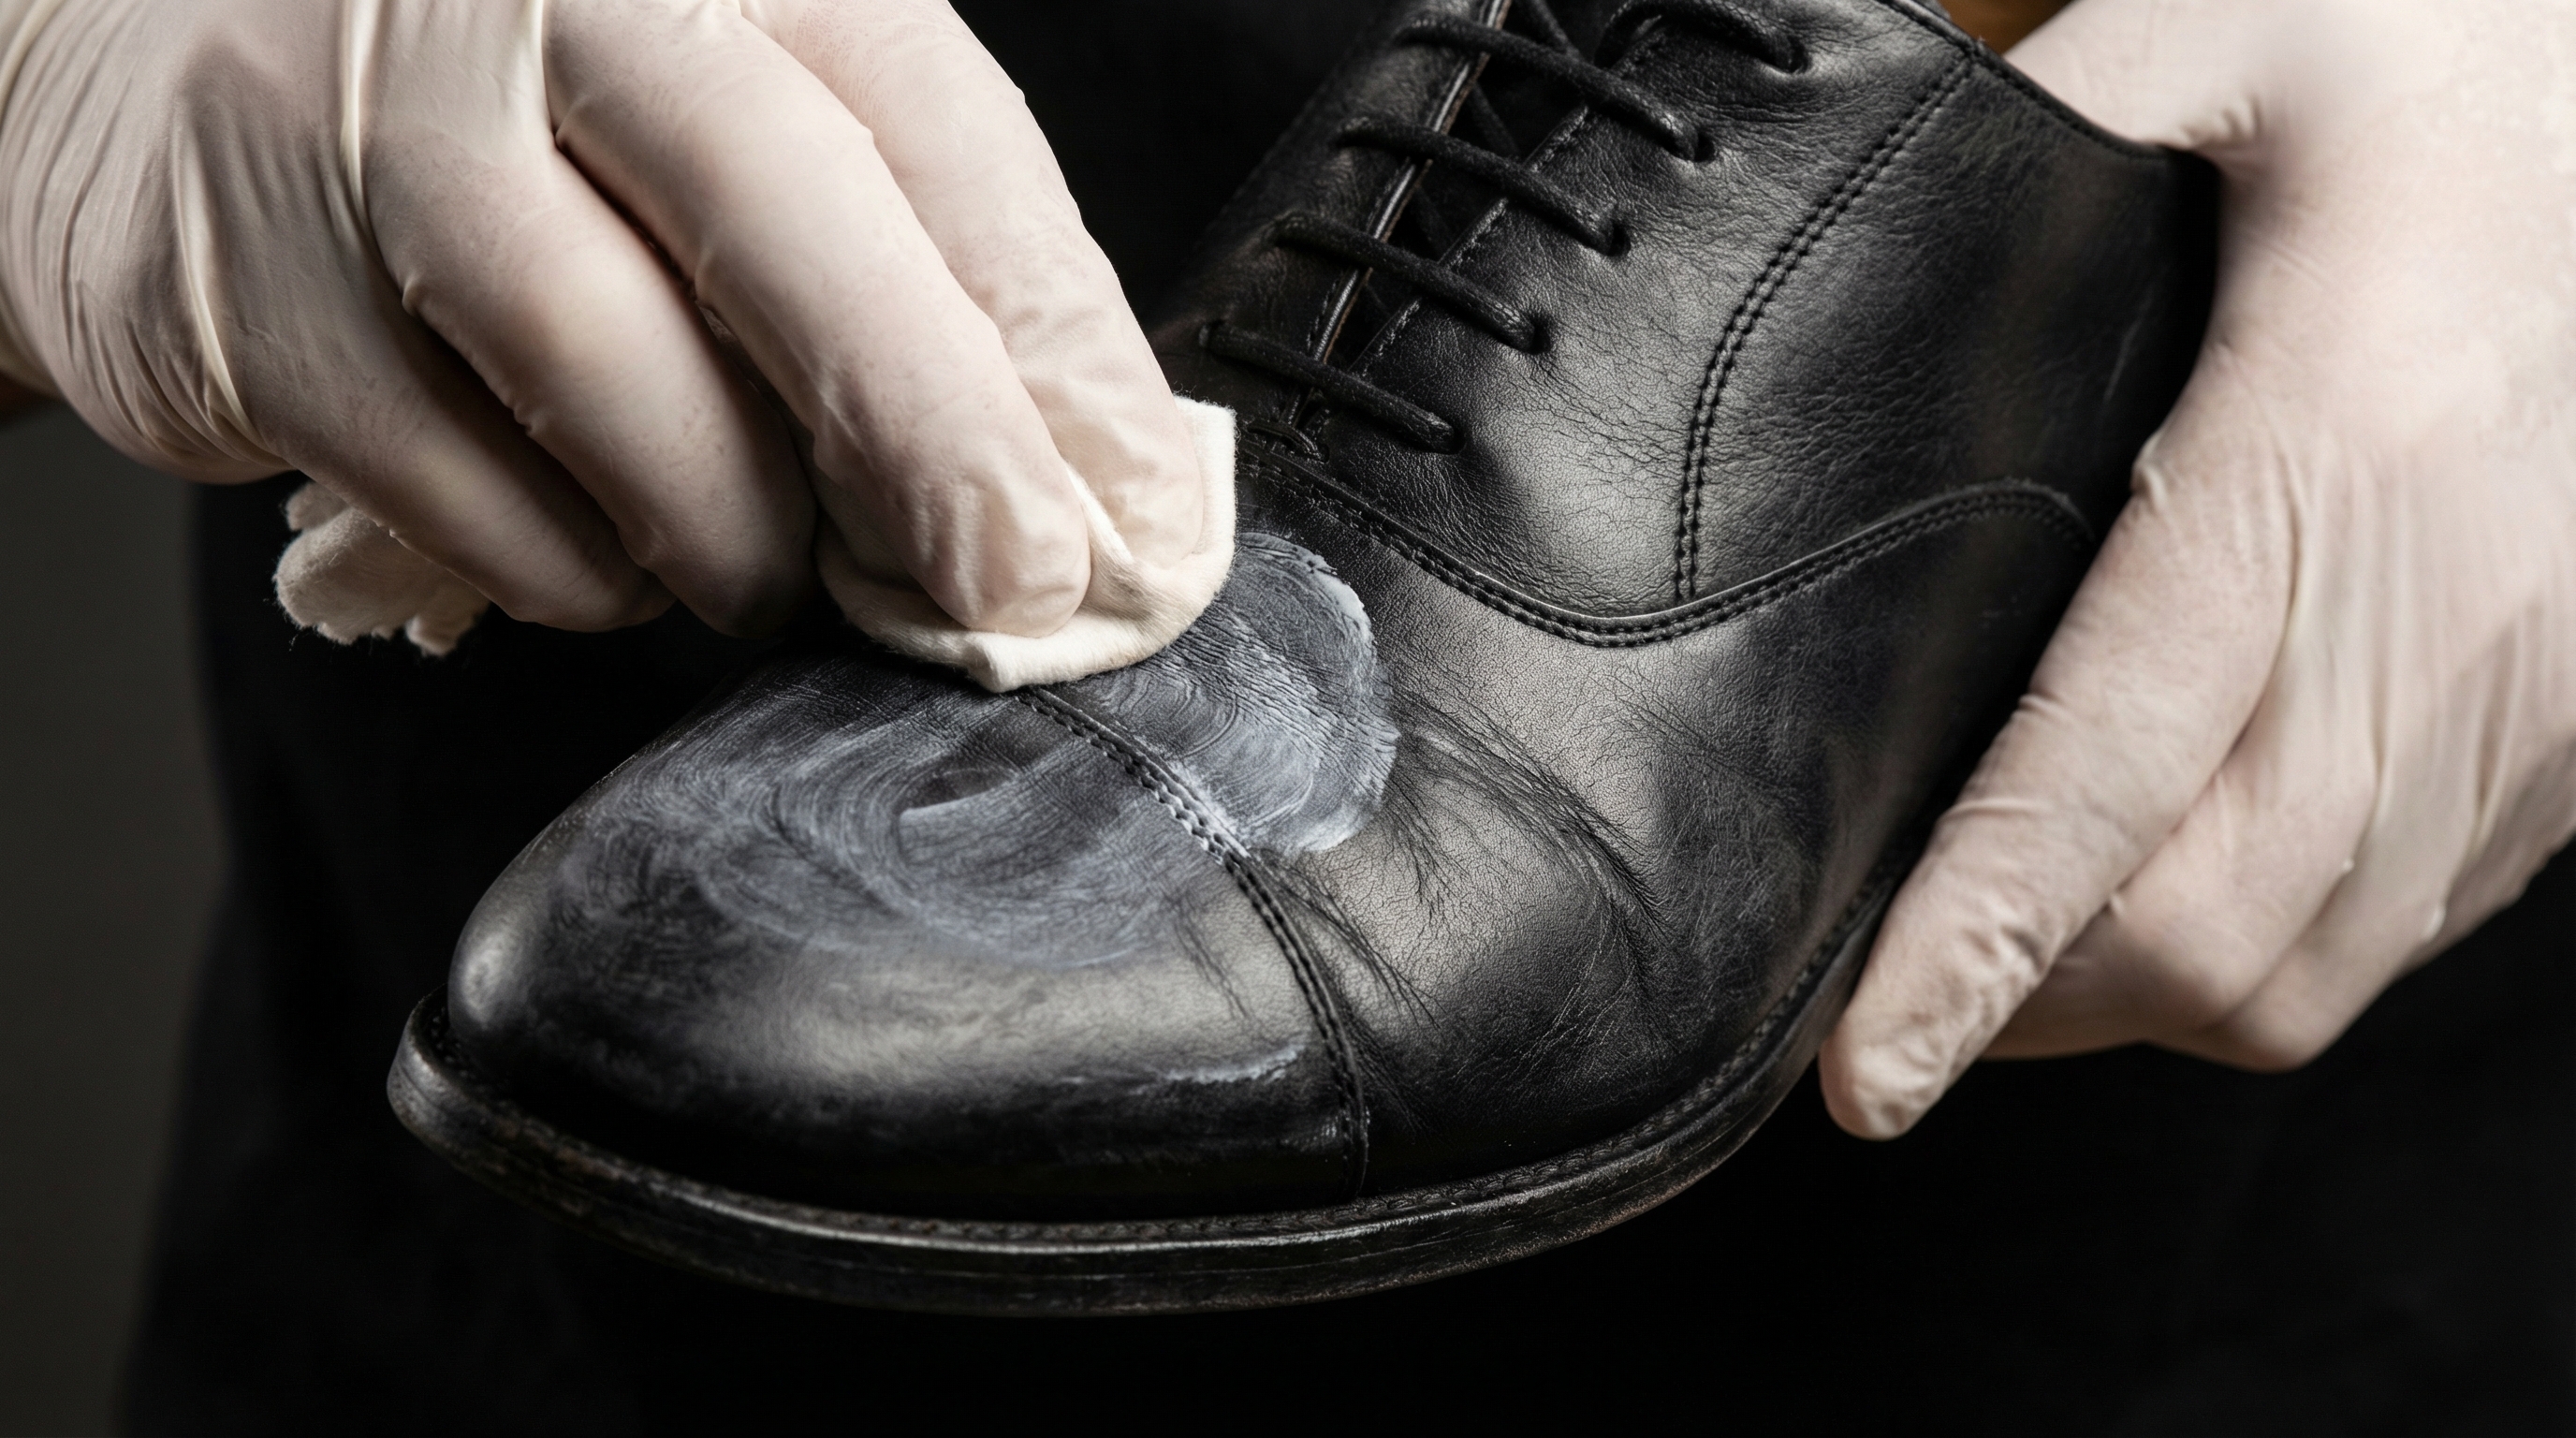
Conditioning and Pigmentation
Start by applying a small amount of leather conditioner or cream polish. Using a cotton cloth wrapped tightly around your index and middle fingers, work the product into the leather using small, circular motions. The goal is to nourish the fibers and restore the color. Pay extra attention to the “vamp” (the area where the shoe creases), as this part of the shoe experiences the most mechanical stress and needs the most hydration. If you are handling custom footwear production, this conditioning step is where the quality of the original hide truly shines through.
Drying and Initial Set
After applying the cream, allow the shoes to sit for at least 15 to 20 minutes. This gives the oils time to penetrate the pores and the pigments time to set. What’s the real story with drying times? If you buff too early, you are simply wiping the product off the shoe. If you wait too long, the wax can become too hard to manipulate easily. The “sweet spot” is when the surface looks dull, hazy, and feels slightly tacky to the touch.
Mastering the Buff: Friction, Heat, and Depth of Shine
Buffing is where the physical transformation occurs. It is the process of using friction to generate heat, which melts the microscopic particles of wax and spreads them into a perfectly flat, reflective surface. Without heat, the wax remains uneven, scattering light and appearing dull. This step requires physical effort and a consistent rhythm to achieve the desired results.
The High-Speed Horsehair Buff
Take your large buffing brush and use long, fast strokes across the entire surface of the shoe. You are not trying to “scrub” the leather; rather, you are trying to create a high-speed glide. The sound of the brush should be a consistent “zip-zip” as it passes over the leather. Continue this process until the hazy look disappears and a soft, natural glow begins to emerge. This is the foundation of premium footwear solutions that last for decades.
The Micro-Buffing Technique
For a more refined finish, follow the brush buffing with a clean section of your cotton cloth. Wrap the cloth tightly and quickly “buff” the toe cap and heel using side-to-side motions. This further levels the wax and removes any tiny stray hairs left by the brush. At this point, you should have a solid “business shine” that is suitable for any professional environment.
Cream vs. Wax: The Science of Nourishment vs. Protection
Understanding the chemical difference between cream and wax is the hallmark of a true shoe care expert. These products are not interchangeable; they serve distinct functions in the maintenance lifecycle. Creams are typically water or oil-based and contain a high concentration of pigments. Waxes, conversely, are solvent-based and utilize hard materials like Carnauba or Beeswax to provide a physical shield.
When to Use Cream
Cream should be your primary tool for routine maintenance. Because of its liquid-like consistency, it can carry pigments deep into the leather’s grain. This is why cream is so effective at hiding scuffs and “refreshing” the color of a faded shoe. It keeps the leather soft and prevents it from becoming brittle. If your shoes are made by a top-tier private label shoe manufacturer, a good cream will preserve the natural texture of the hide.
When to Use Wax
Wax is the “finishing” step. It does not penetrate deeply into the leather; instead, it sits on the surface to provide a hydrophobic layer. If you live in a rainy climate, wax is your best friend. It also provides the “mirror shine” capability that creams cannot achieve. However, you should only apply wax to the non-flexing parts of the shoe, like the toe cap and the heel counter, to prevent the wax from cracking.
Table 2: Polish Type Guide
| Feature | Cream Polish | Wax Polish |
|---|---|---|
| Primary Base | Water/Oil | Solvent/Wax |
| Nourishment | High (Deep penetration) | Low (Surface level) |
| Pigment Depth | Excellent for scuffs | Moderate |
| Shine Level | Natural/Satin | High Gloss/Mirror |
| Protection | Low | High (Waterproof) |
| Flexibility | Remains Supple | Can Crack on Creases |
The Physics of Failure: Avoiding Mistakes That Ruin Leather
Even with the best intentions, it is easy to inadvertently damage your footwear by applying incorrect techniques. Leather is remarkably durable, but it is also sensitive to chemical imbalances and mechanical overstress. Understanding the “physics of failure” in shoe care allows you to avoid the most common pitfalls.
The Over-Polishing Trap
It sounds counterintuitive, but you can polish your shoes too often. Here’s the kicker: every time you add a layer of wax without removing the old one, you are building up a “crust” that can eventually suffocate the leather. This buildup becomes brittle and can trap dirt against the surface. Professionals suggest stripping the old wax every 5 to 10 polishes using a mild cleaner to prevent this accumulation and maintain footwear craftsmanship integrity.
Dangerous Chemicals and Household Hacks
Never use household cleaners, olive oil, or petroleum-based products on your leather shoes. Household soaps are often too alkaline, which disrupts the natural pH of the leather, causing it to become stiff and dry. Furthermore, “instant shine” sponges often contain silicones that create a permanent, non-breathable seal. Once this seal is established, it is nearly impossible to nourish the leather again, leading to certain cracking. If you are unsure about a product, it is always wise to contact our experts for guidance.
Advanced Techniques: Achieving a Mirror Shine (Glaçage)
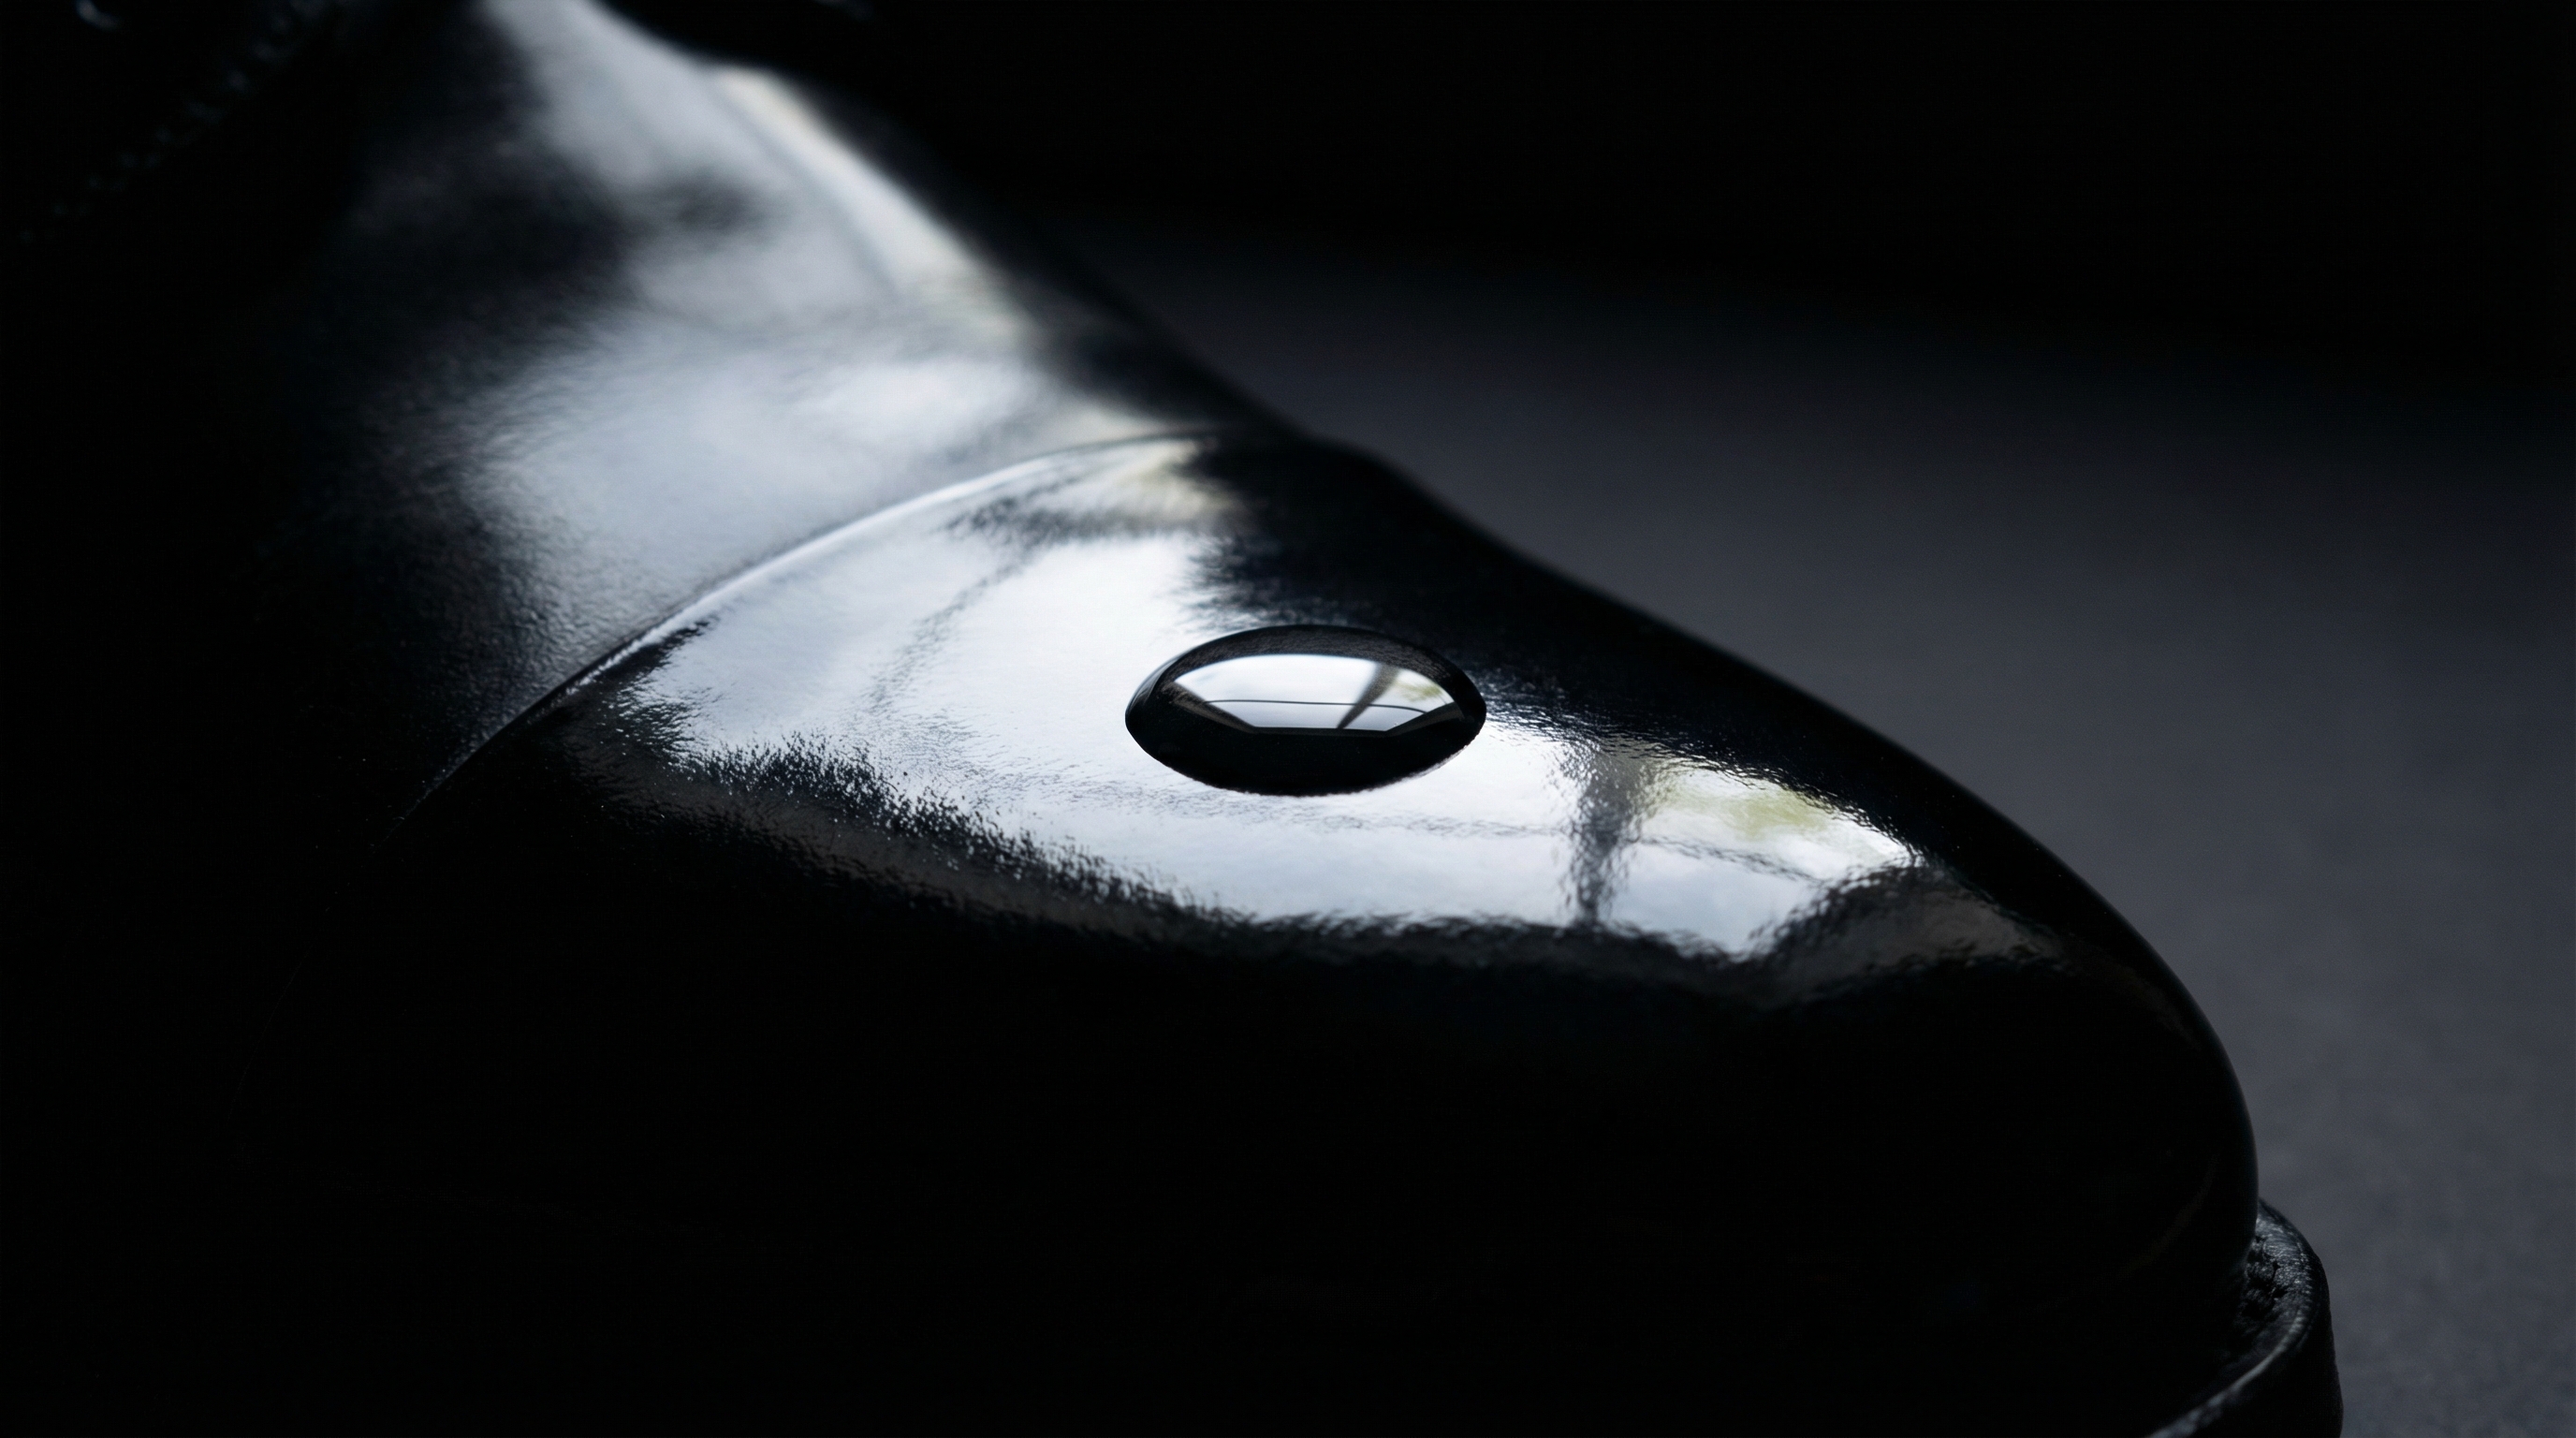
For those who want to reach the pinnacle of shoe care, the “Mirror Shine” or Glaçage is the ultimate technique. This involves creating a layer of wax so smooth that it reflects light like glass. It is a test of patience and precision, often taking 30 to 60 minutes per shoe. This finish is traditionally reserved for the toe cap, where the leather does not flex.
The Water and Wax Equilibrium
The secret to a mirror shine is the interaction between wax and tiny droplets of water. Start by applying several thin layers of hard wax to the toe cap, buffing each one lightly. Then, apply a single drop of cold water to the leather. Using a very soft cotton cloth, gently “whisper” a tiny amount of wax over the water in circular motions. The water acts as a lubricant, allowing the wax to settle into a perfectly flat plane.
The “Spit-Shine” Myth and Reality
While the term “spit-shine” is famous, modern enthusiasts prefer distilled water. The goal is to fill in the microscopic “valleys” of the leather grain until the surface is as flat as a mirror. It gets better: once you achieve a mirror shine, it is incredibly easy to maintain with just a quick buff and a single drop of water. However, remember that this shine is brittle; if you apply it to the flexing parts of the shoe, it will crack into white, flaky shards.
Manufacturer Pro Tip: QC and Surface Consistency
In high-end shoe manufacturing, we inspect the “tightness” of the grain. High-density calfskin from the best tanneries makes the mirror shine process much easier because the “valleys” are smaller. If you are struggling to get a shine on a cheaper pair of shoes, it may be due to a looser grain structure rather than your technique. For insights into sourcing premium materials, you can always inquire about shoe manufacturing.
Maintenance Frequency: How Often Should You Polish?
The frequency of your polishing routine depends on three variables: the environment, the frequency of wear, and the type of leather. A pair of boots worn daily in a snowy city requires significantly more attention than a pair of dress shoes worn once a week in an office. Consistency is more important than intensity; five minutes of care every week is better than an hour of care once a year.
Table 3: Recommended Maintenance Schedule
| Frequency | Action | Goal |
|---|---|---|
| After Every Wear | Brush and insert shoe trees | Remove dust and maintain shape |
| Every 2-3 Weeks | Apply cream polish | Restore color and hydration |
| Every 2 Months | Apply wax polish | Restore shine and protection |
| Every 6 Months | Deep clean and strip wax | Prevent buildup and check leather health |
The Seasonal Deep Clean
Every six months, you should perform a full “reset.” This involves stripping away old wax with a leather-safe cleaner, deep conditioning the leather with a high-end renovator, and reapplying a fresh foundation of cream and wax. This deep maintenance cycle ensures that the leather remains healthy and that the color stays vibrant for the long term.
Frequently Asked Questions: Troubleshooting and Material Care
How do I fix a polish that has started to crack?
Cracking usually happens when wax is applied to the flexing areas of the shoe (the vamp) or when layers have become too thick. To fix this, you need to use a specialized wax stripper or a mild leather cleaner to remove the old, brittle wax. Once the leather is bare, apply a deep conditioner to restore flexibility before starting a new, thinner polishing cycle.
Can I polish suede or nubuck shoes?
Absolutely not. Traditional cream and wax polishes will ruin the “nap” of suede, turning it into a flat, greasy mess. Suede requires specialized brushes (brass or crepe) and protective sprays. If you accidentally get polish on suede, it is very difficult to remove and may require professional intervention to restore the texture.
What is the best way to match the polish color to my shoes?
When in doubt, always choose a polish that is one shade lighter than the shoe. A lighter polish will enhance the existing color without changing it. If you use a darker polish, you can permanently darken the leather. For those with multi-toned shoes or unique patinas, a neutral (clear) wax is the safest choice to provide shine without affecting the color.
How long does shoe polish actually need to dry?
While most guides say 10 minutes, the “professional’s secret” is to let the cream sit for at least an hour, or even overnight, before the final buff. This allows the solvents to evaporate completely, leaving only the hard solids behind. This results in a much more durable shine that won’t smudge the first time you walk through a puddle.
Is it okay to use a sponge for a quick shine?
While convenient, these sponges are generally discouraged for fine leather. They often contain high concentrations of silicone and mineral oils that do not provide long-term nourishment. They are “band-aids” that can lead to leather degradation over time. It is always better to spend five minutes with a horsehair brush than thirty seconds with a chemical sponge.
For more details on material options and professional-grade footwear care, contact our experts.